SAML (ADFS)
Setting Up ADFS and SUSE® Security Integration
This section describes the setup steps in ADFS first, then in the SUSE® Security console.
ADFS Setup
-
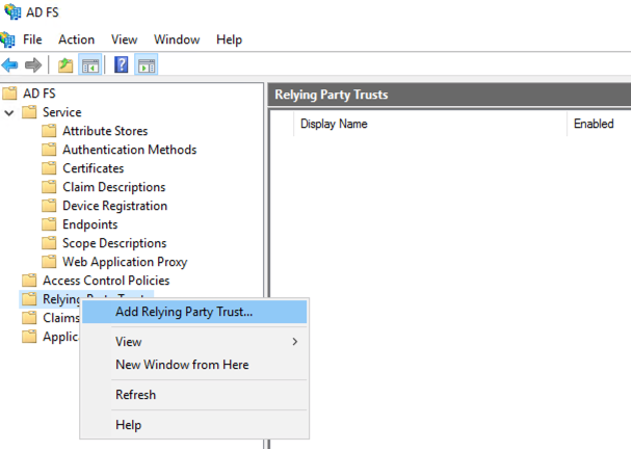
From AD FS Management, right click on Relying Party Trusts and select Add Relying Party Trust….
-
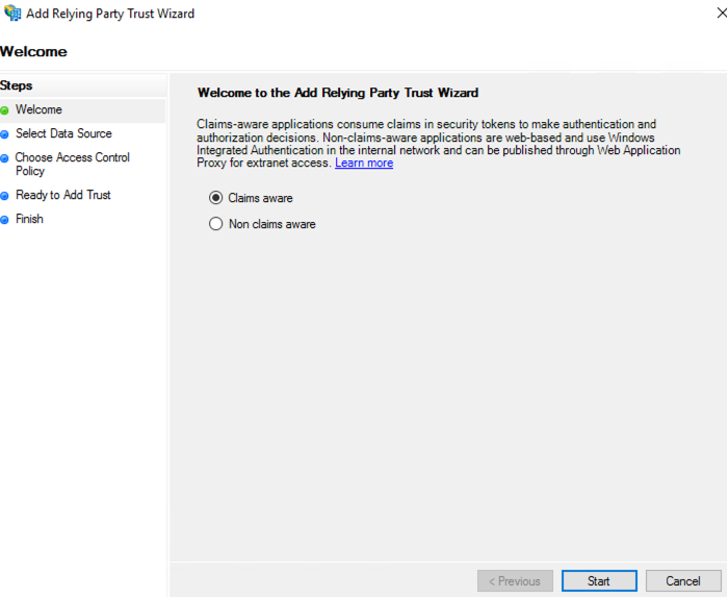
Select Start button from Welcome step.
-
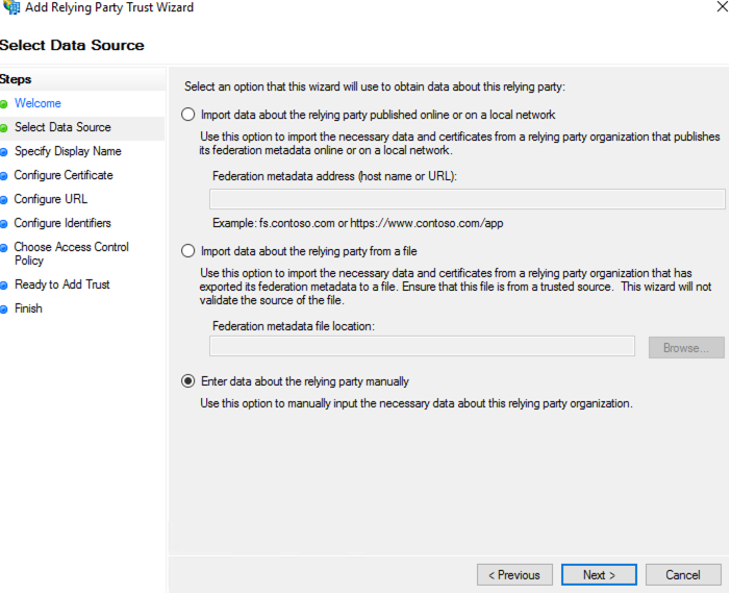
Select Enter data about the relying party manually and select Next.
-
Enter a unique name for the
Display namefield and select Next.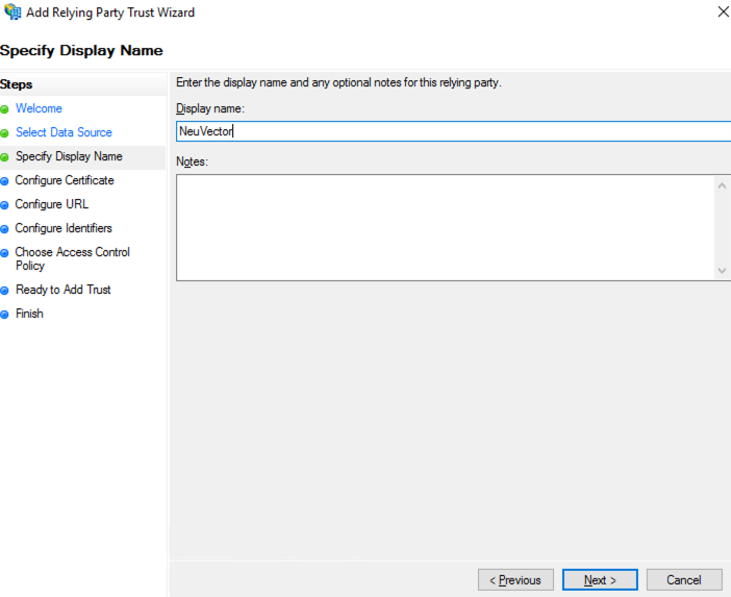
-
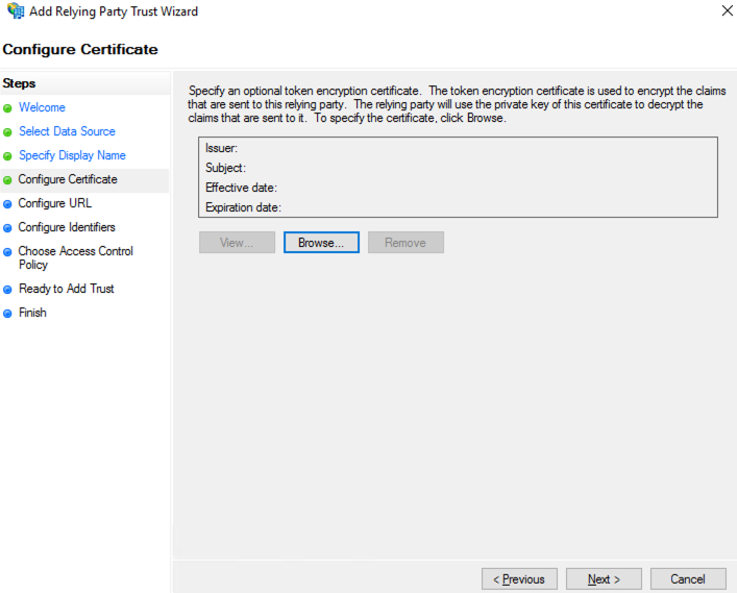
Select Next to skip token encryption.
-
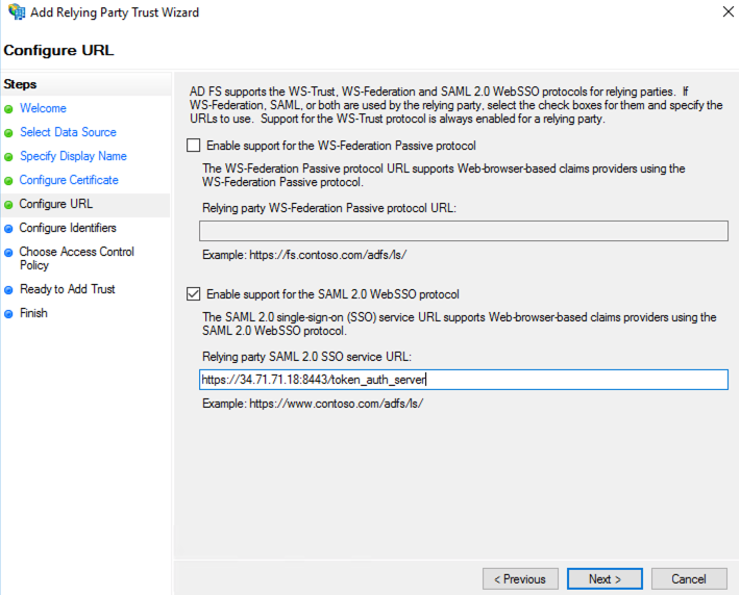
Check Enable support for the SAML 2.0 WebSSO protocol and enter the SAML Redirect URI from the SUSE® Security Settings > SAML Settings page into the Relying party SAML 2.0 SSO service URL field. Select Next to continue.
-
Enter the same SAML Redirect URI into the Relying party trust identifier field and click Add; then select Next to continue. This identifier is the audience URI (SP entity ID) that AD FS puts in the audience restriction of the assertion.
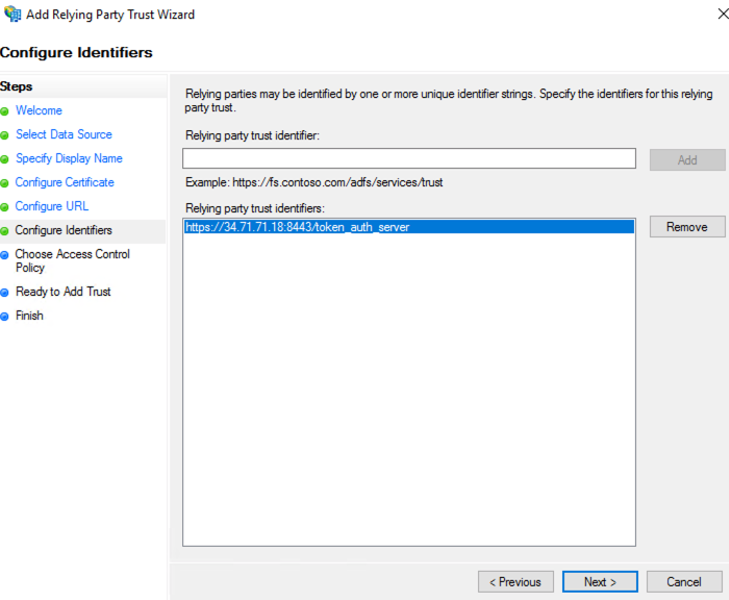
NeuVector uses its SAML Redirect URI as both the assertion consumer service URL and the audience URI (SP entity ID); it is not configurable in the NeuVector console. Enter that same value in both the Relying party SAML 2.0 SSO service URL and the Relying party trust identifier fields so the audience of the assertion matches what NeuVector expects.
-
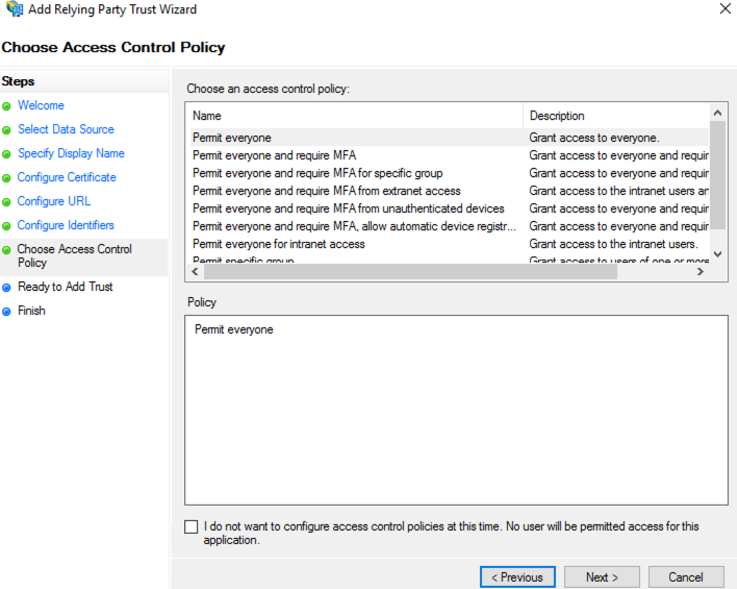
Customize Access Control; then select Next to continue.
-
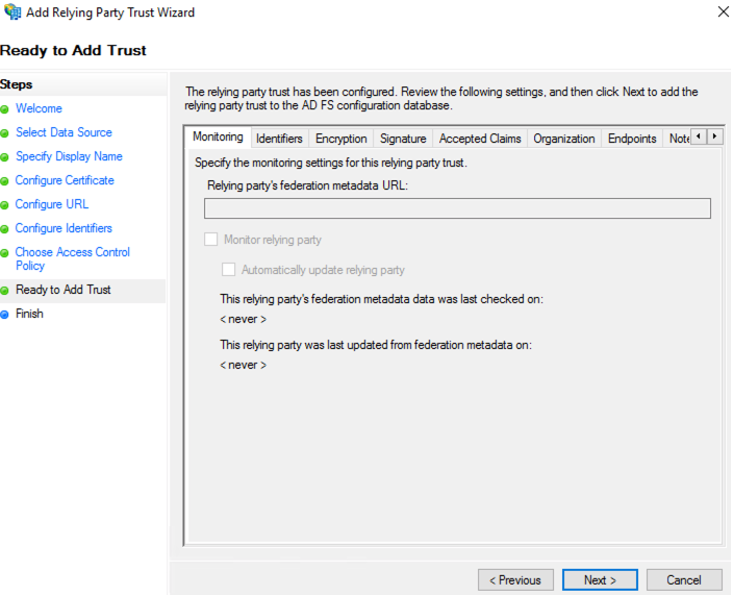
Select Next to continue.
-
Select Close to finish.
-
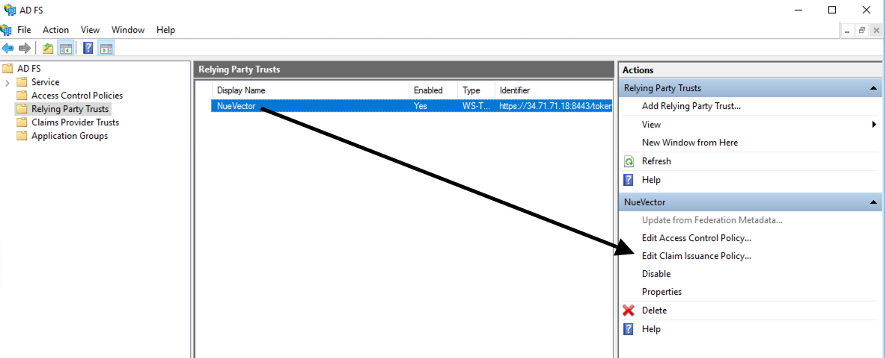
Select Edit Claim Issuance Policy…
-
Select Add Rule… and choose Send LDAP Attributes as Claims; then select Next. Name the rule and choose Active Directory as the Attribute store. Only Username outgoing claim is required for authentication if default role is set; else groups is needed for role mapping. Email is optional.
-
SAM-Account-Name → Username
-
E-Mail-Address → Email
-
Token-Groups — Unqalified Names → groups

-
-
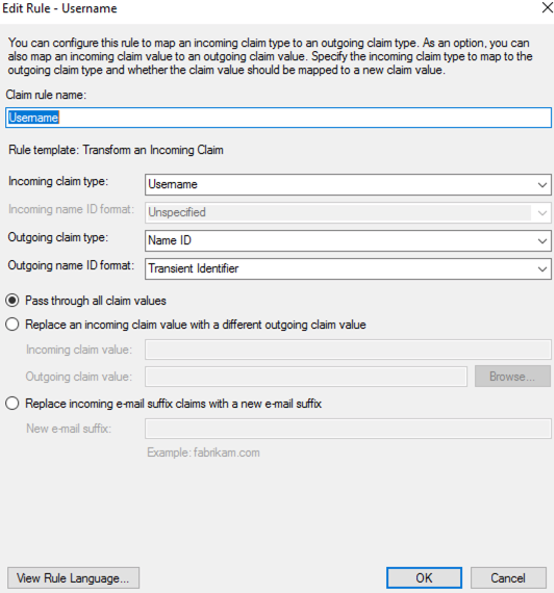
Select Add Rule… and choose Transform an Incoming Claim; then select Next. Name the rule and set the field as captured in the screenshot below. The Outgoing name ID format needs to be Transient Identifier.
SUSE® Security Setup
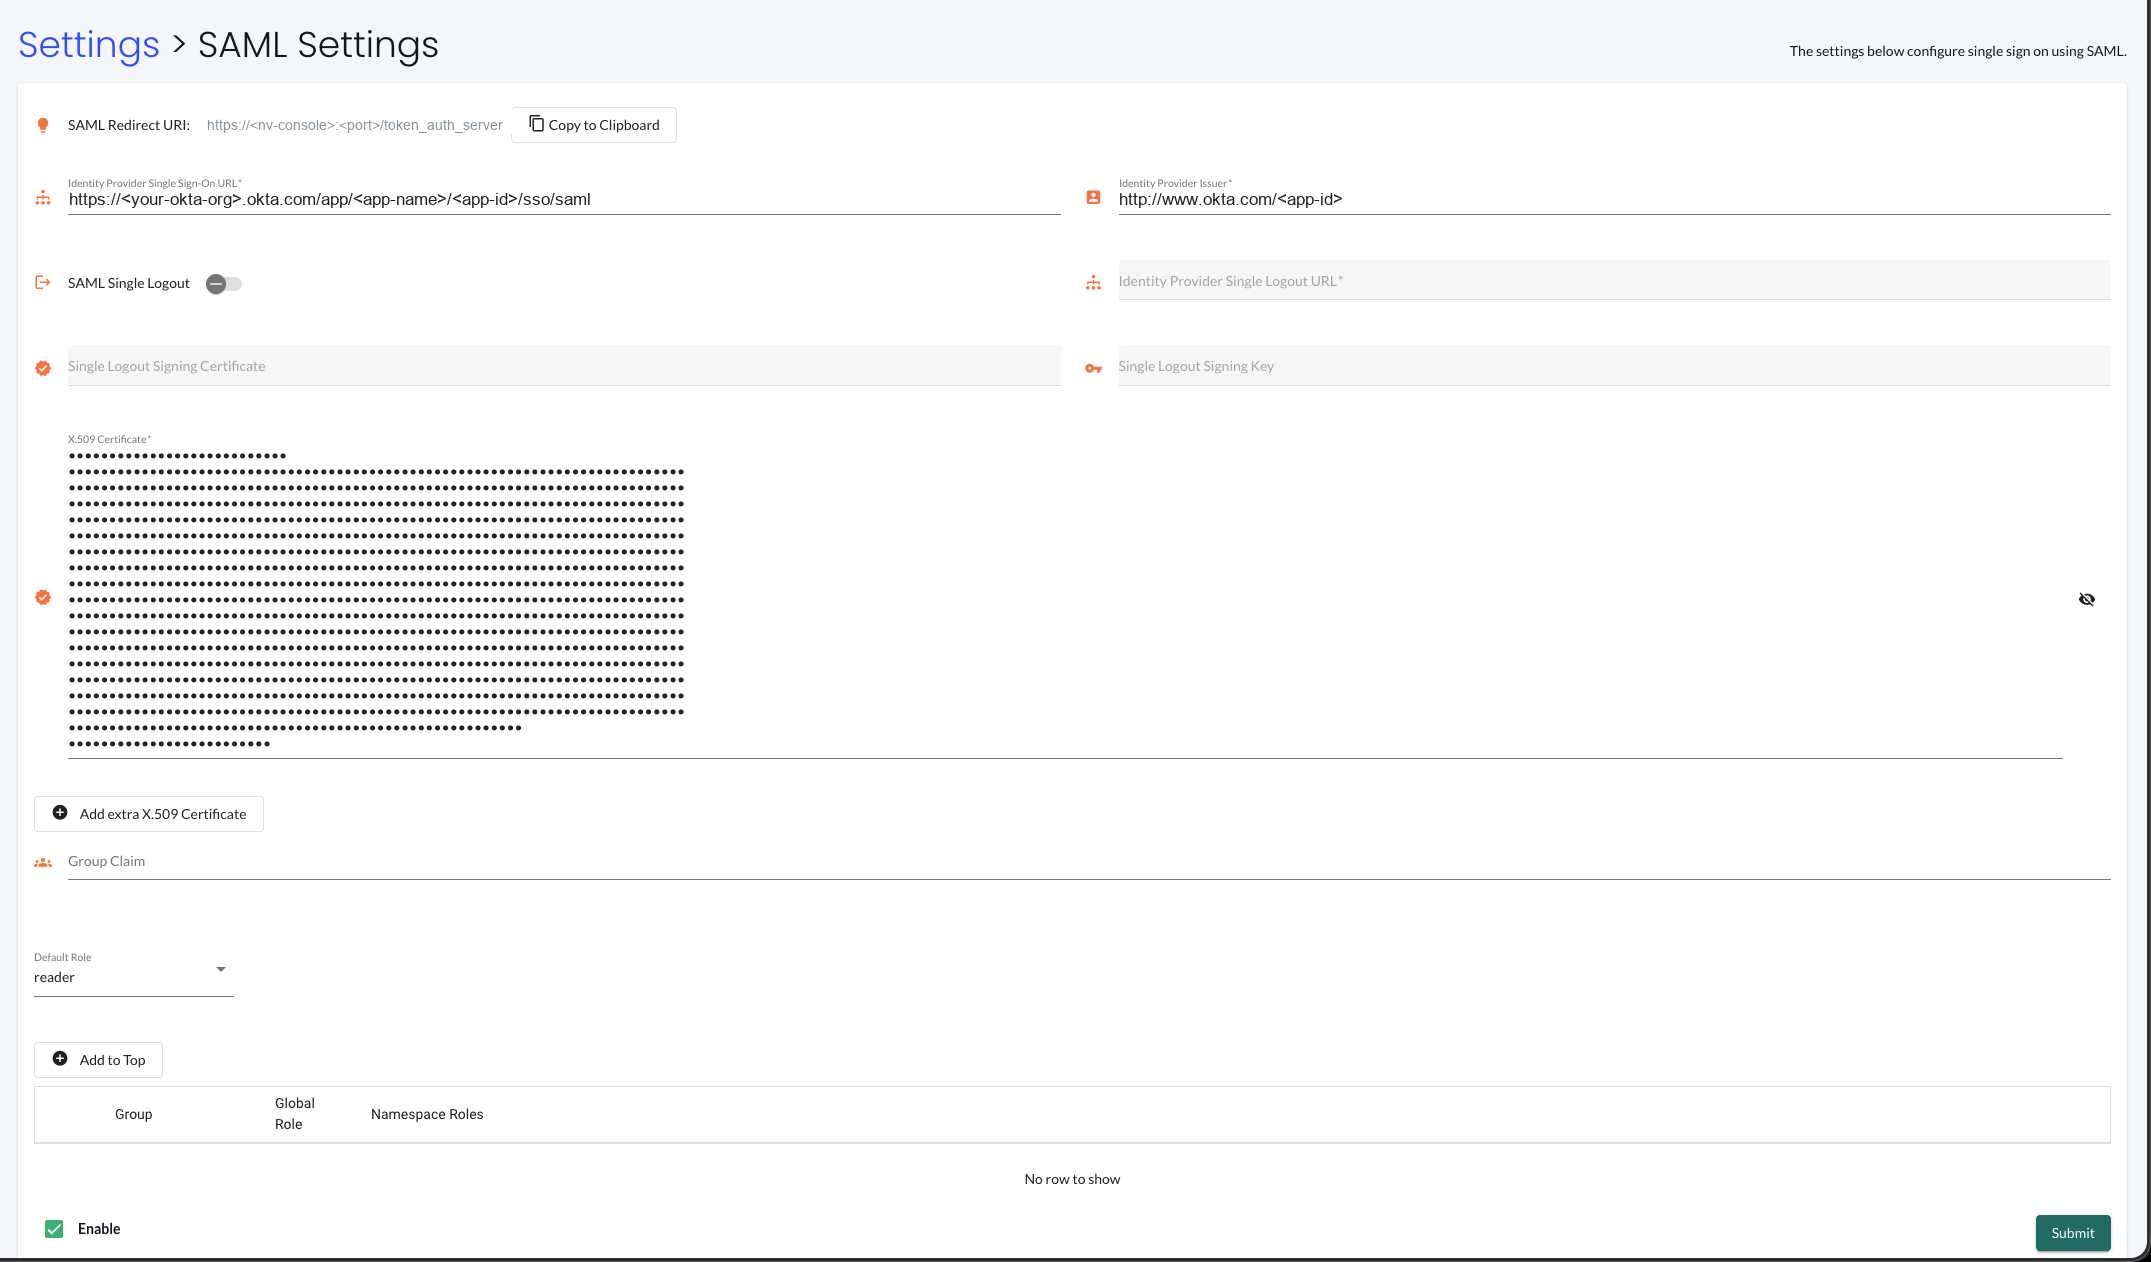
Log in to the NeuVector console as an administrator and go to Settings > SAML Settings, then fill in the following fields.
-
Identity Provider Single Sign-On URL:
-
View Endpoints from AD FS Management > Service and use the
SAML 2.0/WS-Federationendpoint URL. -
Example:
https://<adfs-fqdn>/adfs/ls
-
-
Identity Provider Issuer:
-
Right click on AD FS from the AD FS Management console and select Edit Federation Service Properties…; use the Federation Service identifier.
-
Example:
http://<adfs-fqdn>/adfs/services/trust
-
-
X.509 Certificate:
-
From AD FS Management, select Service > Certificate, right click on Token-signing certificate and choose View Certificate…
-
Select the Details tab and click Copy to File
-
Save it as a Base-64 encoded x.509 (.CER) file
-
Copy and paste the contents of the file into the X.509 Certificate field
-
-
Group claim:
-
Enter the Outgoing claim name for the groups
-
Example: groups
-
-
Default role:
Recommended to be
Noneunless you want to allow any authenticated user a default role. -
Role map:
Click Add to Top and enter the group name of the users together with the Global Role and Namespace Roles to assign to its members.
Every user needs a role, assigned either by the default role or by the role map. A user who ends up without a role cannot log in, even with the correct credentials.
Mapping Groups to Roles and Namespaces
Please see the Users and Roles section for how to map groups to preset and custom roles as well as namespaces in SUSE® Security.
Troubleshooting
-
ADFS
SamlResponseSignatureneeds to be eitherMessageOnlyorMessageAndAssertion. UseGet-AdfsRelyingPartyTrustcommand to verify or update it.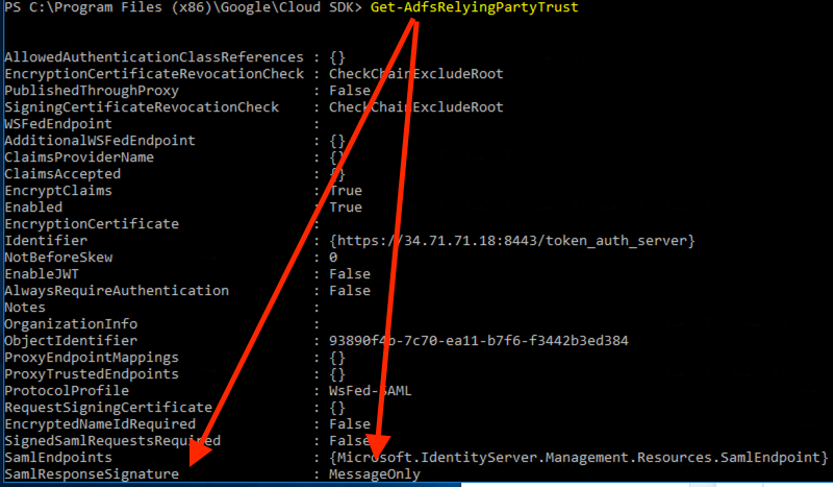
-
Time synchronization between Kubernetes Nodes x ADFS Server.
For a successful authentication, the time between the Kubernetes nodes and the ADFS server needs to be the same to avoid time sync or clock drift issues.
It’s recommended to use an NTP server, with equal time settings across all servers.
Please check and confirm that both ADFS and SUSE® Security hosts are synchronized and the potential delays do not exceed more than 10 seconds. You can use Linux and Windows commands to check dates, times and NTP server activity.
You can reload the auth times by disabling and enabling again the config in the SUSE® Security UI as follows:
-
Log in to SUSE® Security with Admin User
-
Go to Settings
-
Click on the button to disable and enable the SAML setting
-
Make sure to keep the configuration settings!
-
Once the setting has been re-enabled, you can try to log in with an ADFS user. If it works, this confirms the issue was due to a time synchronization error between Kubernetes nodes and the ADFS Server.
-
-
SAML characters must be case sensitive in SUSE® Security UI.
Attribute names are case sensitive. Make sure any SAML attribute name configured here is an exact match to the application configuration. SAML must point to the correct URL to authenticate.
All the fields in
{product-name} UI -> Settings -> SAML Settingsare case-sensitive.The SUSE® Security controller logs contain the relevant information about authentication with the ADFS server and errors that will help identify the root cause. We recommended recreate the failed login condition and check the logs.
-
Make sure to enter the correct groups, certificates and protocols.
The SAML settings need to match the following configuration:
Setting Value Identity Provider Single Sign-On URL
Requires HTTPS protocol
Identity Provider Issuer
Requires HTTP protocol
ADFS
SamlResponseSignatureNeeds to be either
MessageOnlyorMessageAndAssertionThese settings need to be validated on your ADFS server and in the SUSE® Security UI.
The selected certificate needs to be valid and correctly generated, including its
CA RootandIntermediate Certificates. You can generate them using your trusted certificate authority, Windows or an automation tool such as LetsEncrypt.If any of these parameters are incorrect, you will receive an
Authentication Failederror when you try to log in to SUSE® Security with an ADFS user using SAML authentication.