Upload Images
Currently, there are three ways that are supported to create an image: uploading images via URL, uploading images via local files, and creating images via volumes.
Upload Images via URL
-
UI
-
API
-
Terraform
To import virtual machine images in the Images page, enter a URL that can be accessed from the cluster. Description and labels are optional.
|
|
Large image files may cause memory issues in SUSE Virtualization when you use third-party StorageClasses with download URLs that are hosted on servers that do not support HTTP range requests (for example, Python’s |
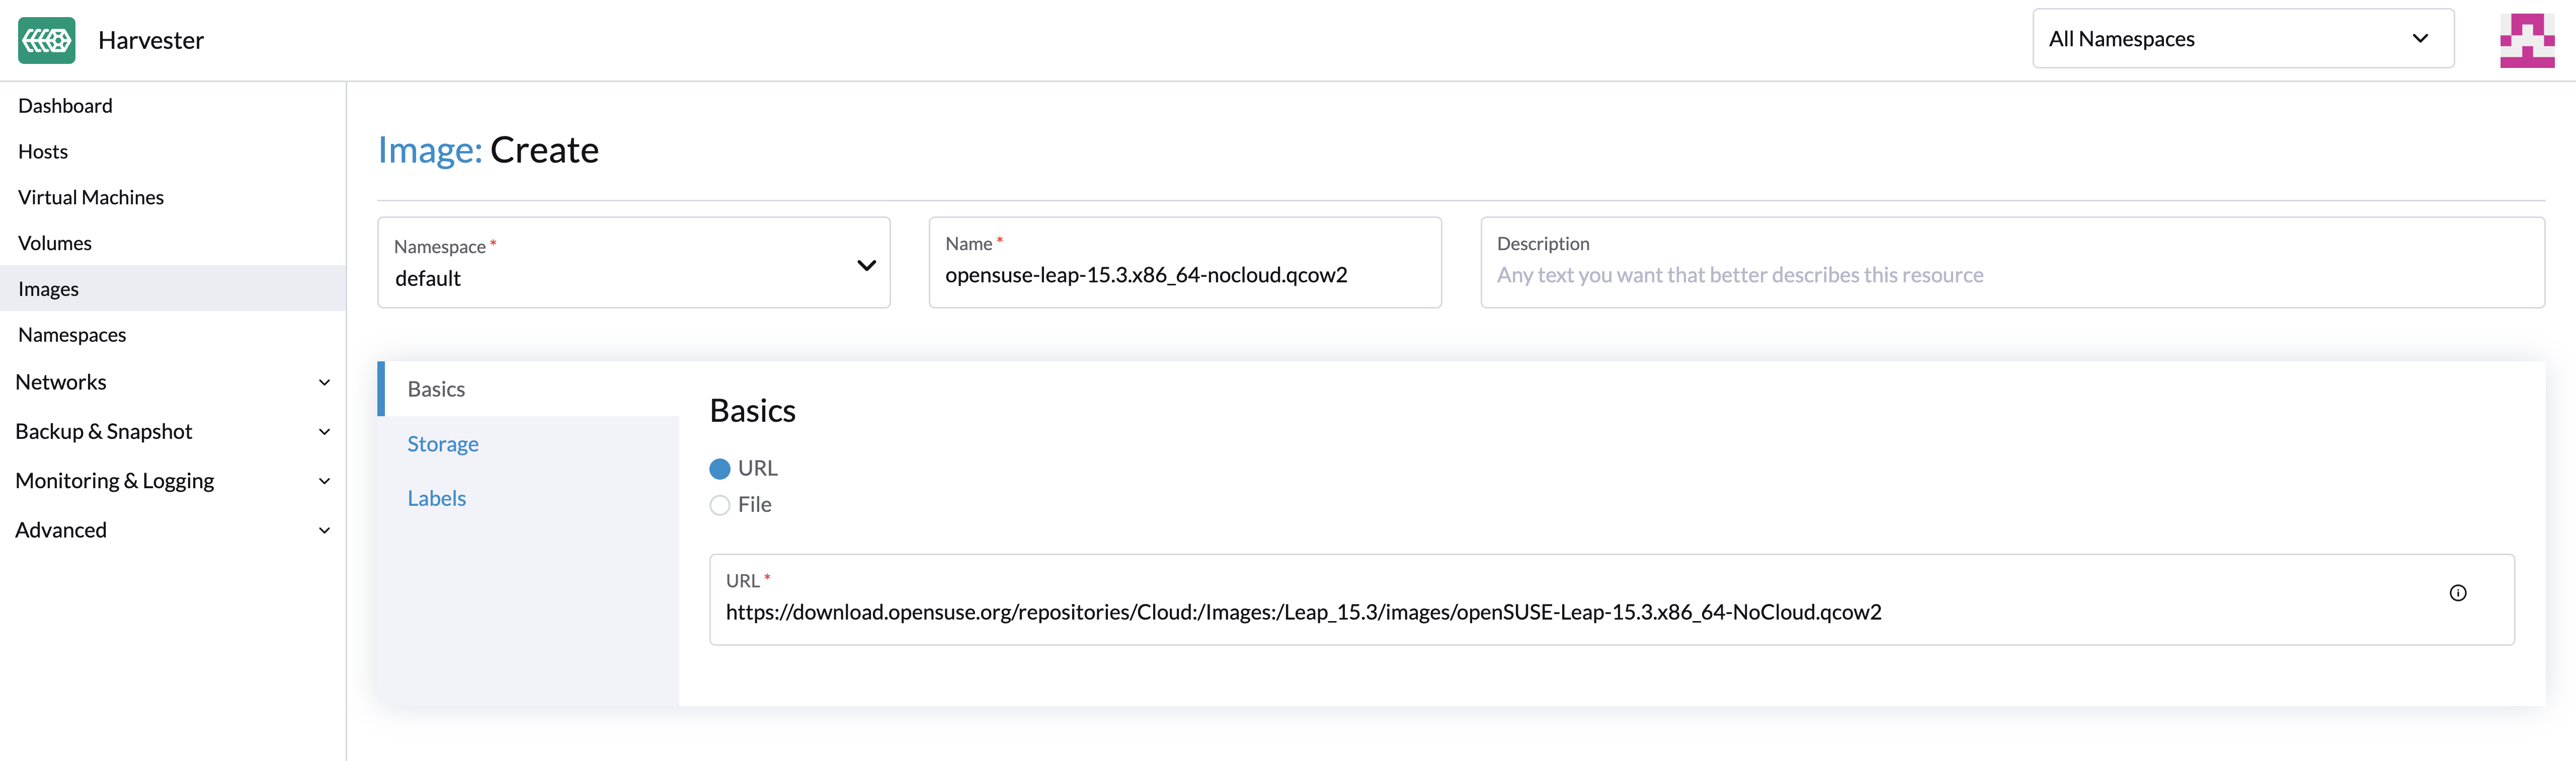
To import a virtual machine image from a repository using the API, create a VirtualMachineImage object. You must specify a URL that can be accessed from the cluster.
By default, a VirtualMachineImage object uses the SUSE Storage backing image backend. To store images in third-party storage or Longhorn V2 Data Engine volumes, use the Containerized Data Importer (CDI) backend and specify the target StorageClass.
Example (SUSE Storage backing image backend):
apiVersion: harvesterhci.io/v1beta1
kind: VirtualMachineImage
metadata:
  name: opensuse-leap
  namespace: default
spec:
  description: A human-readable description for the VM image
  displayName: openSUSE-Leap
  sourceType: download
  url: "https://download.opensuse.org/repositories/Cloud:/Images:/Leap_15.5/images/openSUSE-Leap-15.5.x86_64-NoCloud.qcow2"
  checksum: 80c27afb7cd791ac86ee1b0b0c572a242f6142579db5beac841e71151d370cd6
Example (CDI backend):
apiVersion: harvesterhci.io/v1beta1
kind: VirtualMachineImage
metadata:
  name: opensuse-leap-nfs
  namespace: default
spec:
  backend: cdi
  description: A VM image stored in third-party storage
  displayName: openSUSE-Leap-NFS
  sourceType: download
  url: "https://download.opensuse.org/repositories/Cloud:/Images:/Leap_15.5/images/openSUSE-Leap-15.5.x86_64-NoCloud.qcow2"
  checksum: 80c27afb7cd791ac86ee1b0b0c572a242f6142579db5beac841e71151d370cd6
  targetStorageClassName: nfs-csi
Replace nfs-csi with the name of the StorageClass for your storage solution. The target StorageClass cannot be changed after the image is created.
For more information, see the API reference.
resource "harvester_image" "opensuse154" {
  name      = "opensuse154"
  namespace = "harvester-public"

  display_name = "openSUSE-Leap-15.4.x86_64-NoCloud.qcow2"
  source_type  = "download"
  url          = "https://downloadcontent-us1.opensuse.org/repositories/Cloud:/Images:/Leap_15.4/images/openSUSE-Leap-15.4.x86_64-NoCloud.qcow2"
}
Upload Images via Local File
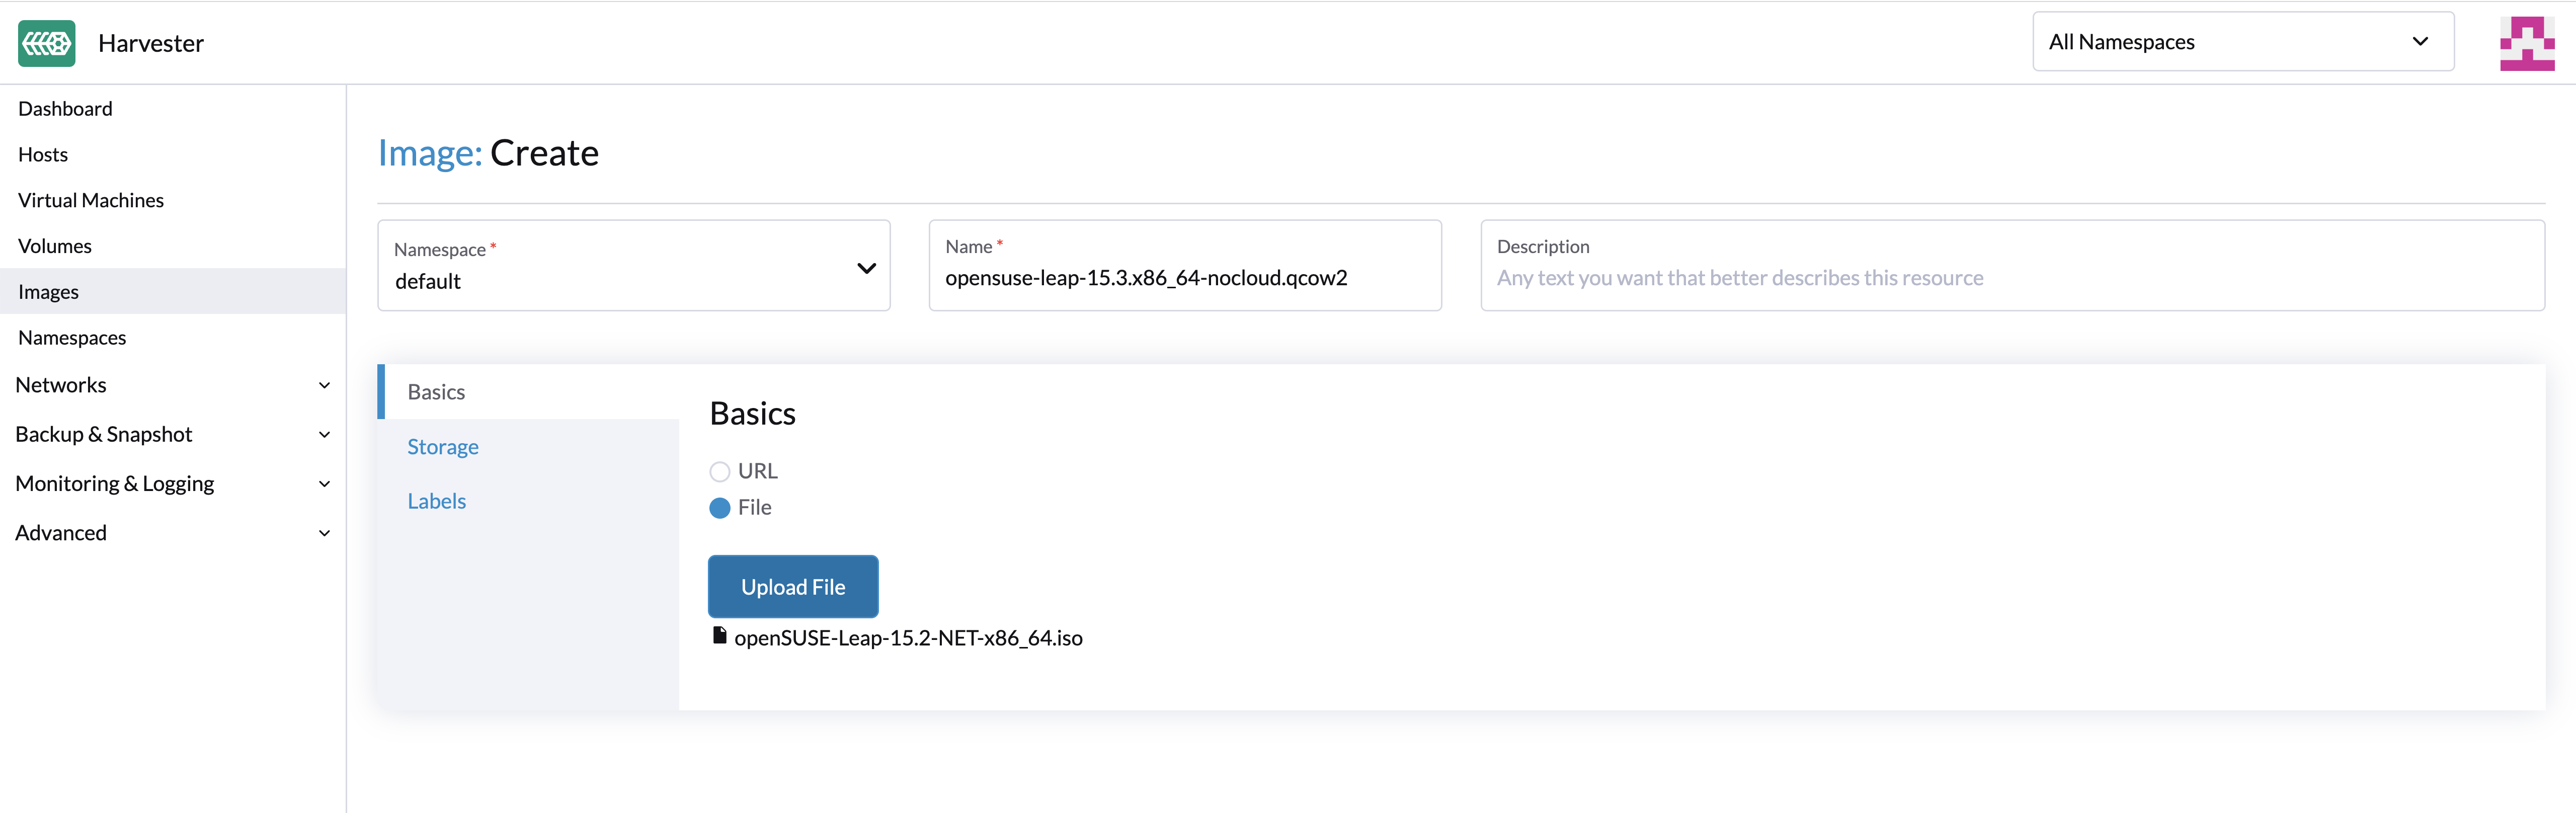
Currently, qcow2, raw, and ISO images are supported.
|
HTTP 413 Error in SUSE Rancher Prime Multi-Cluster Management
You can upload images from the Multi-Cluster Management screen on the SUSE Rancher Prime UI. When the status of an image is _Uploading but the progress indicator displays 0% for an extended period, check the HTTP response status code. 413 indicates that the size of the request body exceeds the limit.
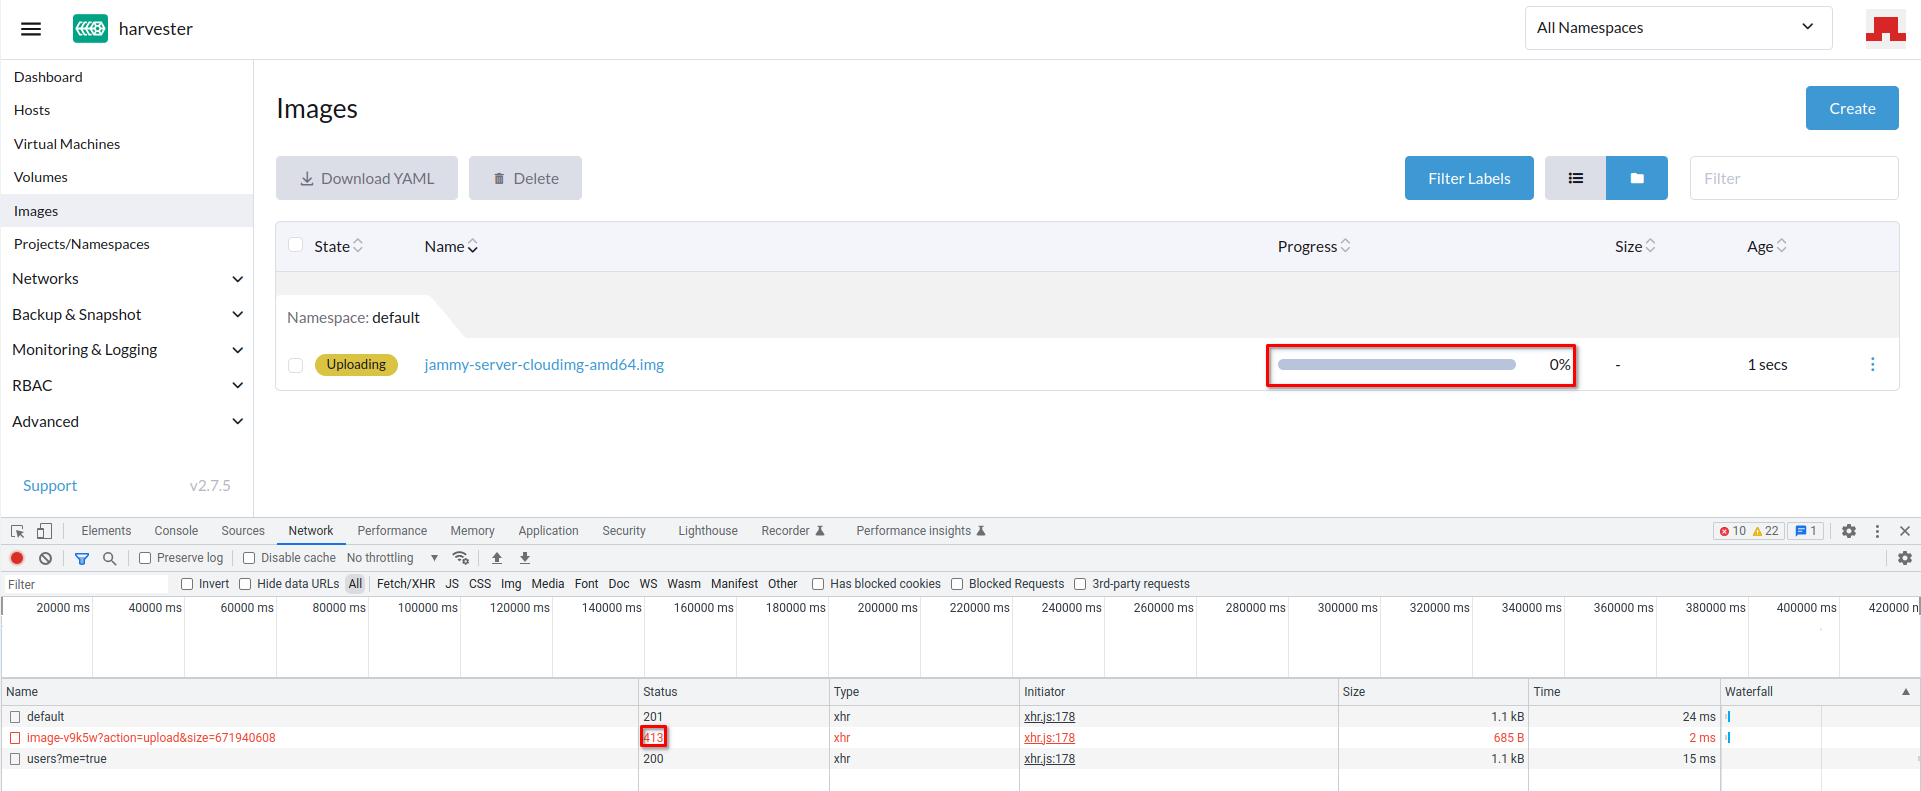
The maximum request body size should be specific to the cluster that is hosting SUSE Rancher Prime (for example, RKE2 clusters have a default limit of 1 MB but no such limit exists in K3s clusters).
The current workaround is to upload images from the SUSE Virtualization UI. If you choose to upload images from the SUSE Rancher Prime UI, you may need to configure related settings on the ingress server (for example, proxy-body-size in NGINX).
If SUSE Rancher Prime is deployed on an RKE2 cluster, perform the following steps:
-
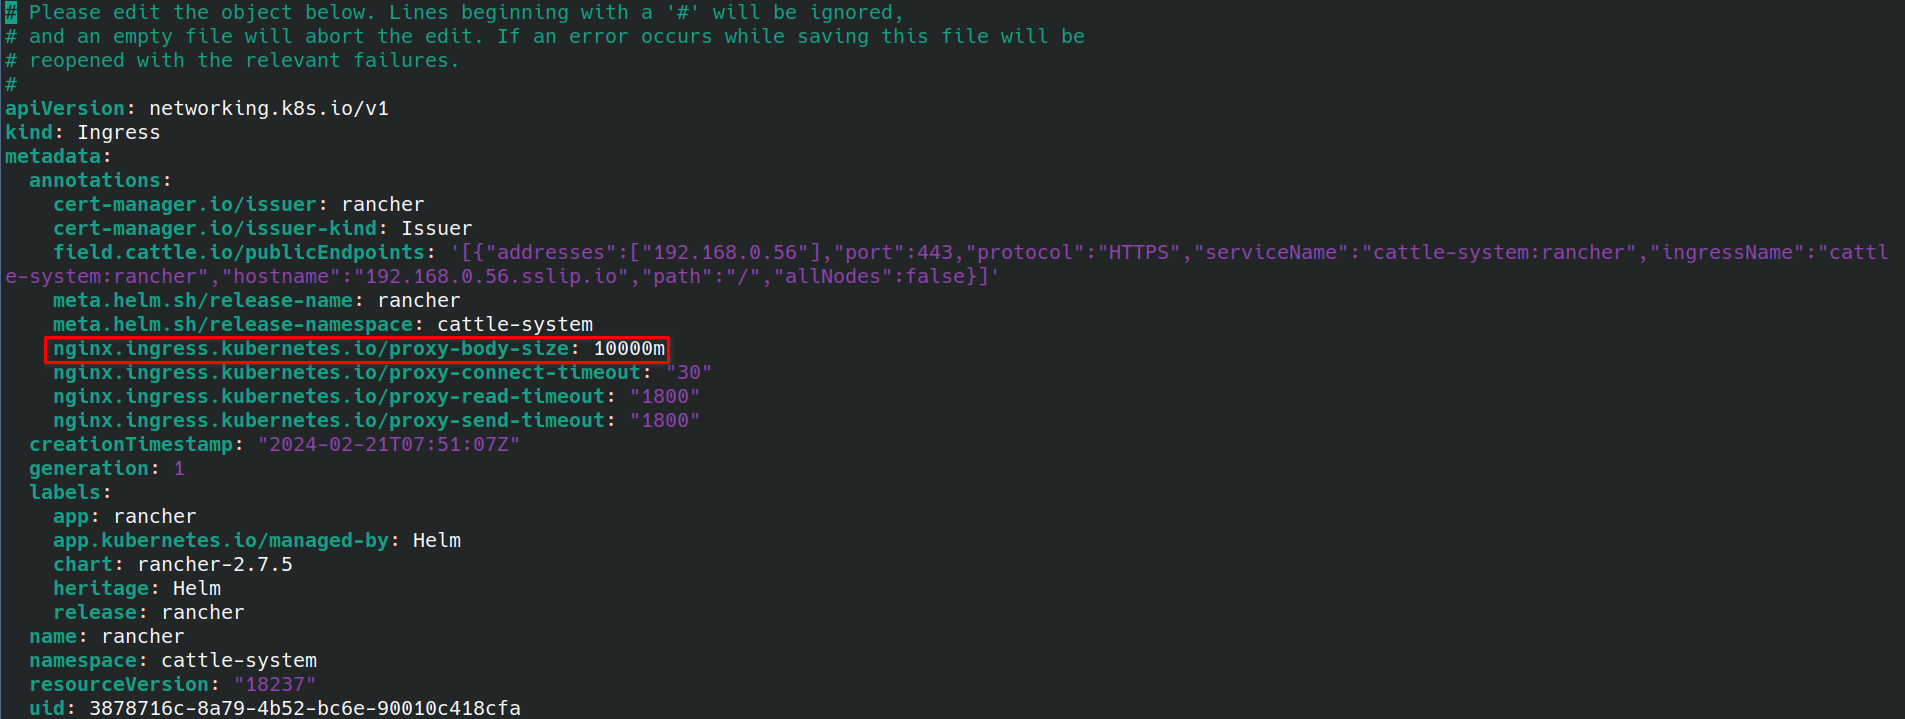
Edit the SUSE Rancher Prime ingress.
kubectl -n cattle-system edit ingress rancher -
Specify a value for
nginx.ingress.kubernetes.io/proxy-body-size.Example:
-
Delete the stuck image, and then restart the upload process.
Prolonged Uploading of Large Images in SUSE Rancher Prime Multi-Cluster Management
If you upload a very large image (over 10 GB) from the Multi-Cluster Management screen on the SUSE Rancher Prime UI, the operation may take longer than usual and the image status (Uploading) may not change.
This behavior is related to proxy-request-buffering in the ingress configuration, which is also specific to the cluster that is hosting SUSE Rancher Prime.
The current workaround is to upload images from the SUSE Virtualization UI. If you choose to upload images from the SUSE Rancher Prime UI, you may need to configure related settings on the ingress server (for example, proxy-request-buffering in NGINX).
If SUSE Rancher Prime is deployed on an RKE2 cluster, perform the following steps:
-
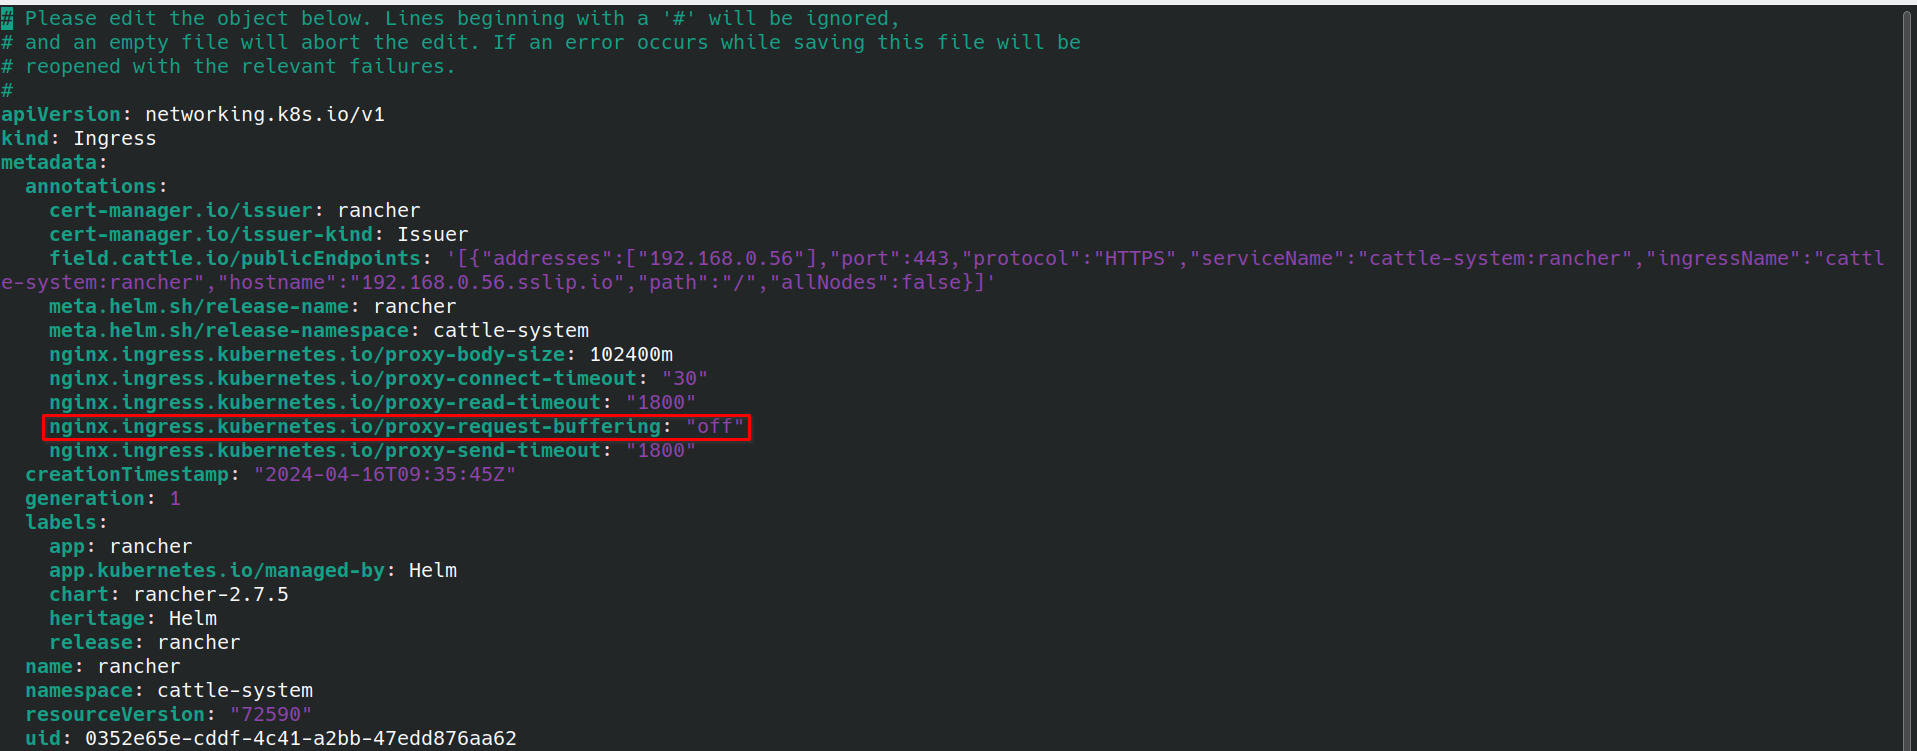
Edit the SUSE Rancher Prime ingress.
kubectl -n cattle-system edit ingress rancher -
Turn off
nginx.ingress.kubernetes.io/proxy-request-buffering.Example:
-
Delete the stuck image, and then restart the upload process.
Failure to upload an image with a third-party StorageClass
When uploading a large qcow2 image with a third-party StorageClass, the upload progress may pause at 99% before failing with a context canceled error.
This issue occurs because CDI requires extra time to convert the qcow2 image during the final upload stage. If the image conversion exceeds SUSE Virtualization’s default ingress proxy timeout, the request times out.
A timeout error does not always mean the upload has failed. Image processing often continues in the background, and the virtual machine image may eventually transition to a Healthy state. You can verify whether the process is still running by checking the status of the corresponding cdi-upload-* pod.
To prevent request timeouts during large image uploads, increase the ingress proxy timeout values. The following example increases the proxy timeout to 30 minutes (1800 seconds):
kubectl annotate ingress rancher-expose \
  -n cattle-system \
  nginx.ingress.kubernetes.io/proxy-read-timeout="1800" \
  nginx.ingress.kubernetes.io/proxy-send-timeout="1800" \
  --overwrite
This increases the proxy timeout to 30 minutes.
Uploading Images Previously Downloaded from SUSE Virtualization
Starting with v1.5.5, SUSE Storage compresses backing images for downloading. If you attempt to upload a compressed backing image, SUSE Virtualization rejects the attempt and displays the message Upload failed: the uploaded file size xxxx should be a multiple of 512 bytes since Longhorn uses directIO by default because the compressed data violates SUSE Storage’s data alignment.
Before uploading, decompress backing images using the command gzip -d <file name>.
Create Images via Volumes
On the Volumes page, click Export Image. Enter the image name and select a StorageClass to create an image.
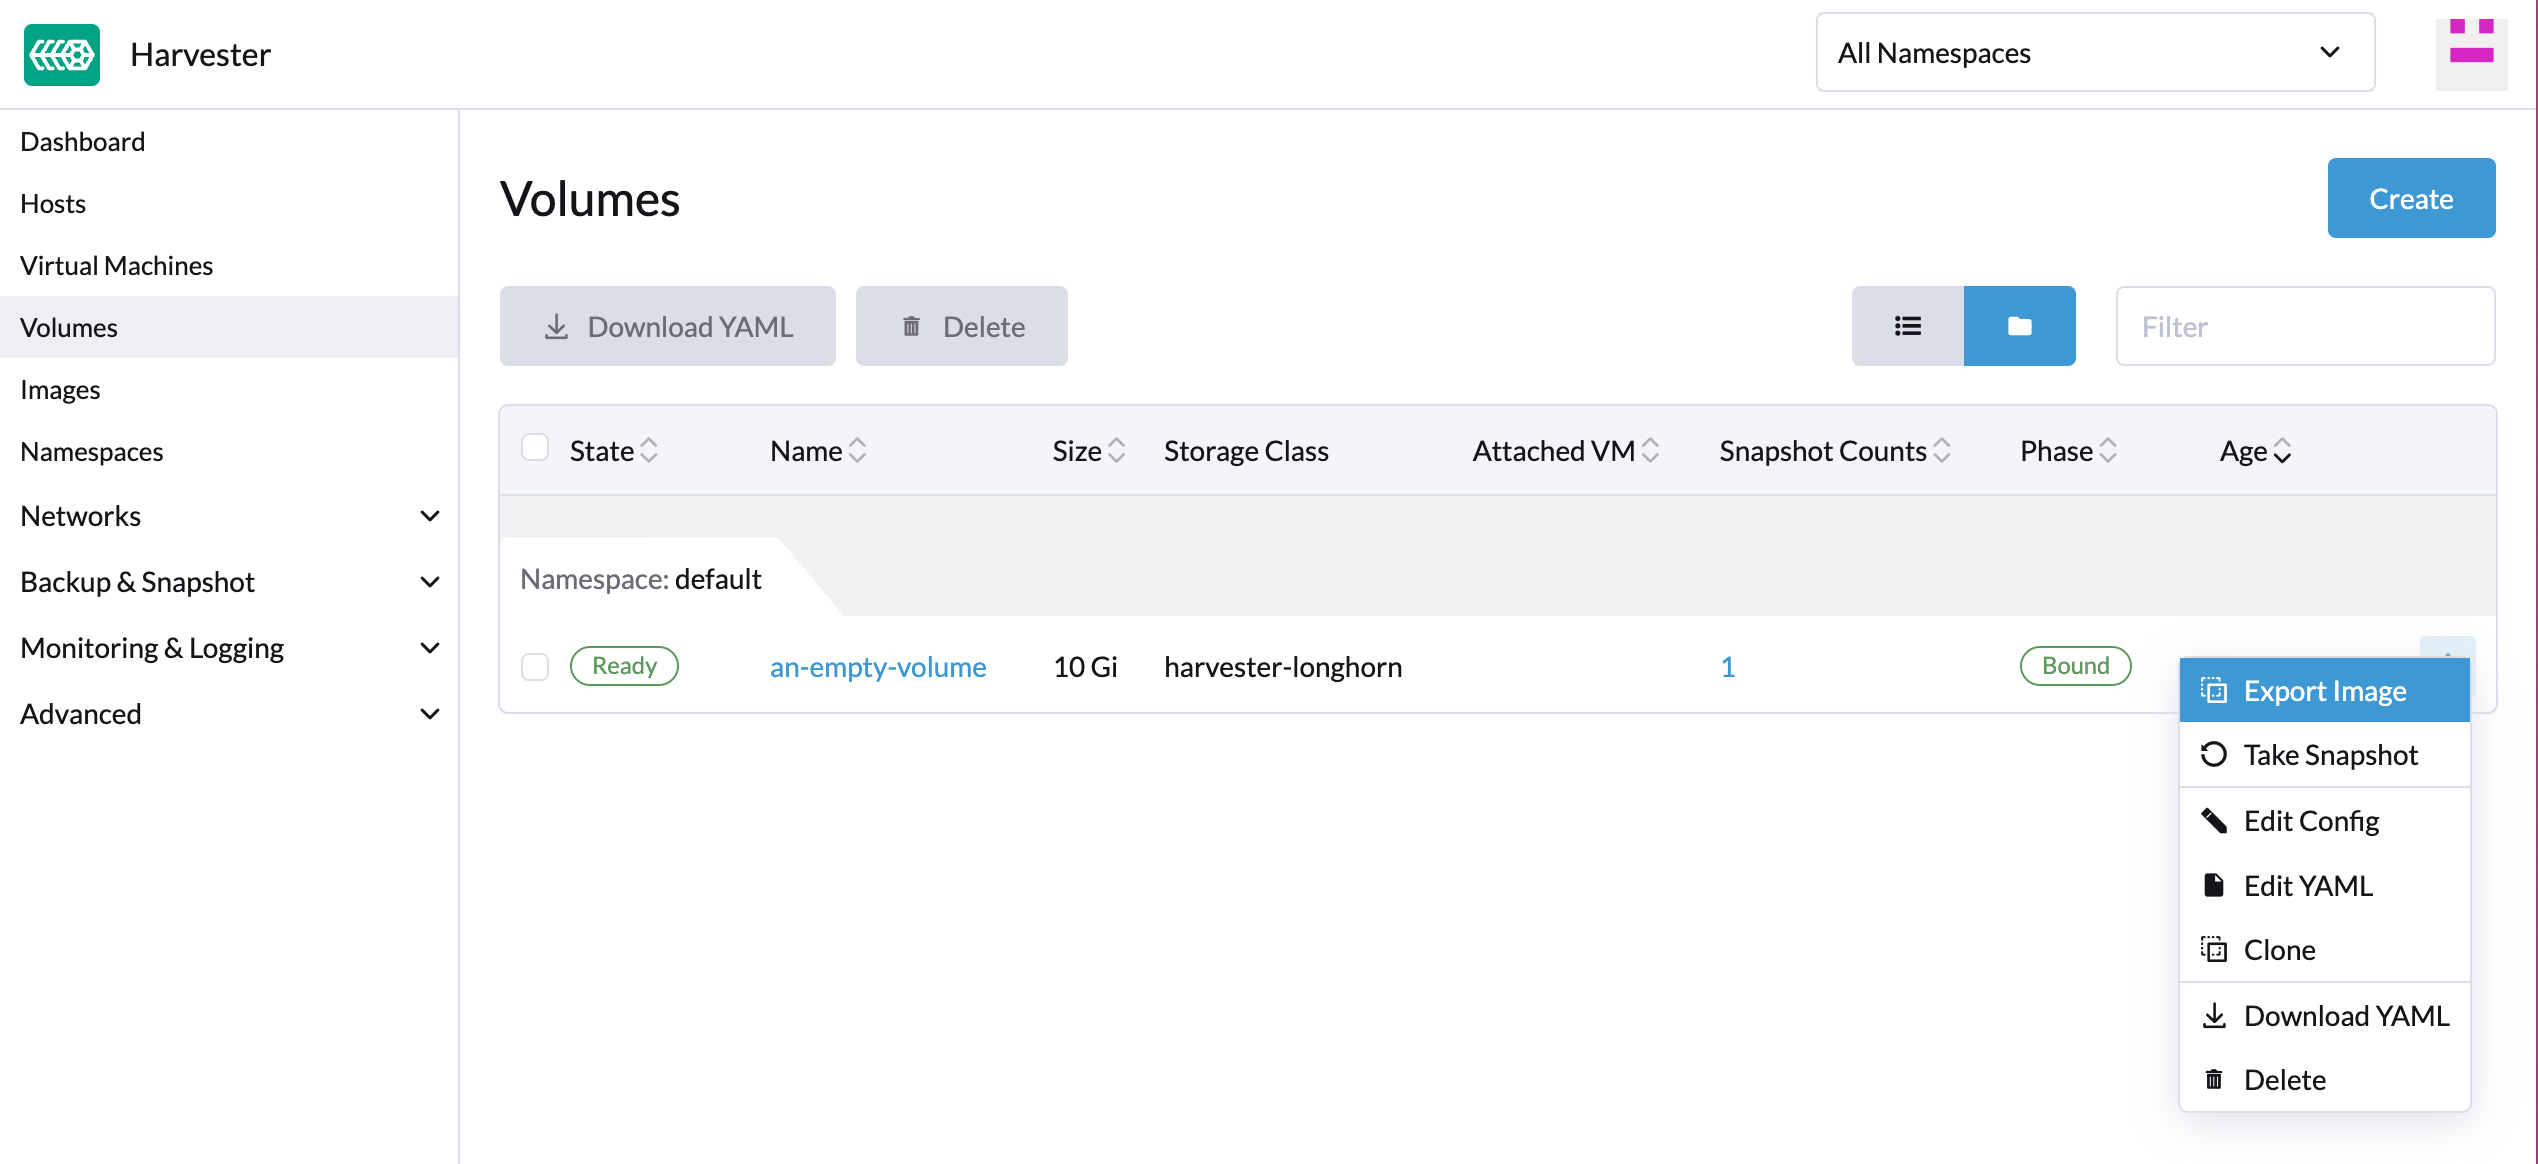
Image StorageClass
When creating an image, select a StorageClass on the Storage tab. SUSE Virtualization selects the image backend according to the type of storage.
| Image Backend | StorageClass | Image Storage |
|---|---|---|
SUSE Storage backing image |
Longhorn V1 Data Engine |
SUSE Virtualization creates an image-specific StorageClass that inherits parameters such as the number of replicas, node selectors, and disk selectors from the selected StorageClass. The image does not use the selected StorageClass directly. |
CDI |
Longhorn V2 Data Engine, LVM, and third-party CSI storage |
SUSE Virtualization creates a golden image PVC directly in the selected StorageClass. |
To create an image in third-party storage, perform the following steps:
-
Install and configure the third-party CSI driver, and create a StorageClass for the storage solution.
-
Configure the StorageClass CDI settings.
This step is required when CDI cannot automatically determine the volume mode and access modes for the CSI provisioner.
-
On the Images screen, click Create Image.
-
Select URL or File, and configure the image source.
-
On the Storage tab, select the StorageClass for the third-party storage solution.
-
Click Create and wait for the image to become ready.
SUSE Virtualization uses CDI to import the image into a golden image PVC in the selected StorageClass. Volumes created from the image use the clone strategy configured in the StorageClass CDI settings.
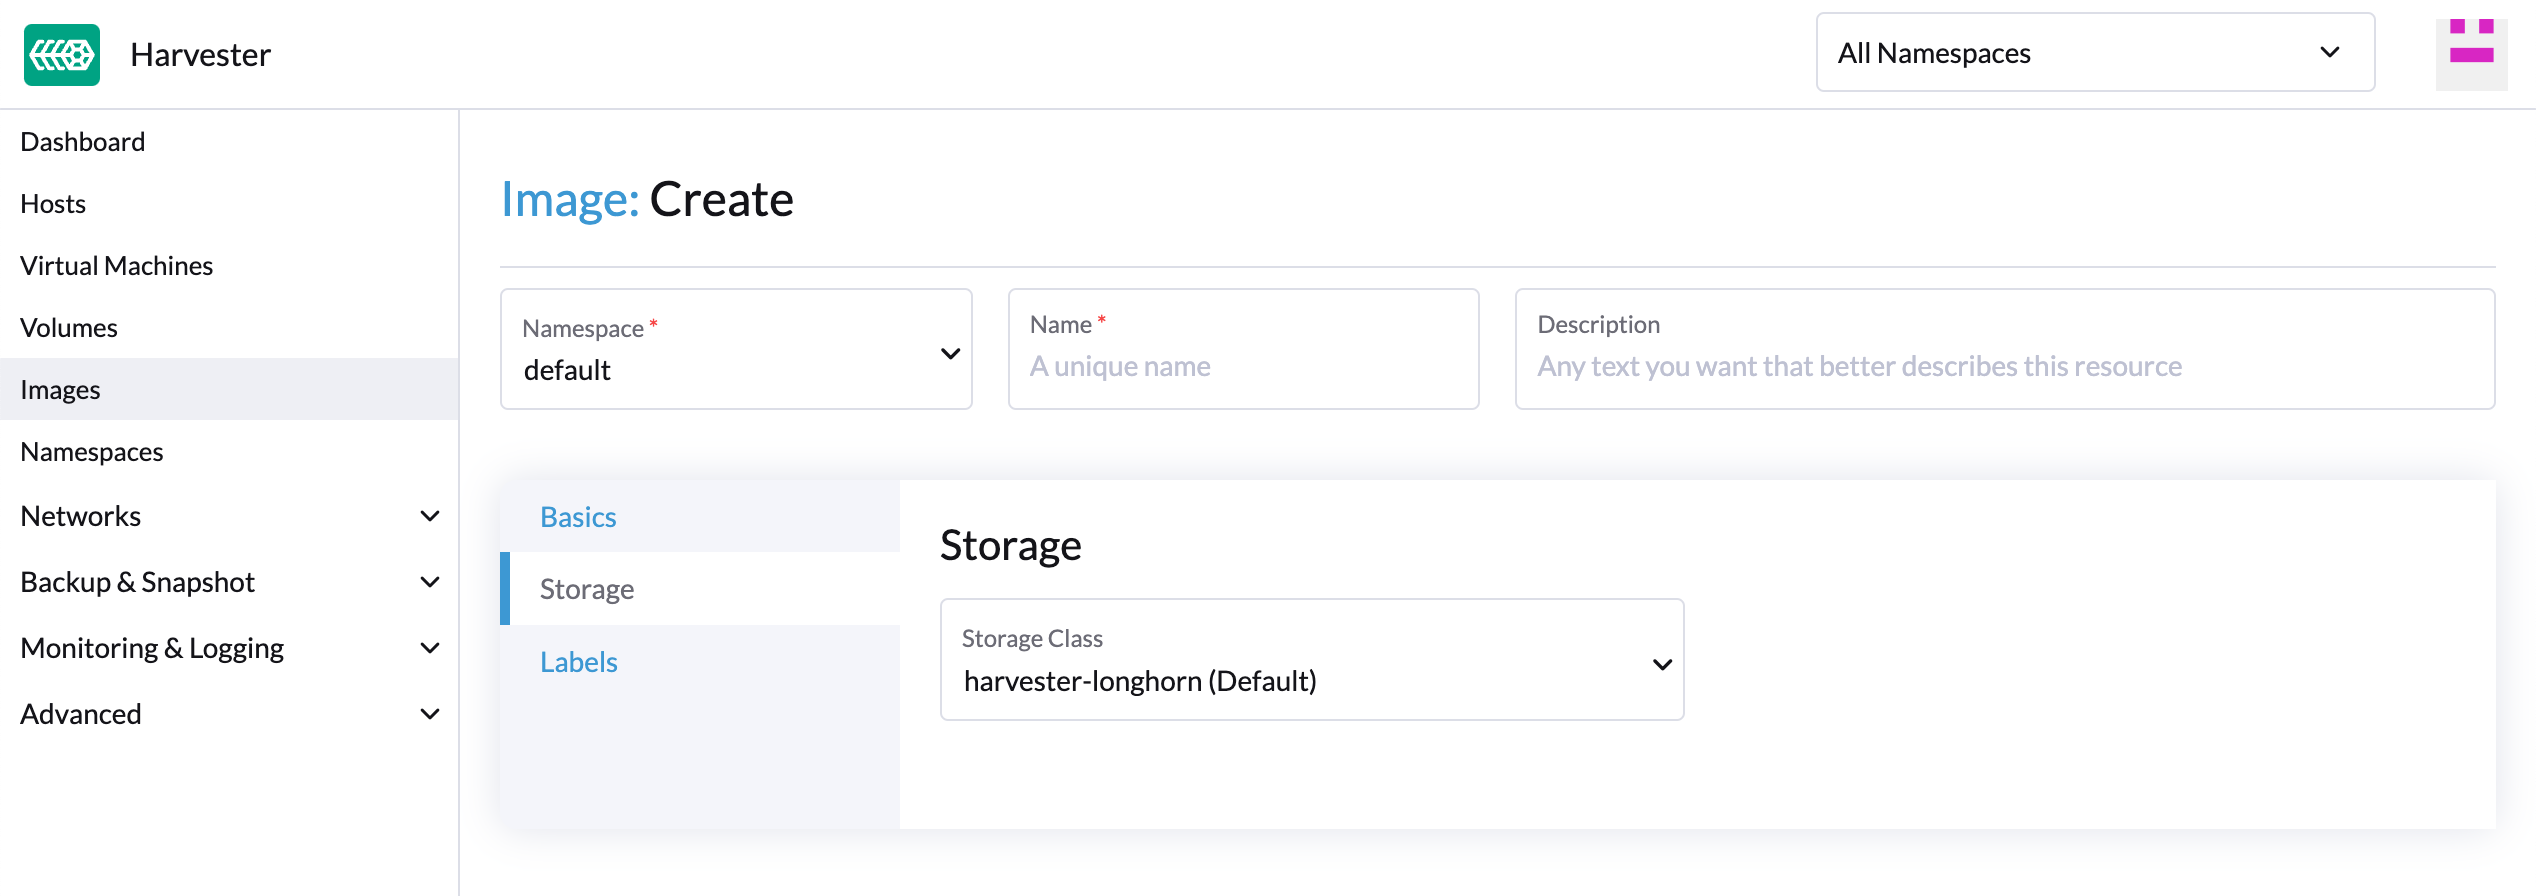
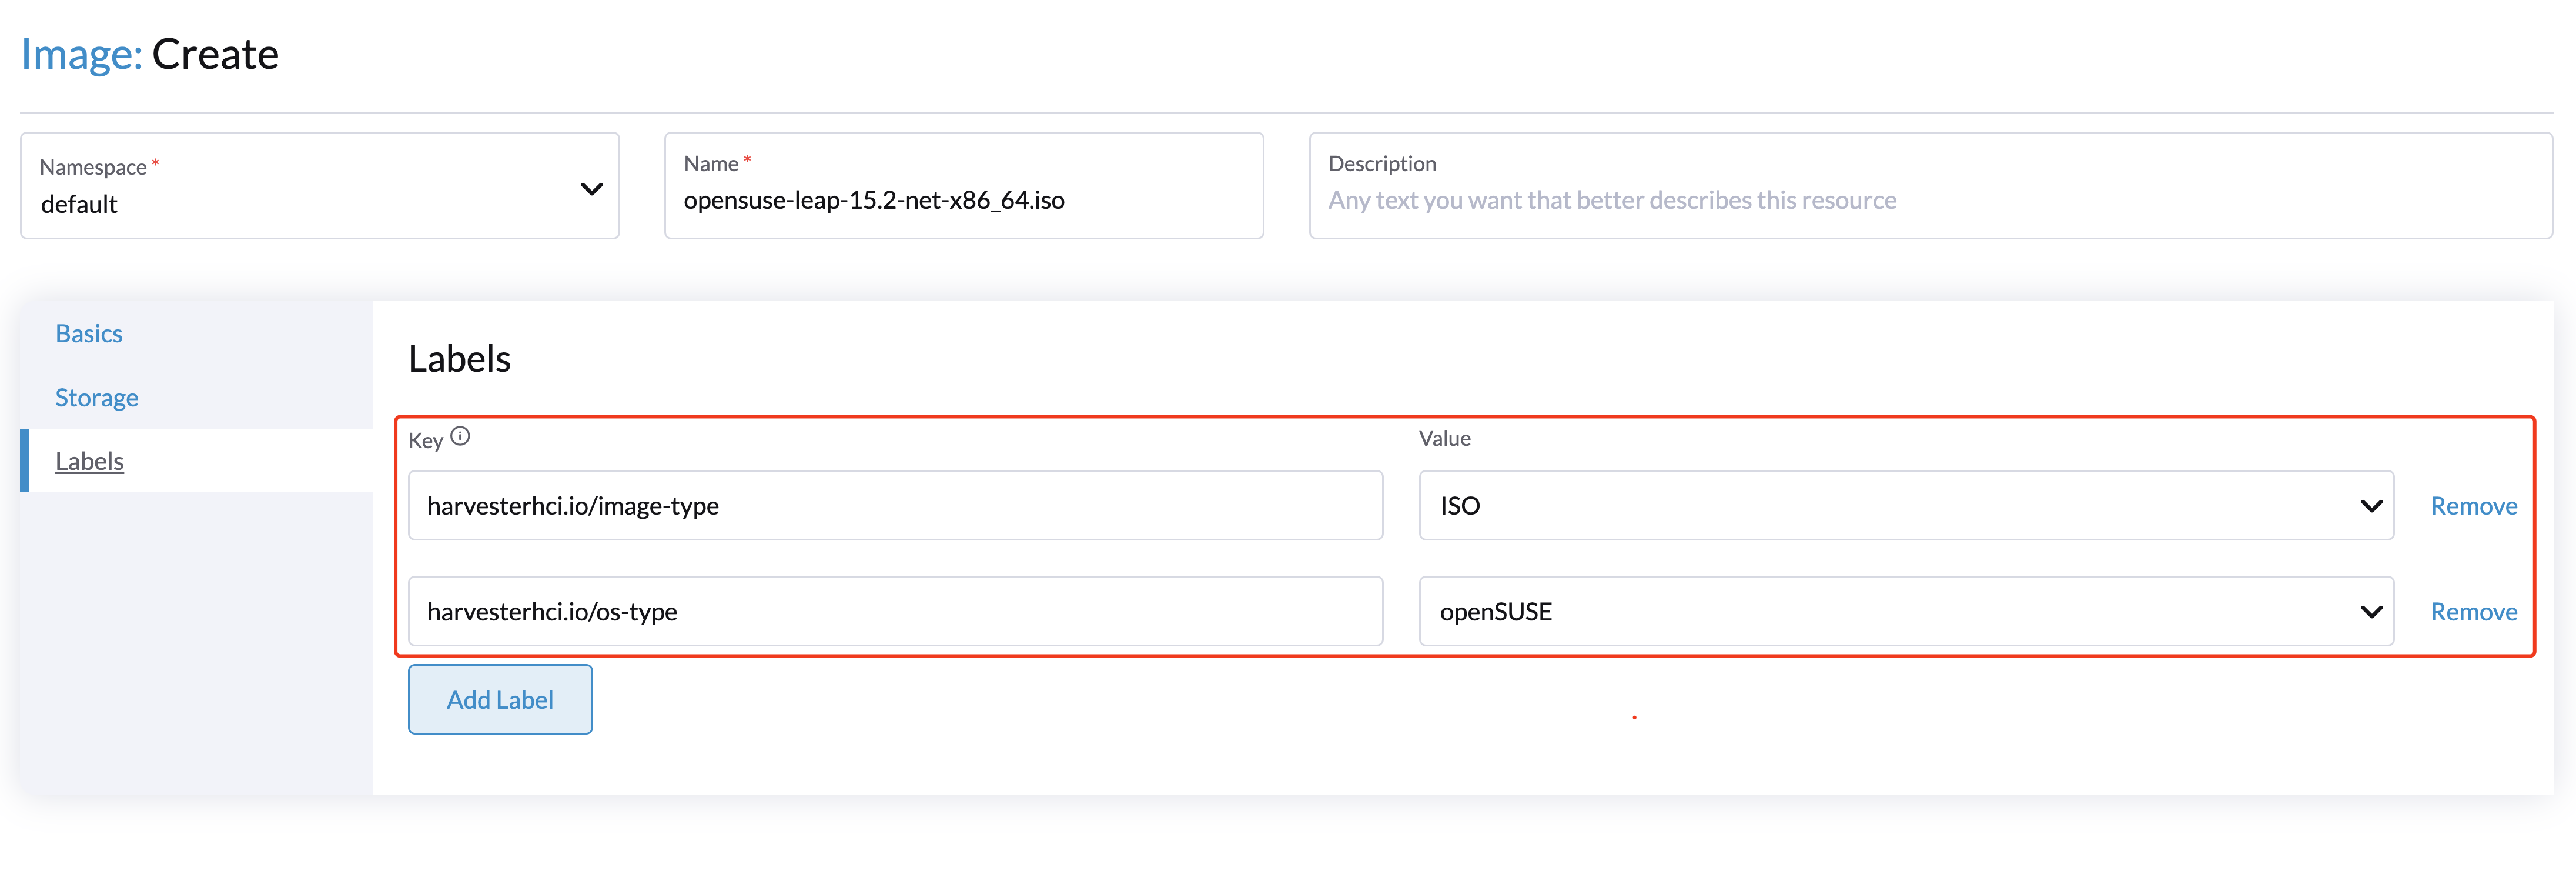
Image Labels
You can add labels to the image, which helps identify the OS type more accurately. Also, you can add any custom labels for filtering if needed.
If your image name or URL contains any valid information, the UI automatically recognizes the OS type and image category for you. If not, you can also manually specify those corresponding labels on the UI.