Geo Clustering Guide
- 1 Challenges for Geo Clusters
- 2 Conceptual Overview
- 3 Requirements
- 4 Setting Up the Booth Services
- 5 Synchronizing Configuration Files Across All Sites and Arbitrators
- 6 Configuring Cluster Resources and Constraints
- 7 Setting Up IP Relocation via DNS Update
- 8 Managing Geo Clusters
- 9 Troubleshooting
- 10 Upgrading to the Latest Product Version
- 11 For More Information
- A GNU Licenses
8 Managing Geo Clusters #
Before booth can manage a certain ticket within the Geo cluster, you initially need to grant it to a site manually—either with the booth command line client or with Hawk2.
8.1 Managing Tickets From Command Line #
Use the booth client command line tool to grant,
list, or revoke tickets as described in
Overview of booth client Commands. The
booth client commands can be run on any machine in
the cluster, not only the ones having the boothd running. The
booth client commands try to find the
“local” cluster by looking at the booth configuration file and
the locally defined IP addresses. If you do not specify a site which the
booth client should connect to (using the -s option), it
will always connect to the local site.
Note: Syntax Changes
The syntax of booth client commands has been simplified since SUSE Linux Enterprise High Availability Extension
11. The former syntax is still supported. For detailed information, see the
Synopsis section in the booth man page.
The examples in this manual use the simplified syntax.
Overview of booth client Commands #
- Listing All Tickets
root #boothlist ticket: ticketA, leader: none ticket: ticketB, leader: 10.2.12.101, expires: 2014-08-13 10:28:57If you do not specify a certain site with
-s, the information about the tickets will be requested from the local booth instance.- Granting a Ticket to a Site
root #boothgrant -s 192.168.201.100 ticketA booth[27891]: 2014/08/13_10:21:23 info: grant request sent, waiting for the result ... booth[27891]: 2014/08/13_10:21:23 info: grant succeeded!In this case,
ticketAwill be granted to the site192.168.201.100. Without the-soption, booth would automatically connect to the current site (the site you are running the booth client on) and would request thegrantoperation.Before granting a ticket, the command executes a sanity check. If the same ticket is already granted to another site, you are warned about that and are prompted to revoke the ticket from the current site first.
- Revoking a Ticket From a Site
root #boothrevoke ticketA booth[27900]: 2014/08/13_10:21:23 info: revoke succeeded!Booth checks to which site the ticket is currently granted and requests the
revokeoperation forticketA. The revoke operation will be executed immediately.
The grant and (under certain circumstances),
revoke operations may take a while to return a definite
operation's outcome. The client waits for the result up to the ticket's
timeout value before it gives up waiting. If the
-w option was used, the client will wait indefinitely
instead. Find the exact status in the log files or with the
crm_ticket -L command.
Warning: crm_ticket and crm site ticket
If the booth service is not running for any reasons, you may also manage
tickets manually with crm_ticket or
crm site ticket. Both commands are only
available on cluster nodes. Use them with great care as they
cannot verify if the same ticket is already granted
elsewhere. For more information, read the man pages.
As long as booth is up and running, only use the
booth client for manual intervention.
After you have initially granted a ticket to a site, the booth mechanism
takes over and manages the ticket automatically. If the site holding a
ticket should be out of service, the ticket is automatically revoked after
the expiry time and granted to another site. The resources that depend on
that ticket fail over to the new site that holds the ticket. The
loss-policy set within the constraint specifies what
happens to the nodes that have run the resources before.
Procedure 8.1: Managing Tickets Manually #
Assuming that you want to manually move ticketA from
site amsterdam (with the virtual IP
192.168.201.100) to site berlin
(with the virtual IP 192.168.202.100), proceed as
follows:
Set
ticketAto standby with the following command:root #crm_ticket-t ticketA -sWait for any resources that depend on
ticketAto be stopped or demoted cleanly.Revoke
ticketAfrom siteamsterdamwith:root #boothrevoke -s 192.168.201.100 ticketAAfter the ticket has been revoked from its original site, grant it to the site
berlinwith:root #boothgrant -s 192.168.202.100 ticketA
8.2 Managing Tickets With Hawk2 #
Tickets can be viewed in both the and the view. Hawk2 displays the following ticket statuses:
: Tickets that are granted to the current site.
: Tickets that are granted to another site.
: Tickets that have been revoked. Additionally, Hawk2 also displays tickets as revoked if they are referenced in a ticket dependency, but have not been granted to any site yet.
Note: Granting Tickets to Current Site and Revoking Tickets
Though you can view tickets for all sites with Hawk2, any grant or revoke operations triggered by Hawk2 only apply to the current site (that you are currently connected to with Hawk2). To grant a ticket to another site of your Geo cluster, start Hawk2 on one of the cluster nodes belonging to the respective site.
You can only grant tickets that are not already given to any site.
Procedure 8.2: Viewing, Granting and Revoking Tickets with Hawk2 #
Start a Web browser and log in to Hawk2.
In the left navigation bar, select .
Along with information about cluster nodes and resources, Hawk2 also displays a category. It lists the ticket status, the ticket name and when the ticket was last granted. From the column you can manage the tickets.
To show further information about the ticket, along with information about the cluster sites and arbitrators, click the icon next to the ticket.
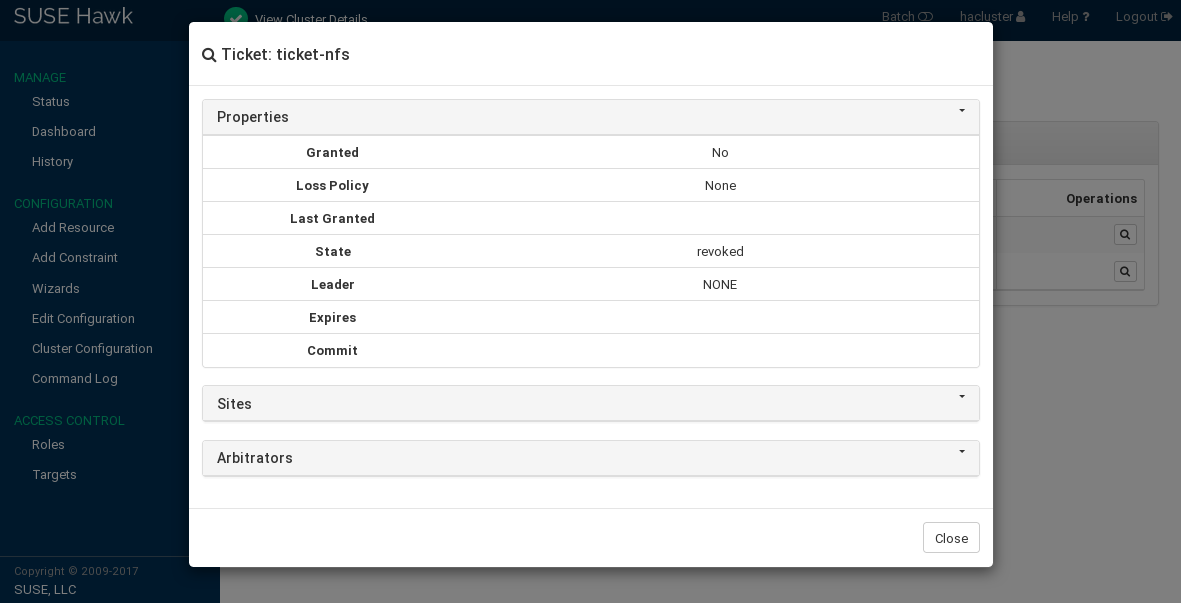
Figure 8.1: Hawk2—Ticket Details #
To revoke a granted ticket from the current site or to grant a ticket to the current site, click the switch in the column next to the ticket. On clicking, it shows the available action. Confirm your choice when Hawk2 prompts for a confirmation.
If the ticket cannot be granted or revoked for any reason, Hawk2 shows an error message. If the ticket has been successfully granted or revoked, Hawk2 will update the ticket .
Procedure 8.3: Simulating Granting and Revoking Tickets #
Hawk2's allows you to explore failure scenarios before they happen. To explore whether your resources that depend on a certain ticket behave as expected, you can also test the impact of granting or revoking tickets.
Start a Web browser and log in to Hawk2.
From the top-level row, select .
In the batch mode bar, click to open the window.
To simulate a status change of a ticket:
Click › .
Select the you want to manipulate and select the you want to simulate.
Confirm your changes. Your event is added to the queue of events listed in the dialog. Any event listed here is simulated immediately and is reflected on the screen.
Close the dialog and review the simulated changes.
To leave the batch mode, either or the simulated changes.
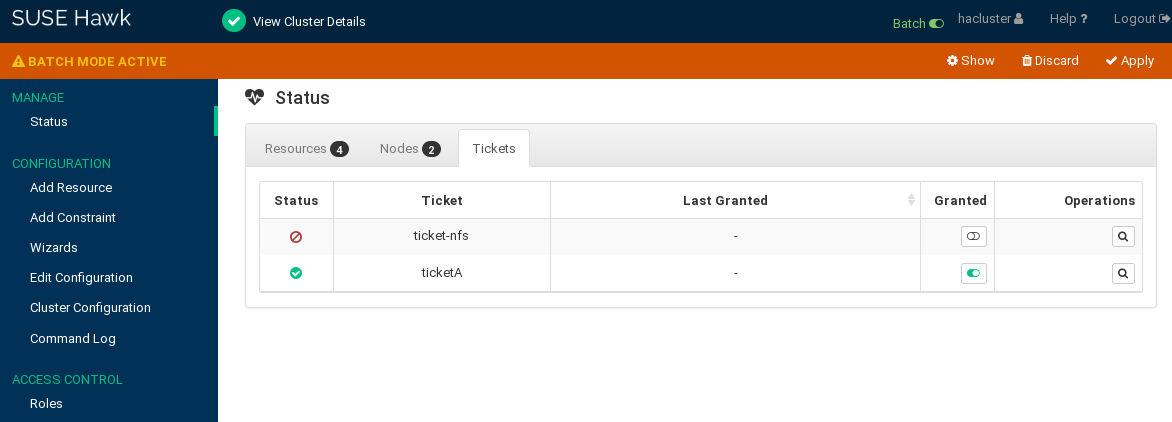
Figure 8.2: Hawk2 Simulator—Tickets #
For more information about Hawk2's (and which other scenarios can be explored with it), refer to Section 7.9, “Using the Batch Mode”.