14 Configuring virtual machines with Virtual Machine Manager #
Virtual Machine Manager's view offers in-depth information about the VM Guest's complete configuration and hardware equipment. Using this view, you can also change the guest configuration or add and modify virtual hardware. To access this view, open the guest's console in Virtual Machine Manager and either choose › from the menu, or click in the toolbar.
The left panel of the window lists VM Guest overview and already installed
hardware. After clicking an item in the list, you can access its detailed
settings in the details view. You can change the hardware parameters to match
your needs, then click to confirm them. Some changes
take effect immediately, while others need a reboot of the machine—and
virt-manager warns you about that fact.
To remove installed hardware from a VM Guest, select the appropriate list entry in the left panel and then click in the bottom right of the window.
To add new hardware, click below the left panel, then select the type of the hardware you want to add in the window. Modify its parameters and confirm with .
The following sections describe configuration options for the specific hardware type being added. They do not focus on modifying an existing piece of hardware as the options are identical.
14.1 Machine setup #
This section describes the setup of the virtualized processor and memory hardware. These components are vital to a VM Guest, therefore you cannot remove them. It also shows how to view the overview and performance information, and how to change boot parameters.
14.1.1 Overview #
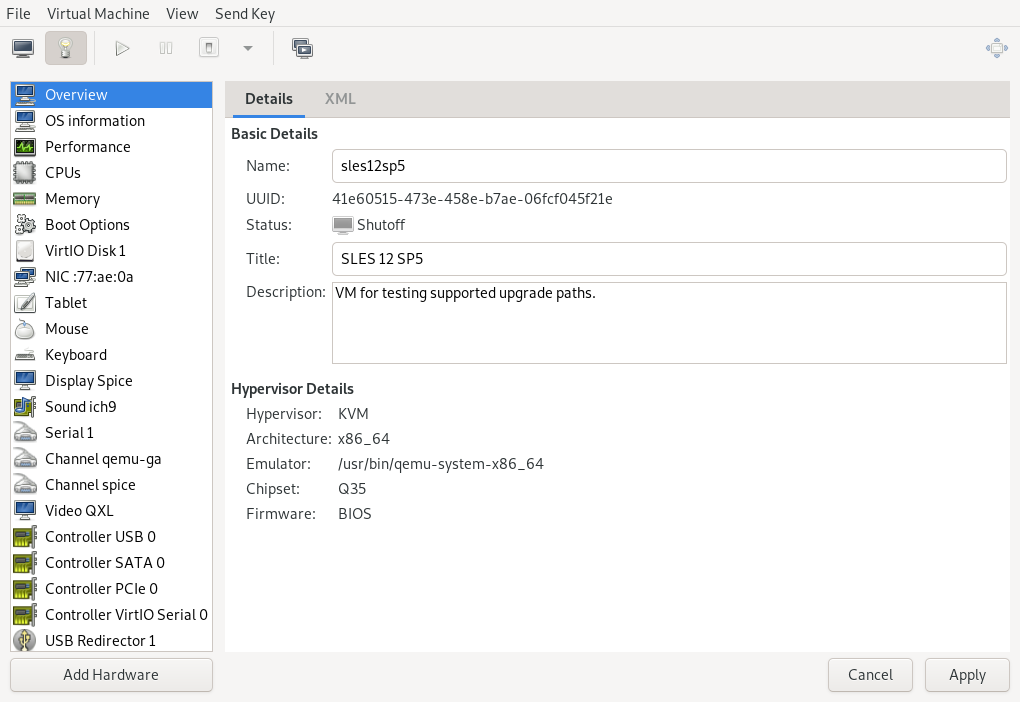
shows basic details about VM Guest and the hypervisor.
, , and are editable and help you identify VM Guest in the list of machines.
shows the universally unique identifier of the virtual machine, while shows its current status—, , or .
The section shows the hypervisor type, CPU architecture, used emulator, and chipset type. None of the hypervisor parameters can be changed.
14.1.2 Performance #
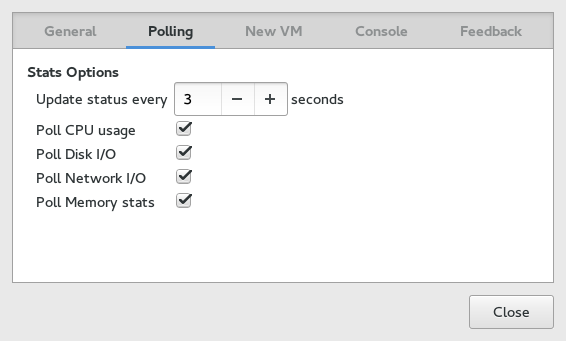
shows regularly updated charts of CPU and memory usage, and disk and network I/O.
Not all the charts in the view are enabled by default. To enable these charts, go to › , then select › › , and check the charts that you want to see regularly updated.
14.1.3 Processor #
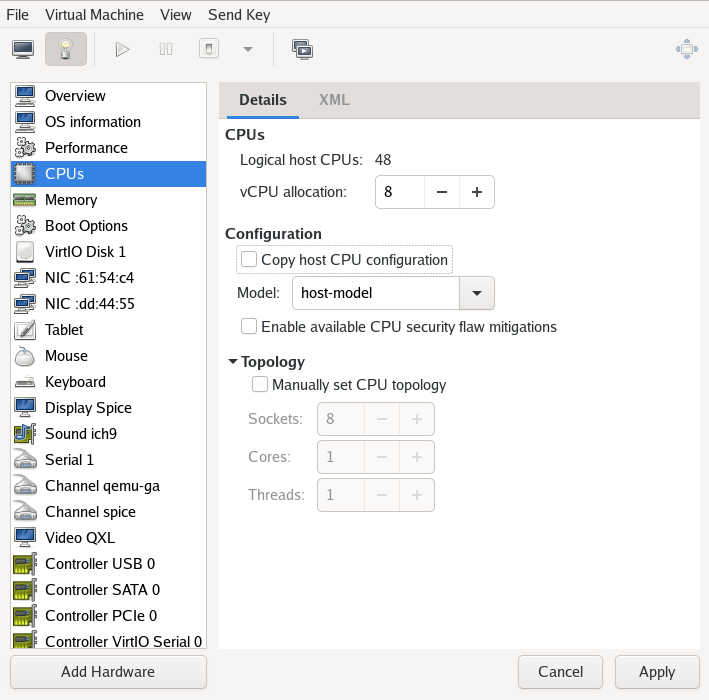
includes detailed information about VM Guest processor configuration.
In the section, you can configure the number of virtual CPUs allocated to the VM Guest. shows the number of online and usable CPUs on the VM Host Server.
The section lets you configure the CPU model and topology.
When activated, the option
uses the host CPU model for VM Guest. You can see the details of the host CPU model in the output of the virsh capabilities command. When deactivated, the CPU model
needs to be specified from the models available in the drop-down box.
The host CPU model generally provides a good trade-off between CPU features
and ability to migrate the VM Guest. libvirt does not model every aspect
of each CPU, so the VM Guest CPU will not match the VM Host Server CPU exactly.
But the ABI provided to the VM Guest is reproducible and during migration
the complete CPU model definition is transferred to the destination VM Host Server,
ensuring the migrated VM Guest will see the exact same CPU model on the
destination.
The host-passthrough model provides the VM Guest with a CPU that is exactly
the same as the VM Host Server CPU. This can be useful when the VM Guest workload
requires CPU features not available in libvirt's simplified host-model CPU.
The host-passthrough model is also required in some cases, for example, when running
VM Guests with more than 4TB of memory. The host-passthrough model comes
with the disadvantage of reduced migration capability. A VM Guest with
host-passthrough model CPU can only be migrated to a VM Host Server with identical
hardware.
For more information on libvirt's CPU model and topology options, see
the CPU model and topology documentation
at https://libvirt.org/formatdomain.html#cpu-model-and-topology.
After you activate , you can specify a custom number of sockets, cores and threads for the CPU.
14.1.4 Memory #
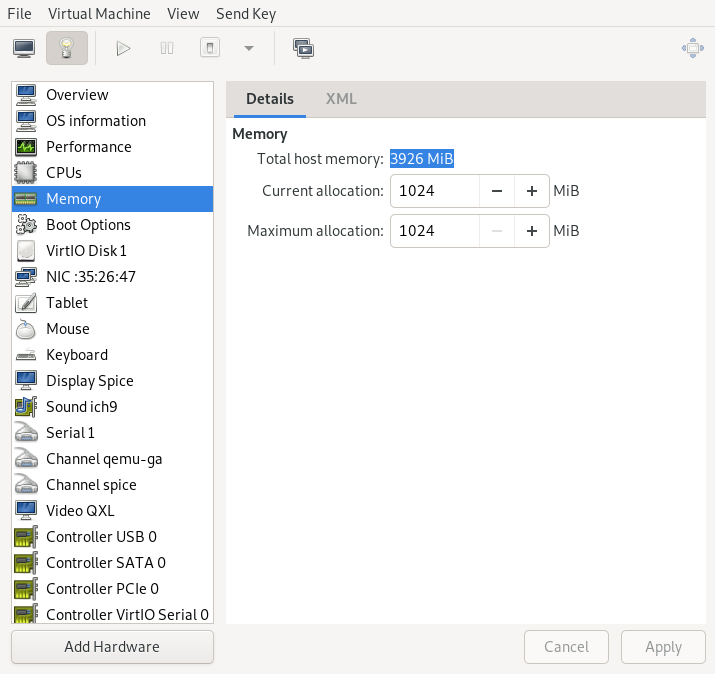
contains information about the memory that is available to VM Guest.
Total amount of memory installed on VM Host Server.
The amount of memory currently available to VM Guest. You can hotplug more memory by increasing this value up to the value of .
The maximum value to which you can hotplug the currently available memory. Any change to this value will take effect after the next VM Guest reboot.
VM Guests with memory requirements of 4TB or more currently need to
use the host-passthrough CPU model.
14.1.5 Boot options #
introduces options affecting the VM Guest boot process.
In the section, you can specify whether the virtual machine should automatically start during the VM Host Server boot phase.
In the , activate the devices that will be used for booting VM Guest. You can change their order with the up and down arrow buttons on the right side of the list. To choose from a list of bootable devices on VM Guest start, activate .
To boot a different kernel than the one on the boot device, activate and specify the paths to the alternative kernel and initrd placed on the VM Host Server file system. You can also specify kernel arguments that will be passed to the loaded kernel.
14.2 Storage #
This section gives you a detailed description of configuration options for storage devices. It includes both hard disks and removable media, such as USB or CD-ROM drives.
Below the left panel, click to open the window. There, select .
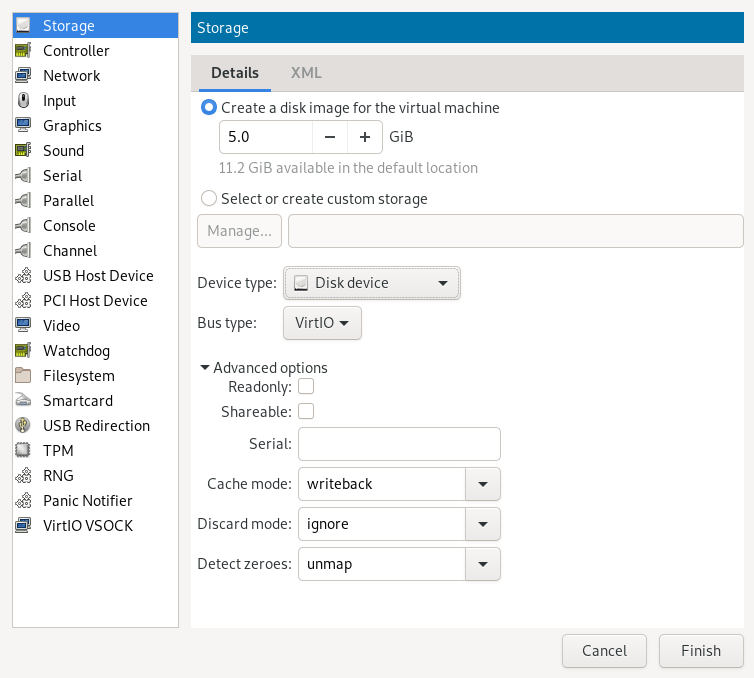
Figure 14.9: Add a new storage #To create a
qcow2disk image in the default location, activate and specify its size in gigabytes.To gain more control over the disk image creation, activate and click to manage storage pools and images. The window opens which has almost identical functionality as the tab described in Section 9.2.2, “Managing storage with Virtual Machine Manager”.
Tip: Supported storage formatsSUSE only supports the following storage formats:
rawandqcow2.After you manage to create and specify the disk image file, specify the . It can be one of the following options:
: Does not allow using .
: Does not allow using .
: Required to use an existing SCSI storage directly without adding it into a storage pool.
Select the for your device. The list of available options depends on the device type you selected in the previous step. The types based on use paravirtualized drivers.
In the section, select the preferred . For more information on cache modes, see Chapter 18, Disk cache modes.
Confirm your settings with . A new storage device appears in the left panel.
14.3 Controllers #
This section focuses on adding and configuring new controllers.
Below the left panel, click to open the window. There, select .
Figure 14.10: Add a new controller #Select the type of the controller. You can choose from , , , , (paravirtualized), , or (smart card devices).
Optionally, in the case of a USB or SCSI controller, select a controller model.
Confirm your settings with . A new controller appears in the left panel.
14.4 Networking #
This section describes how to add and configure new network devices.
Below the left panel, click to open the window. There, select .
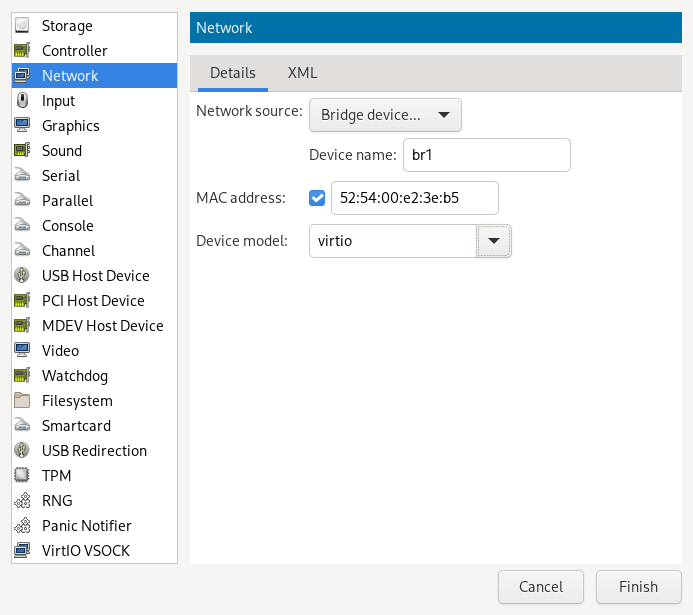
Figure 14.11: Add a new network interface #From the list, select the source for the network connection. The list includes VM Host Server's available physical network interfaces, network bridges, or network bonds. You can also assign the VM Guest to an already defined virtual network. See Section 9.1, “Configuring networks” for more information on setting up virtual networks with Virtual Machine Manager.
Specify a for the network device. While Virtual Machine Manager pre-fills a random value for your convenience, it is recommended to supply a MAC address appropriate for your network environment to avoid network conflicts.
Select a device model from the list. You can either leave the , or specify one of , , or models. Note that virtio uses paravirtualized drivers.
Confirm your settings with . A new network device appears in the left panel.
14.5 Input devices #
This section focuses on adding and configuring new input devices such as mouse, keyboard, or tablet.
Below the left panel, click to open the window. There, select .
Figure 14.12: Add a new input device #Select a device type from the list.
Confirm your settings with . A new input device appears in the left panel.
When you click within a VM Guest's console with the mouse, the pointer is captured by the console window and cannot be used outside the console unless it is explicitly released (by pressing Alt–Ctrl). To prevent the console from grabbing the key and to enable seamless pointer movement between host and guest instead, follow the instructions in Procedure 14.4, “Adding a new input device” to add an to the VM Guest.
Adding a tablet has the additional advantage of synchronizing the mouse pointer movement between VM Host Server and VM Guest when using a graphical environment on the guest. With no tablet configured on the guest, you will often see two pointers with one dragging behind the other.
14.6 Video #
This section describes how to add and configure new video devices.
Below the left panel, click to open the window. There, select .
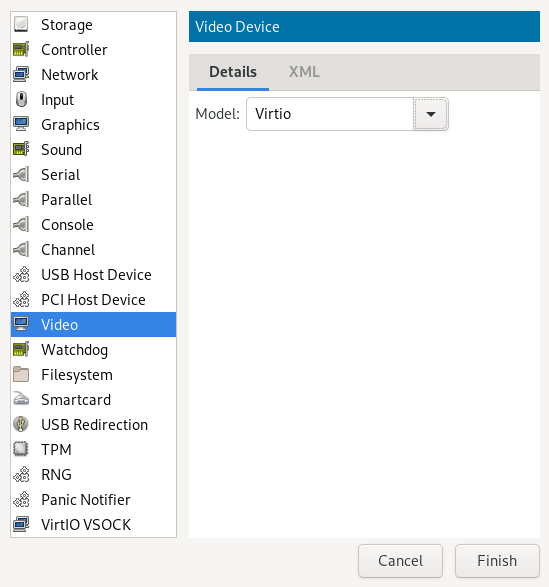
- Figure 14.13: Add a new video device #
Select a model from the list. You can choose from:
Cirrus
QXL
VGA
Virtio
VMVGA
Xen
Note: Secondary video devicesOnly and can be added as secondary video devices.
Confirm your settings with . A new video device appears in the left panel.
14.7 USB redirectors #
USB devices that are connected to the client machine can be redirected to the VM Guest by using .
Below the left panel, click to open the window. There, select .
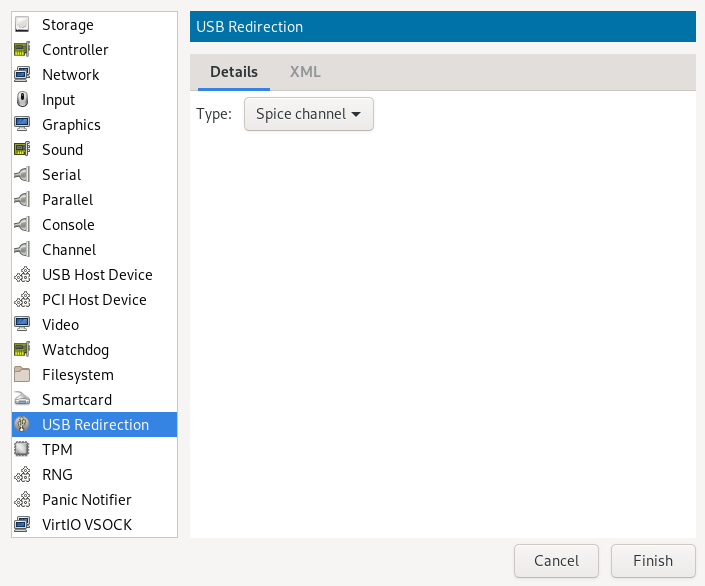
Figure 14.14: Add a new USB redirector #Select a device type from the list. Depending on your configuration, you can either select a or a redirector.
Confirm your settings with . A new USB redirector appears in the left panel.
14.8 Miscellaneous #
- Smartcard
Smartcard functionality can be added via the element. A physical USB smartcard reader can then be passed through to the VM Guest.
- Watchdog
Virtual watchdog devices are also supported. They can be created via the element. The model as well as the action of the device can be specified.
Tip: Requirements for virtual watchdog devicesQA virtual watchdog devices require a specific driver and daemon to be installed in the VM Guest. Otherwise the virtual watchdog device does not work.
- TPM
You can use the Host TPM device in the VM Guest by adding TPM functionality via the element.
Tip: Virtual TPMsThe Host TPM can only be used in one VM Guest at a time.
14.9 Adding a CD/DVD-ROM device with Virtual Machine Manager #
KVM supports CD or DVD-ROMs in VM Guest either by directly accessing a
physical drive on the VM Host Server or by accessing ISO images. To create an ISO
image from an existing CD or DVD, use dd:
>sudodd if=/dev/CD_DVD_DEVICE of=my_distro.iso bs=2048
To add a CD/DVD-ROM device to your VM Guest, proceed as follows:
Double-click a VM Guest entry in the Virtual Machine Manager to open its console and switch to the view with › .
Click and choose in the pop-up window.
Change the to .
Select .
To assign the device to a physical medium, enter the path to the VM Host Server's CD/DVD-ROM device (for example,
/dev/cdrom) next to . Alternatively, use to open a file browser and then click to select the device. Assigning the device to a physical medium is only possible when the Virtual Machine Manager was started on the VM Host Server.To assign the device to an existing image, click to choose an image from a storage pool. If the Virtual Machine Manager was started on the VM Host Server, alternatively choose an image from another location on the file system by clicking . Select an image and close the file browser with .
Save the new virtualized device with .
Reboot the VM Guest to make the new device available. For more information, see Section 14.11, “Ejecting and changing floppy or CD/DVD-ROM media with Virtual Machine Manager”.
14.10 Adding a floppy device with Virtual Machine Manager #
Currently KVM only supports the use of floppy disk images—using a
physical floppy drive is not supported. Create a floppy disk image from an
existing floppy using dd:
>sudodd if=/dev/fd0 of=/var/lib/libvirt/images/floppy.img
To create an empty floppy disk image use one of the following commands:
- Raw image
>sudodd if=/dev/zero of=/var/lib/libvirt/images/floppy.img bs=512 count=2880- FAT formatted image
>sudomkfs.msdos -C /var/lib/libvirt/images/floppy.img 1440
To add a floppy device to your VM Guest, proceed as follows:
Double-click a VM Guest entry in the Virtual Machine Manager to open its console and switch to the view with › .
Click and choose in the pop-up window.
Change the to .
Choose and click to choose an existing image from a storage pool. If Virtual Machine Manager was started on the VM Host Server, alternatively choose an image from another location on the file system by clicking . Select an image and close the file browser with .
Save the new virtualized device with .
Reboot the VM Guest to make the new device available. For more information, see Section 14.11, “Ejecting and changing floppy or CD/DVD-ROM media with Virtual Machine Manager”.
14.11 Ejecting and changing floppy or CD/DVD-ROM media with Virtual Machine Manager #
Whether you are using the VM Host Server's physical CD/DVD-ROM device or an
ISO/floppy image: Before you can change the media or image of an existing
device in the VM Guest, you first need to disconnect the
media from the guest.
Double-click a VM Guest entry in the Virtual Machine Manager to open its console and switch to the view with › .
Choose the Floppy or CD/DVD-ROM device and “eject” the medium by clicking .
To “insert” a new medium, click .
If using the VM Host Server's physical CD/DVD-ROM device, first change the media in the device (this may require unmounting it on the VM Host Server before it can be ejected). Then choose and select the device from the drop-down box.
If you are using an ISO image, choose and select an image by clicking . When connecting from a remote host, you may only choose images from existing storage pools.
Click to finish. The new media can now be accessed in the VM Guest.
14.12 Assigning a host PCI device to a VM Guest #
You can directly assign host-PCI devices to guests (PCI pass-through). When the PCI device is assigned to one VM Guest, it cannot be used on the host or by another VM Guest unless it is re-assigned. A prerequisite for this feature is a VM Host Server configuration as described in Important: Requirements for VFIO and SR-IOV.
14.12.1 Adding a PCI device with Virtual Machine Manager #
The following procedure describes how to assign a PCI device from the host machine to a VM Guest using Virtual Machine Manager:
Double-click a VM Guest entry in the Virtual Machine Manager to open its console and switch to the view with › .
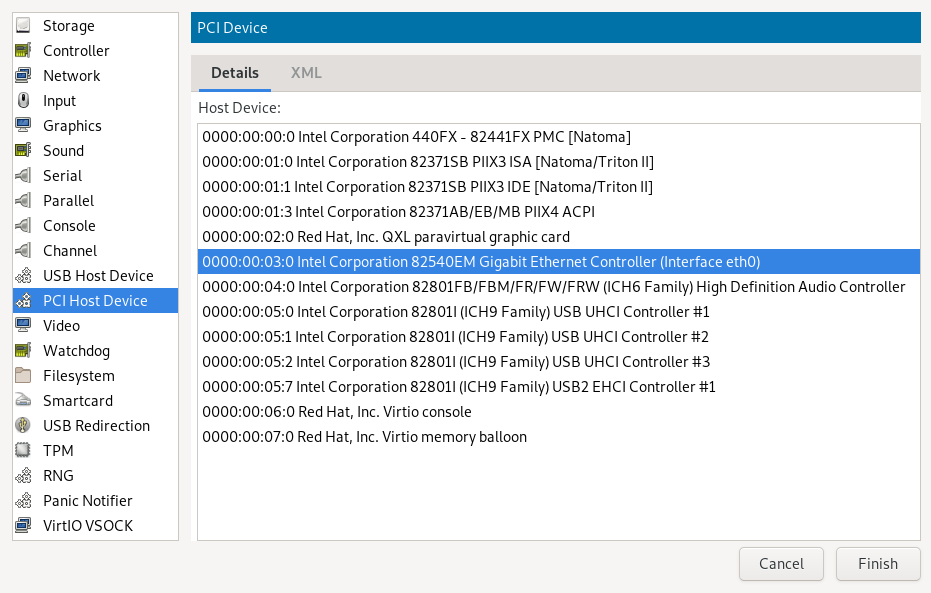
Click and choose the category in the left panel. A list of available PCI devices appears in the right part of the window.
Figure 14.15: Adding a PCI device #From the list of available PCI devices, choose the one you want to pass to the guest. Confirm with .
On a newer QEMU machine type (pc-i440fx-2.0 or higher) with SLES 11
SP4 KVM guests, the acpiphp
module is not loaded by default in the guest. This module must be loaded to
enable hotplugging of disk and network devices. To load the module manually,
use the command modprobe acpiphp. It is also possible to
autoload the module by adding install acpiphp /bin/true
to the /etc/modprobe.conf.local file.
KVM guests using the QEMU Q35 machine type have a PCI topology that
includes a pcie-root controller and seven
pcie-root-port controllers. The
pcie-root controller does not support hotplugging. Each
pcie-root-port controller supports hotplugging a single
PCIe device. PCI controllers cannot be hotplugged, so plan accordingly and
add more pcie-root-ports if more than seven PCIe
devices will be hotplugged. A pcie-to-pci-bridge
controller can be added to support hotplugging legacy PCI devices.
See https://libvirt.org/pci-hotplug.html for more
information about PCI topology between QEMU machine types.
14.13 Assigning a host USB device to a VM Guest #
Analogous to assigning host PCI devices (see Section 14.12, “Assigning a host PCI device to a VM Guest”), you can directly assign host USB devices to guests. When the USB device is assigned to one VM Guest, it cannot be used on the host or by another VM Guest unless it is re-assigned.
14.13.1 Adding a USB device with Virtual Machine Manager #
To assign a host USB device to VM Guest using Virtual Machine Manager, follow these steps:
Double-click a VM Guest entry in the Virtual Machine Manager to open its console and switch to the view with › .
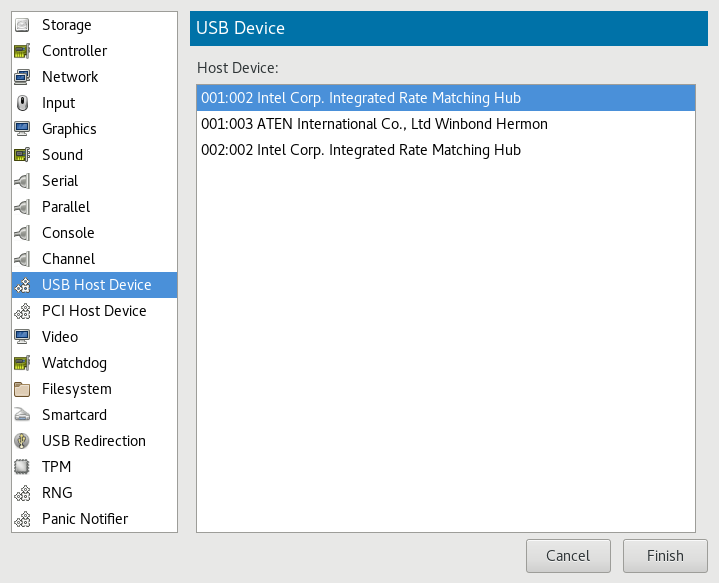
Click and choose the category in the left panel. A list of available USB devices appears in the right part of the window.
Figure 14.16: Adding a USB device #From the list of available USB devices, choose the one you want to pass to the guest. Confirm with . The new USB device appears in the left pane of the view.
Tip: USB device removalTo remove the host USB device assignment, click it in the left pane of the view and confirm with .

