2 SMT Installation #
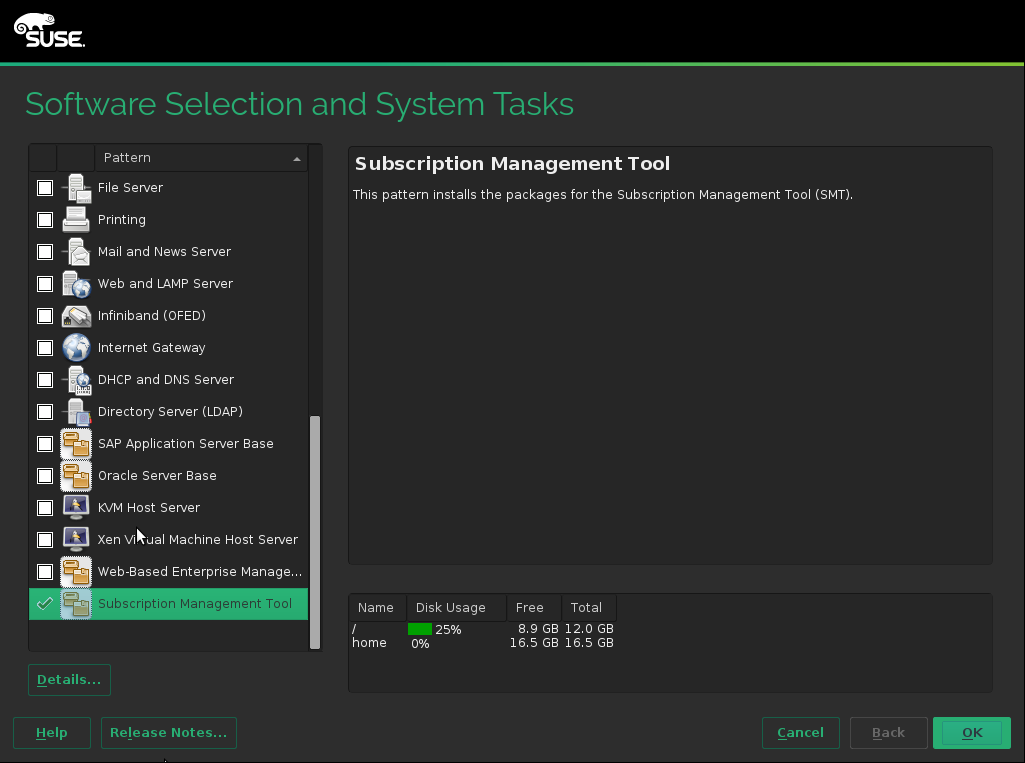
SMT is included in SUSE Linux Enterprise Server starting with version 12 SP1. To install it, start SUSE Linux Enterprise Server installation, and click on the screen. Select the pattern on the screen, then click .
To install SMT on the existing SUSE Linux Enterprise Server system, run › › , select › and select the pattern there.
It is recommended to check for available SMT updates immediately after
installing SUSE Linux Enterprise Server using the zypper patch command. SUSE
continuously releases maintenance updates for SMT, and newer packages are
likely to be available.
After the system is installed and updated, perform an initial SMT configuration using › › .
The smt-client package needs to be installed on clients
connected to the SMT server. The package requires no configuration, and
it can be installed using the sudo zypper in smt-client
command.
2.1 SMT Configuration Wizard #
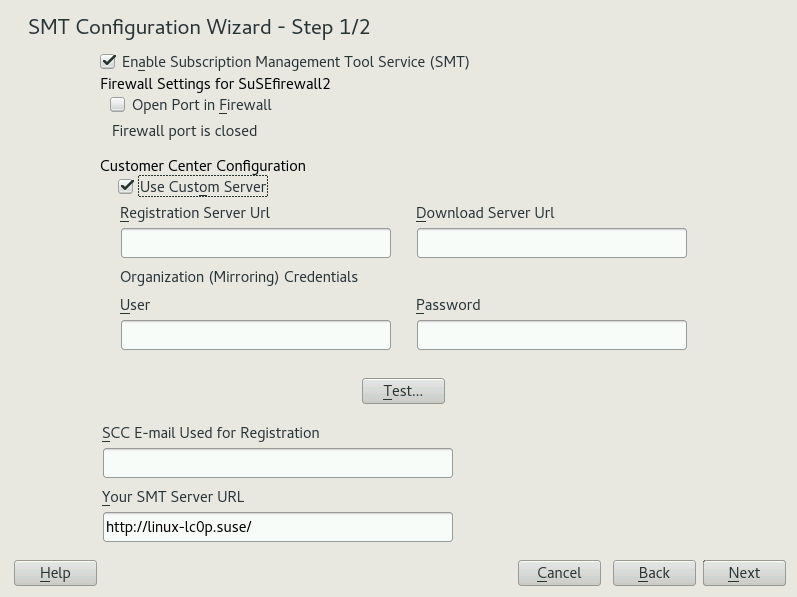
The two-step helps you configure SMT after SUSE Linux Enterprise Server installation is finished. You can change the configuration later using the YaST SMT Server Configuration module—see Chapter 3, SMT Server Configuration.
The option is enabled by default. Toggle it only if you want to disable the SMT product.
If the firewall is enabled, enable to allow access to the SMT service from remote computers.
Enter your SUSE Customer Center organization credentials in and . If you do not know your SUSE Customer Center credentials, refer to Section 4.1, “Mirroring Credentials”. Test the entered credentials using the button. SMT will connect to the Customer Center server using the provided credentials and download testing data.
Enter the e-mail address you used for the SUSE Customer Center registration into .
should contain the URL of the SMT server being configured. It is populated automatically.
Click to continue to the second configuration step.
Figure 2.2: SMT Wizard #For security reasons, SMT requires a separate user to connect to the database. In the screen, set the database password for this user.
Enter all e-mail addresses for receiving SMT reports using the button. Use the and buttons to modify and delete the existing addresses. When you have done that, click .
If the current database root password is empty, you will be prompted to specify it.
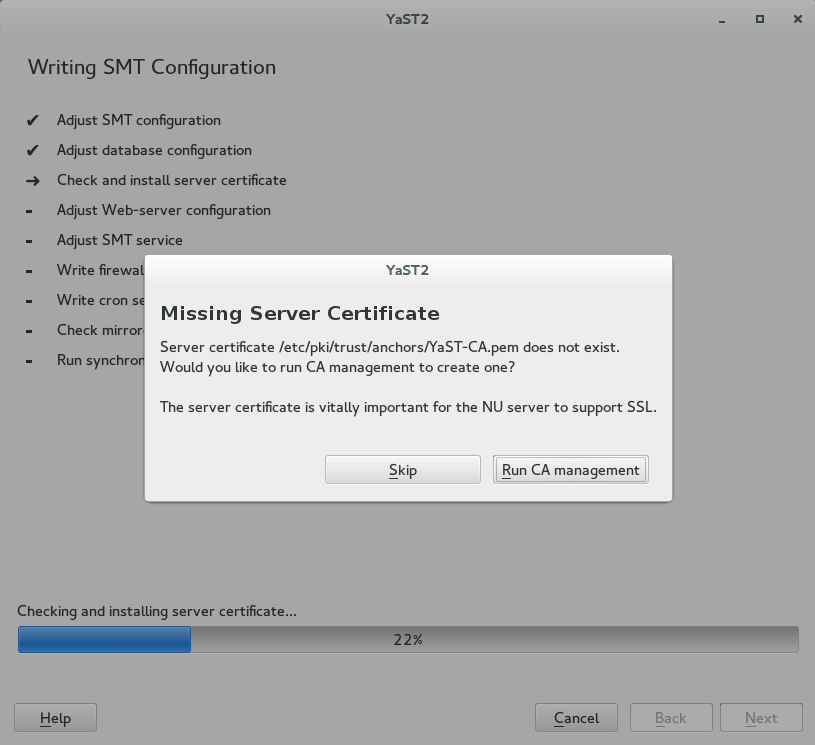
By default, SMT is set to communicate with the client hosts via a secure protocol. For this, the server needs to have a server SSL certificate. The wizard displays a warning if the certificate does not exist. You can create a certificate using the button. Refer to Section 18.2, “YaST Modules for CA Management” for detailed information on managing certificates with YaST.
Figure 2.3: Missing Server Certificate #
2.2 Upgrading from Previous Versions of SMT #
This section provides information on upgrading SMT from the previous versions.
A direct upgrade path from SMT prior to version 11 SP3 is not supported. You need to do the following:
Upgrade the operating system to SUSE Linux Enterprise Server 11 SP3 or SP4 as described at https://documentation.suse.com/sles-11/html/SLES-all/cha-update-sle.html.
At the same time upgrade SMT to version 11 SP3 as described at https://documentation.suse.com/smt/11.3/.
Follow the steps described in Section 2.2.2, “Upgrade from SMT 11 SP3”.
2.2.1 Upgrade from SMT 12 SP1 #
Upgrade from SMT 12 SP1 is performed automatically during the SUSE Linux Enterprise Server upgrade and requires no additional manual steps. For more information on SUSE Linux Enterprise Server upgrade, see Chapter 20, Upgrading SUSE Linux Enterprise.
2.2.2 Upgrade from SMT 11 SP3 #
To upgrade SMT from version 11 SP3 to 12 SP2, follow the steps below.
If you have not already done so, migrate from Novell Customer Center to SUSE Customer Center as described in Section 2.2.2.1, “Migration to SUSE Customer Center on SMT 11 SP3”.
Back up and migrate the database. See the general procedure in Section 20.3.5, “Migrate your MySQL Database”.
Upgrade to SUSE Linux Enterprise Server 12 SP2 as described in Chapter 20, Upgrading SUSE Linux Enterprise.
Look if the new
/etc/my.cnf.rpmnewexists and update it with any custom changes you need. Then copy it over the existing/etc/my.cnf:cp /etc/my.cnf.rpmnew /etc/my.cnf
Enable the
smttarget to start at the system boot:systemctl enable smt.target
Start it immediately, if necessary:
systemctl start smt.target
2.2.2.1 Migration to SUSE Customer Center on SMT 11 SP3 #
Before upgrading to SUSE Linux Enterprise Server 12, you need to switch the registration center on SUSE Linux Enterprise Server 11. SMT now registers with SUSE Customer Center instead of Novell Customer Center. You can do this either via a YaST module or command line tools.
Before performing the switch between customer centers, make sure that the target customer center serves all products that are registered with SMT. Both YaST and the command line tools perform a check to find out whether all products can be served with the new registration server.
To perform the migration to SUSE Customer Center via command line, use the following command:
smt ncc-scc-migration
The migration itself takes time, and during the migration process the SMT server may not be able to serve clients that are already registered.
The migration process itself changes the registration server and the proper type of API in the configuration files. No further (configuration) changes are needed on the SMT.
To migrate from Novell Customer Center to SUSE Customer Center via YaST, use the YaST smt-server module.
When migration has been completed, it is necessary to synchronize SMT with the customer center. It is recommended to ensure that the repositories are up to date. This can be done using the following commands:
   smt sync
   smt mirror
2.3 Enabling SLP Announcements #
SMT includes the SLP service description file
(/etc/slp.reg.d/smt.reg). To enable SLP
announcements of the SMT service, open respective ports in your
firewall and enable the SLP service:
sysconf_addword /etc/sysconfig/SuSEfirewall2 FW_SERVICES_EXT_TCP "427"
sysconf_addword /etc/sysconfig/SuSEfirewall2 FW_SERVICES_EXT_UDP "427"
systemctl enable slpd.service
systemctl start slpd.service


