Running OpenSCAP Compliance Scans for SUSE Multi-Linux Support 8
This guide explains how to use OpenSCAP to run compliance scans on Enterprise Linux systems registered with SUSE Multi-Linux Support 8.
Copyright © 2022–2026 SUSE LLC and contributors. All rights reserved.
Permission is granted to copy, distribute and/or modify this document under the terms of the GNU Free Documentation License, Version 1.2 or (at your option) version 1.3; with the Invariant Section being this copyright notice and license. A copy of the license version 1.2 is included in the section entitled “GNU Free Documentation License”.
For SUSE trademarks, see https://www.suse.com/company/legal/. All third-party trademarks are the property of their respective owners. Trademark symbols (®, ™ etc.) denote trademarks of SUSE and its affiliates. Asterisks (*) denote third-party trademarks.
All information found in this book has been compiled with utmost attention to detail. However, this does not guarantee complete accuracy. Neither SUSE LLC, its affiliates, the authors nor the translators shall be held liable for possible errors or the consequences thereof.
SUSE seeks to provide customers with quick and easy guides that can assist them in maintaining security compliance. Implementation of the settings contained within this guide without its prior testing in a non-operational environment is highly discouraged. The developers of these profiles and documentation have made reasonable efforts to ensure overall compliance. They assume no responsibility for its use by other parties, and make no guarantee, expressed or implied, about its quality, reliability or any other characteristic.
1 Introduction #
SUSE Multi-Linux Support is a technology and support solution for mixed Linux environments. With a SUSE Multi-Linux Support subscription, you can register and update Red Hat Enterprise Linux and CentOS Linux from repositories provided by SUSE.
Because SUSE Multi-Linux Support uses its own branding and paths that are different from RHEL and CentOS Linux, it also uses different profiles for running compliance scans with OpenSCAP.
SCAP is a framework of specifications that support automated configuration, vulnerability scanning, and policy compliance evaluation of systems deployed in an organization. OpenSCAP is a collection of open source tools that implement the SCAP framework for Linux.
SUSE Multi-Linux Support provides the following components in its software update repositories:
The OpenSCAP scanner and utilities.
The SCAP Security Guide, a collection of security guidance and baselines from https://github.com/ComplianceAsCode/content to apply against systems for compliance.
SCAP Workbench, a utility with a graphical user interface for SCAP content tailoring, editing, and validation.
This guide describes running compliance scans locally using the oscap
command-line tool. To run scans remotely or with the SCAP Workbench GUI tool,
see the list of Related information.
Third-party compliance tools, such as proprietary security scanners and upstream builds
of ComplianceAsCode content, might not recognize SUSE Multi-Linux Support properly
and are not currently supported.
Review Section 2, “Requirements” to make sure your system has the registration and packages required to run compliance scans with SUSE Multi-Linux Support profiles.
Choose a profile for running compliance scans in Section 3, “Choosing an OpenSCAP compliance profile”.
Run the compliance scan, as described in Section 4, “Running an OpenSCAP compliance scan”. If you need to include remote resources in the compliance scan, use Section 5, “Including remote resources in an OpenSCAP scan” instead.
Review the report generated by the compliance scan. Section 6, “Reviewing the OpenSCAP evaluation report” shows examples of the main sections of the report.
SUSE Multi-Linux Support was previously named SUSE Liberty Linux and SUSE Linux Enterprise Server with Expanded Support. During the transition period, some components might still use one of these names.
2 Requirements #
Before running compliance scans, make sure your system meets the following requirements:
You can log in to the target system as either the
rootuser or a user withsudoprivileges. Withoutrootaccess, some tests in the compliance scan might not run correctly.The target system is registered with SUSE Multi-Linux Support, as described in one of the following guides:
The most recent versions of the following packages are installed:
sles_es-release
openscap
openscap-scanner
scap-security-guide
Installing these packages might also install additional dependencies.
The installed packages are provided by SUSE. You can use
rpm -qito check the vendor. For example:#rpm -qi openscap-scanner | grep -i vendorVendor : SUSE LLC <https://www.suse.com/>You can also check the distribution name. For example:
#rpm -q --queryformat '%{DISTRIBUTION}\n' openscapSLES Expanded Support platformIf the vendor or distribution is different from the output shown above, reinstall the packages from the SUSE Multi-Linux Support 8 repositories, and make sure no other repository overrides SUSE Multi-Linux Support.
The optional package scap-workbench is also available, but is not required to run scans locally from the command line.
As a security best practice, avoid installing an application software such as SCAP Workbench on the target system. Instead, install SCAP Workbench on a client machine and scan the target system remotely.
3 Choosing an OpenSCAP compliance profile #
The SCAP Security Guide contains the latest set of security polices for Linux systems. Each security policy includes multiple compliance profiles, which contain sets of rules to test the system against. Before you can run a compliance scan, you must choose the appropriate compliance profile for your system.
The security policies are installed in /usr/share/xml/scap/ssg/content/.
For compatibility, builds of the SCAP Security Guide for SUSE Multi-Linux Support also provide RHEL policies in
the same location.
To list the profiles for SUSE Multi-Linux Support 8, query
the ssg-sles_esp8-ds security policy:
#oscap info /usr/share/xml/scap/ssg/content/ssg-sles_esp8-ds.xml
You can use grep to narrow down the results. For example,
to see only CIS profiles, run the following command:
#oscap info /usr/share/xml/scap/ssg/content/ssg-sles_esp8-ds.xml | grep -i cisTitle: CIS Benchmark for Level 2 - Server Id: xccdf_org.ssgproject.content_profile_cis Title: CIS Benchmark for Level 1 - Server Id: xccdf_org.ssgproject.content_profile_cis_server_l1 Title: CIS Benchmark for Level 1 - Workstation Id: xccdf_org.ssgproject.content_profile_cis_workstation_l1 Title: CIS Benchmark for Level 2 - Workstation Id: xccdf_org.ssgproject.content_profile_cis_workstation_l2
Select the profile to use. You will specify this profile when you run the compliance scan.
The output of oscap info also includes a WARNING
if the security policy includes a reference to remote resources from
https://ftp.suse.com. Using remote resources in the compliance scan
is not compulsory, but can provide useful data about known security vulnerabilities.
You can continue with either of the following options:
Ignore the warning and perform the compliance scan without remote resources, as described in Section 4, “Running an OpenSCAP compliance scan”.
Download the remote resources and use them in the compliance scan, as described in Section 5, “Including remote resources in an OpenSCAP scan”.
4 Running an OpenSCAP compliance scan #
After choosing a profile, run a compliance scan on the target system with the
oscap xccdf eval command. Specify the profile as shown in
the following example:
#oscap xccdf eval \--profile xccdf_org.ssgproject.content_profile_cis \1--report /tmp/report.html \2--results-arf /tmp/results-arf.xml \3/usr/share/xml/scap/ssg/content/ssg-sles_esp8-ds.xml4
The compliance profile to use for the scan. | |
Where to save the HTML report with test results and recommended remediations. | |
Where to save the XML report, which can be used later in automation and report generation. | |
The SCAP Security Guide policy file that the compliance profile belongs to. |
The compliance scan collects information from the target system and evaluates it against rules set by the selected compliance profile. The scan will take some time to complete. The results are saved in the specified files and also appear on screen, as shown in this example snippet:
Title   Configure auditd Max Log File Size
Rule    xccdf_org.ssgproject.content_rule_auditd_data_retention_max_log_file
Result  pass

Title   Configure auditd max_log_file_action Upon Reaching Maximum Log Size
Rule    xccdf_org.ssgproject.content_rule_auditd_data_retention_max_log_file_action
Result  fail
When the scan is complete, you can review the report by opening
/tmp/report.html in a browser. See
Section 6, “Reviewing the OpenSCAP evaluation report” for examples of the report.
5 Including remote resources in an OpenSCAP scan #
SUSE Multi-Linux Support provides external OVAL-formatted content for use in scans. This content is downloaded from https://ftp.suse.com/pub/projects/security/oval/ and includes information such as recently addressed security vulnerabilities. Scans using remote resources take longer and generate larger reports.
To include remote content in a compliance scan, use one of the following procedures:
Directly download the remote content during the compliance scan, as described in Procedure 1, “Fetching remote resources during a compliance scan”.
Download the remote content and save it as a local file, as described in Procedure 2, “Saving remote resources locally to use in a compliance scan”. This can be useful for systems with stricter security policies (for example, if OpenSCAP cannot access external networks).
Make sure the machine you run the scan from has access to https://ftp.suse.com:
#nc -zv ftp.suse.com 21Connection to ftp.suse.com 21 port [tcp/ftp] succeeded!Run the compliance scan with the
--fetch-remote-resourcesoption:#oscap xccdf eval --fetch-remote-resources \1--profile xccdf_org.ssgproject.content_profile_cis \2--report /tmp/report.html \3--results-arf /tmp/results-arf.xml \4/usr/share/xml/scap/ssg/content/ssg-sles_esp8-ds.xml5Fetches remote resources from https://ftp.suse.com for use in the compliance scan.
The compliance profile to use for the scan.
Where to save the HTML report with test results and recommended remediations.
Where to save the XML report, which can be used later in automation and report generation.
The SCAP Security Guide policy file that the compliance profile belongs to.
Create a directory for storing downloaded resources:
#mkdir /tmp/scap-filesFind the link to the remote resource by querying the
ssg-sles_esp8-dssecurity policy:#oscap info /usr/share/xml/scap/ssg/content/ssg-sles_esp8-ds.xmlThe output of this command includes a
WARNINGthat contains the link.Using the link found in the previous command, download the remote resource and save it as a local file in the
/tmp/scap-filesdirectory. For example:#wget -O /tmp/scap-files/pub-projects-security-oval-suse.liberty.linux.8.xml \https://ftp.suse.com/pub/projects/security/oval/suse.liberty.linux.8.xmlRun the compliance scan with the
--local-filesoption:#oscap xccdf eval --local-files /tmp/scap-files \1--profile xccdf_org.ssgproject.content_profile_cis \2--report /tmp/report.html \3--results-arf /tmp/results-arf.xml \4/usr/share/xml/scap/ssg/content/ssg-sles_esp8-ds.xml5The directory where downloaded resources are stored.
The compliance profile to use for the scan.
Where to save the HTML report with test results and recommended remediations.
Where to save the XML report, which can be used later in automation and report generation.
The SCAP Security Guide policy file that the compliance profile belongs to.
The compliance scan collects information from the target system and evaluates it against rules set by the selected compliance profile. The scan will take some time to complete. The results are saved in the specified files and also appear on screen, as shown in this example snippet:
Title   Configure auditd Max Log File Size
Rule    xccdf_org.ssgproject.content_rule_auditd_data_retention_max_log_file
Result  pass

Title   Configure auditd max_log_file_action Upon Reaching Maximum Log Size
Rule    xccdf_org.ssgproject.content_rule_auditd_data_retention_max_log_file_action
Result  fail
After the scan is complete, you can review the report by opening
/tmp/report.html in a browser. See
Section 6, “Reviewing the OpenSCAP evaluation report” for examples of the report.
6 Reviewing the OpenSCAP evaluation report #
The HTML-formatted OpenSCAP report shows the results of the compliance scan in a human-readable format. These examples show the main features of the report.
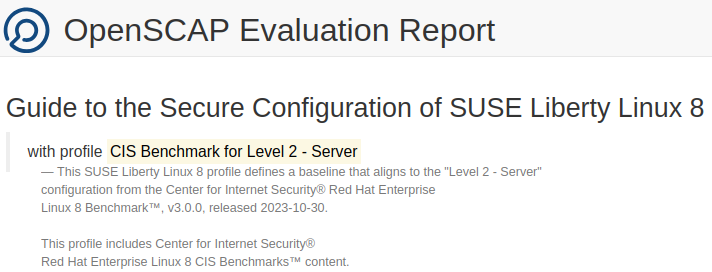
- Report header
The header of the report shows information about the chosen compliance profile.
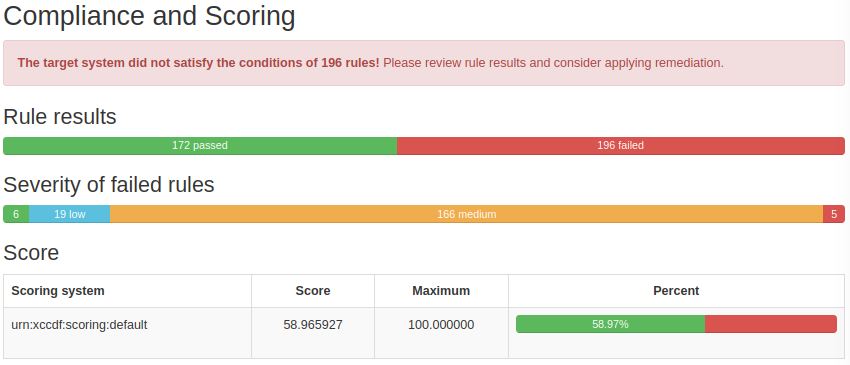
Figure 1: Header of a typical OpenSCAP report #- Compliance and Scoring
The Compliance and Scoring section shows a summary of the scan's results, including the number of passed and failed rules and the severity of the failures.
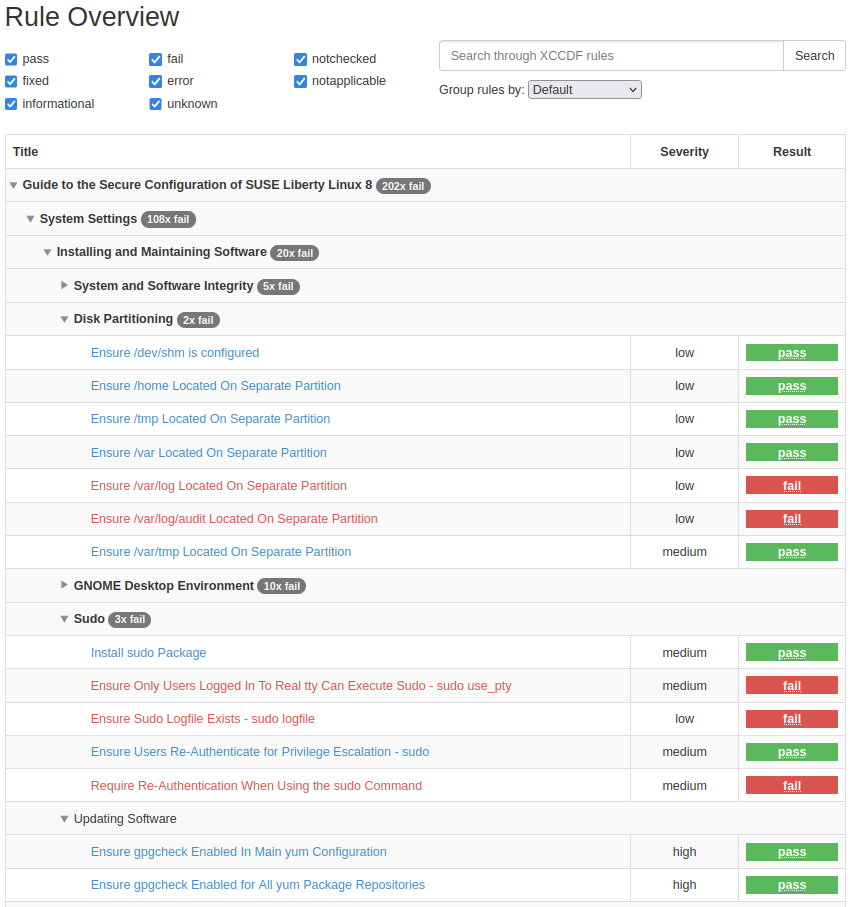
Figure 2: Summary of results in a typical OpenSCAP report #- Rule Overview
The Rule Overview section shows a list of rules included with the compliance profile, along with the severity and test result of each rule. This section is interactive. You can check and uncheck filter options, group rules by different criteria, search the list with a search bar, and click the rule names to see more details. You can also expand the details for every rule by clicking at the bottom of the report.
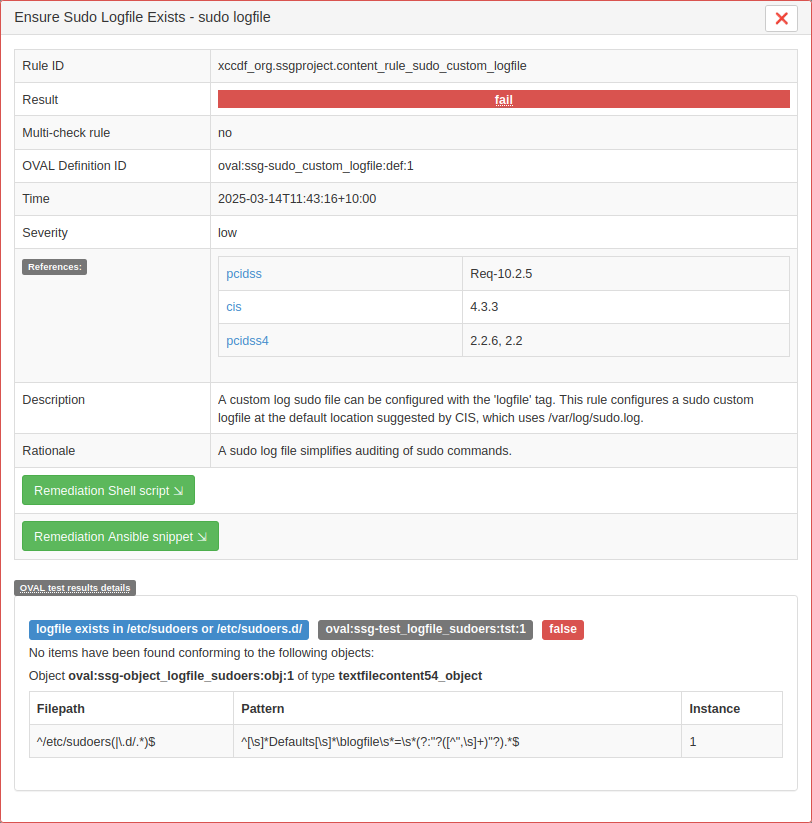
Figure 3: Partial list of rules in a typical OpenSCAP report #- Rule details and remediation
Clicking the name of a rule opens a window showing detailed information about that rule. Depending on the rule, the detail window might also include multiple remediation options. Click a remediation option to expand it.
Figure 4: Detailed information about a rule in a typical OpenSCAP report #


