Deploying SUSE Linux Micro on vSphere Using VMDK Images
- WHAT?
The article describes how to use the pre-built VMDK image to deploy SUSE Linux Micro within a vSphere environment.
- WHY?
You want to deploy SUSE Linux Micro using the provided VMDK image with vSphere.
- EFFORT
It takes 20 minutes to read the article.
- GOAL
You will have your own template for creating SUSE Linux Micro virtual machines that you can easily reuse.
- REQUIREMENTS
Access to the vSphere client.
1 Preparing the firstboot cloud-init configuration #
The system is intended to be configured on first boot to create a user, add SSH keys, install packages, and so on. To enable this, you must create a cloud-init configuration and pass it to the virtual machine.
Before you compose the cloud-init configuration, prepare hashed passwords for users of the system, as described in the following procedure:
Generate a salt to include in the password hash:
>openssl rand -hex 16ab5c3063ff477c689288bb3891910023Note the output of the command and use it in the following step.
Choose a strong password and generate a hash from it:
>openssl passwd -6 -salt ab5c3063ff477c689288bb3891910023 password$6$ab5c3063ff477c68$ywRiGL2w2MNmnnabhw1C5wjIioDC6lbcTs.tBoSK/d3bqggfD/nvkjB4Nw.uZrUvRQfuKLJi79SnQvxM1Xv260Use the prepared hash in the cloud-init configuration described below.
An example cloud-init configuration follows:
#cloud-config
package_update: true
# disable root user
disable_root: true
runcmd:
# Disable root login over ssh, both password and key based
  - transactional-update --continue run sed -i 's/#PermitRootLogin prohibit-password/PermitRootLogin no/' /usr/etc/ssh/sshd_config
# Temporarily register template machine with scc to enable zypper repos
  - transactional-update --continue register --url https://scc.suse.com -r SCCREGCODEXXX
# Install system packages
  - transactional-update --continue --non-interactive pkg install jq net-tools ca-certificates cloud-init cloud-init-config-suse openssh-server open-vm-tools nfs-client
# Disable Auto update transaction-update.timer
  - transactional-update --continue run systemctl --now disable transactional-update.timer
# Set cgroupv1 hiearachy enabled
  - sed -i 's/GRUB_CMDLINE_LINUX=""/GRUB_CMDLINE_LINUX="systemd.unified_cgroup_hierarchy=0"/' /etc/default/grub
# Disable selinux
  - sed -i 's/selinux=1/selinux=0/' /etc/default/grub
# Enable ia32_emulation
  - sed -i 's/GRUB_CMDLINE_LINUX_DEFAULT="/GRUB_CMDLINE_LINUX_DEFAULT="ia32_emulation=on /' /etc/default/grub
  - sed -i 's/GRUB_TIMEOUT=.*/GRUB_TIMEOUT=0/' /etc/default/grub
# Potential Work Around for fsck issue
  - transactional-update --continue run dracut --regenerate-all -f -N
# Deregister template machine from scc
  - transactional-update --continue register -d --url https://scc.suse.com -r SCCREGCODE 1
# Rebuild bootloader
  - transactional-update --continue run update-bootloader
# Reset cloud-init for next build
  - transactional-update --continue run cloud-init clean --logs

users:
# Add non-root user
  - name: tux 2
    hashed_passwd: $6$ab5c3063ff477c68$ywRiGL2w2MNmnnabhw1C5wjIioDC6lbcTs.tBoSK/d3bqggfD/nvkjB4Nw.uZrUvRQfuKLJi79SnQvxM1Xv260 3
    lock_passwd: false
    shell: /bin/bash
# Add sudo entry for non-root user
    sudo: ALL=(ALL) NOPASSWD:ALL
# Add authorized keys
    ssh_authorized_keys: 4
      - ssh-rsa
        AAAAB3NzaC1yc2EAAAABJQAAAQEAkW7bd2iQBx8/A5pAbN207oWgcrV0lXgUHT2RZI/r/xbb9/ydLKCUBqmYhSKgBF80KJoWvE3cPeUDfThqo+qLlivc9vrTYZDMB+7wP/XGtA99jqFQsXDyC2gb8H/yKIRKu9eSrY9BHW9el80bpdxPID0YbxWYGJoxib5DO4mg3WtGIv9MeW4bvgoMj1ZhKMFrq2tYGv3P1MpuNgklwsGmUW+rIOVjhCEUz3KSr2+4EfcusOV6FD32SHkIgdeNy3C5MT1Oe6hk0bsUx/fZ9KS9YHX6b3LuIjkw1FuZBCByMgMWa4jO9QK/y76YMOFHOQtxhOszSuEkHtl6ijeejZYPtQ==
      - ssh-rsa
        AAAAB3NzaC1yc2EAAAADAQABAAABgQDZxAsYNJS266jPpWEsJwyibfZJN6FPNMHMxW9PlruOXJLrvdXc1wgo23d4c1BbaGiRoXW3xwd5zJwtr4dVB+QGtW1rCOYtHLGtvfIh6L5Y0SVrGOtDSVIpuwYtMnt4YBfZfBeDyJfnuvZ5E8CMNI1CekzfT7FgZnF1TQigOKgO8MUUS3HTNd3oly8D7w3QZLcjHufhFGojnZjEXfuT8tXqOaiCmlAzkdAmGczwTfXjZ3Q3KCEH20KTK31AxUP+80p75i2FE3QEMfHijXiuUbdEPTN8L2XSRe8nX7c3NZO5hWV+t9wLyfZgc5qHC5CS9fN1vGfLTpjQoaRoxKCS9dFJKVDg4huHcOz1go0YAQy6Ef+c7gkQv1ZV7VATTU9kVQWOy7+gztXnwoFXSg2qmn3JiJPVMDift2yozzpF+O4GpC9dgplBcugZT5Bg3TNPcfEBLGcNgIAC/bYma1z6+TDee0RDkWLg8JsCw554QCDI/B7Is1DZ/J4gTkmO1MNw3mM=

# set desired power_state after cloud-init finishes
power_state:
  mode: poweroff
  message: Powering Off for Templating
  timeout: 10
  condition: True
Specify the desired user name. | |
Replace the SCCREGCODE with your registration code. | |
Paste the password hash you created in Procedure 1, “Creating a password hash”. | |
Paste your own SSH keys there. |
After you finish editing the cloud-init config, convert it to the Base64 encoding:
>base64 -w 0 CONFIG_FILE OUTPUT_FILE
2 Preparing the SUSE Linux Micro image #
The topic covers downloading the image and uploading it to the vSphere datastore.
2.1 Downloading the image #
To download the VMDK image of SUSE Linux Micro, proceed as follows:
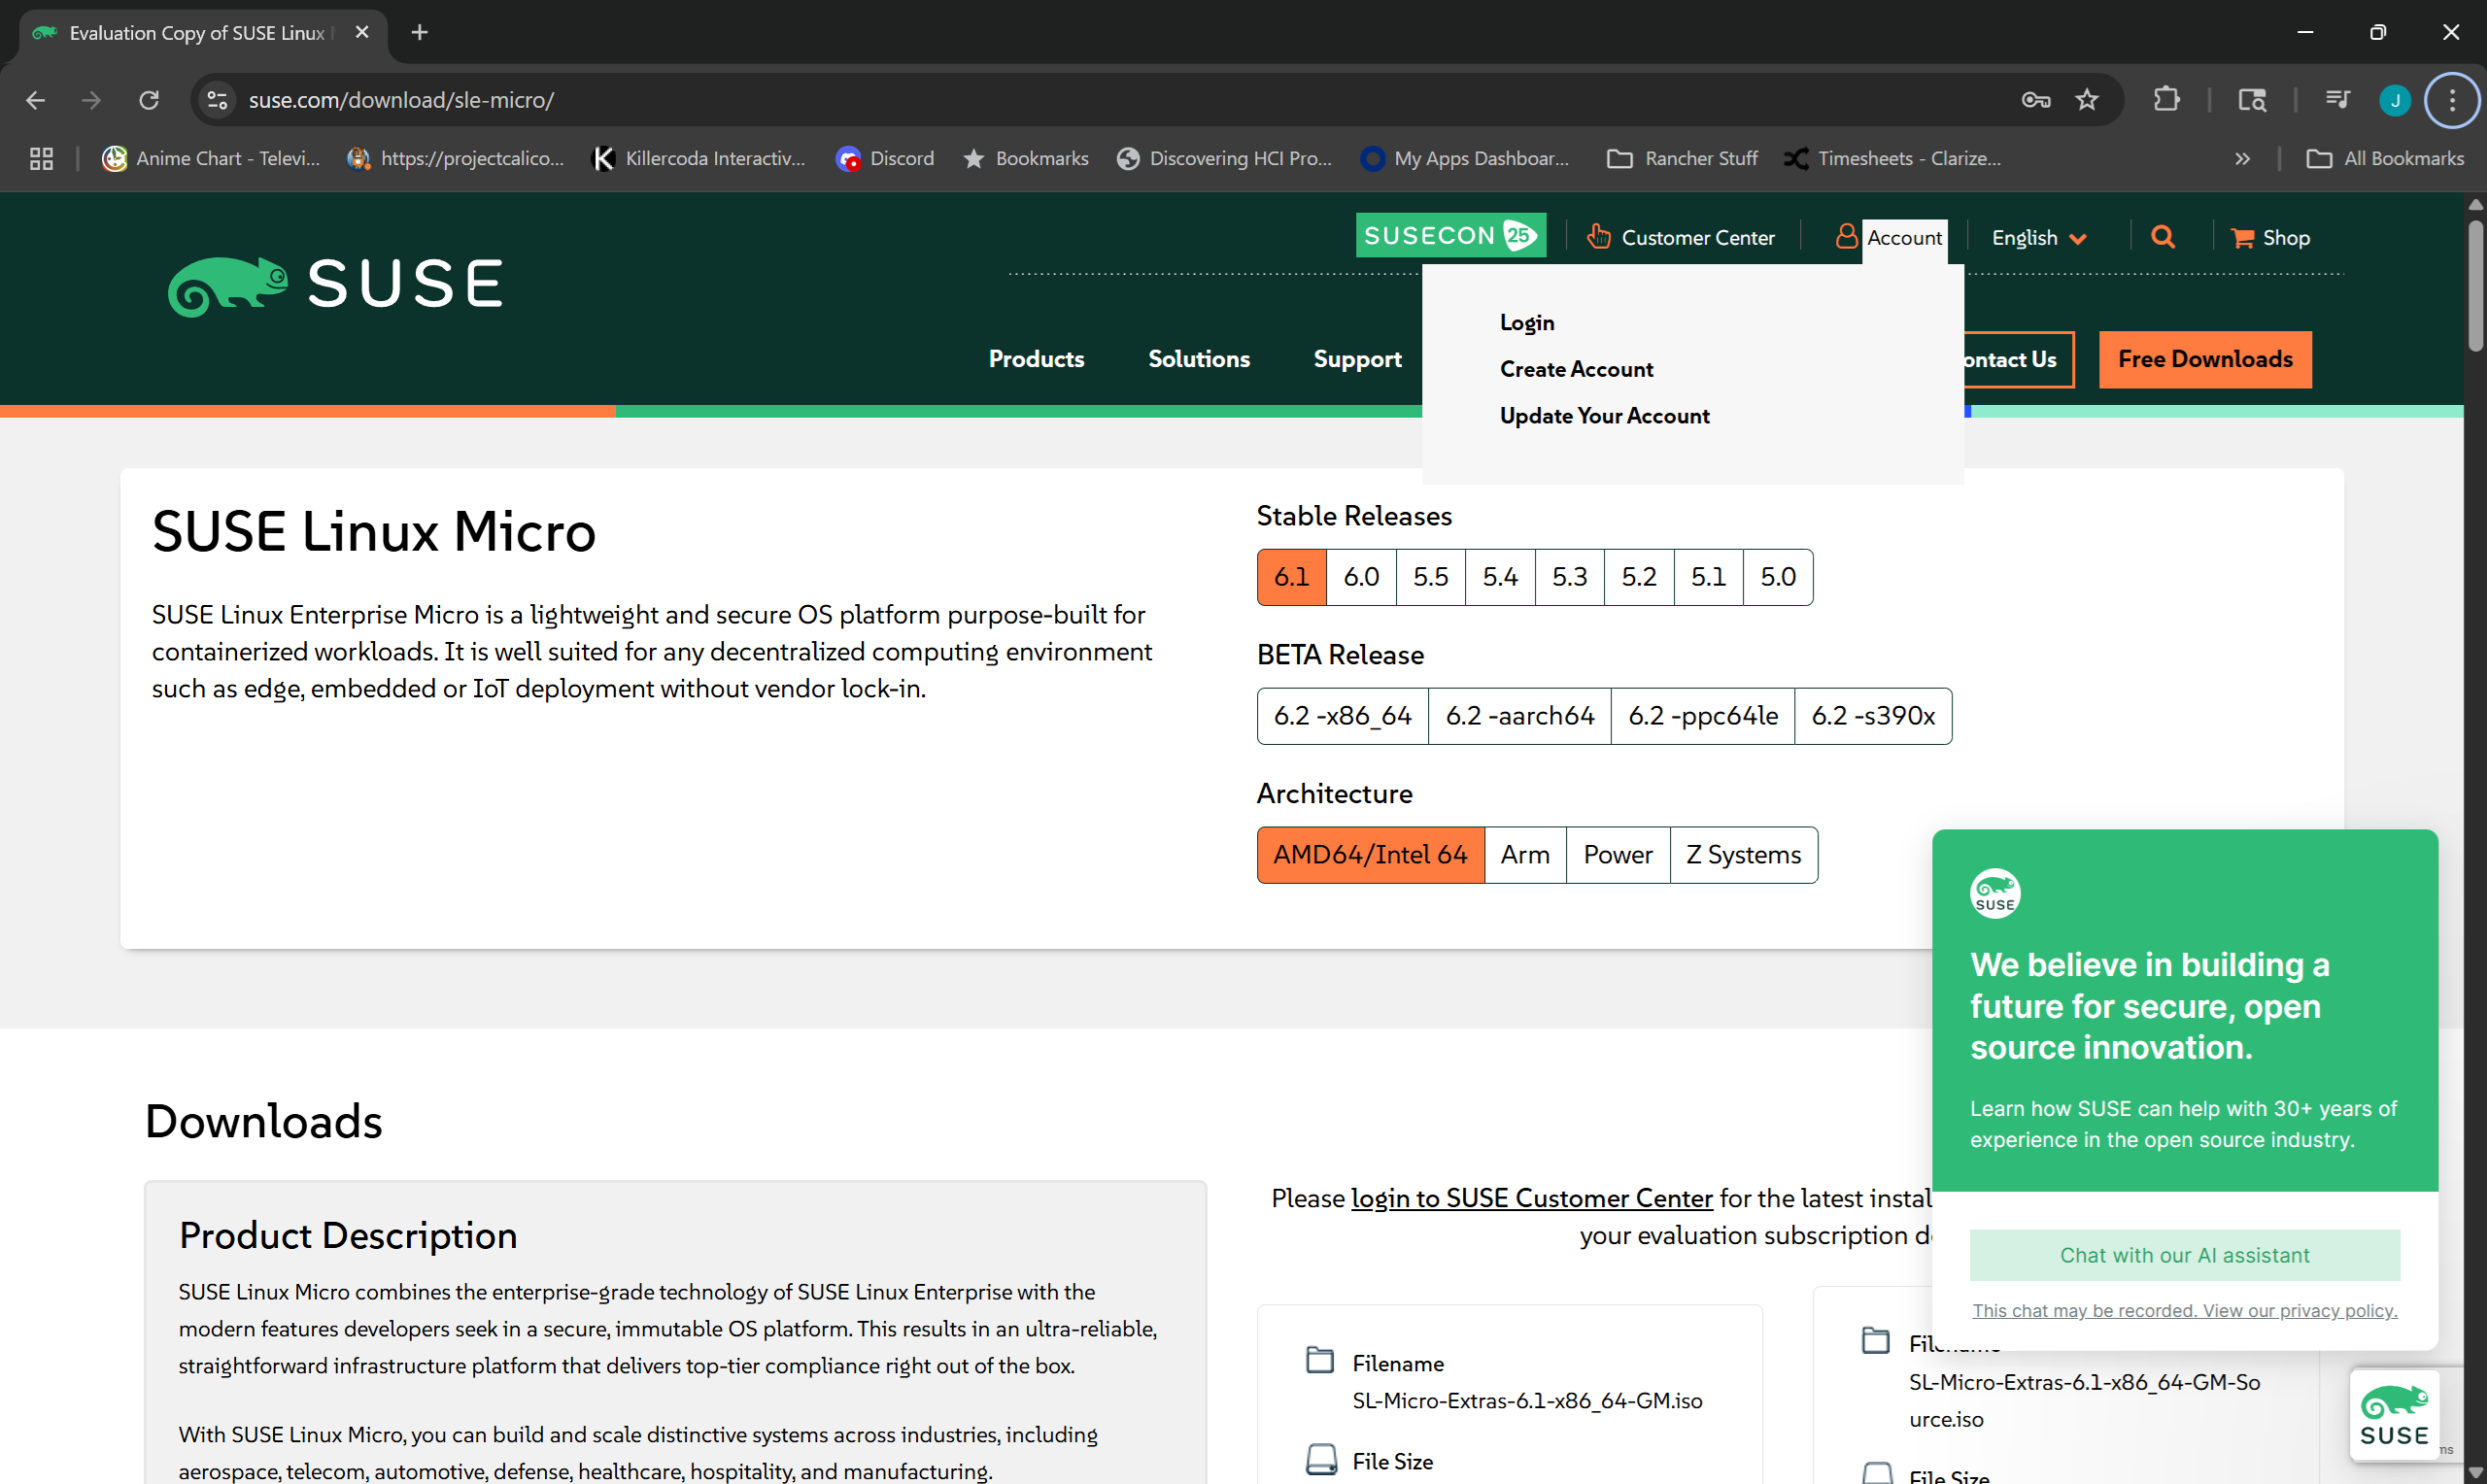
In your Web browser, navigate to the SUSE Linux Micro download page.
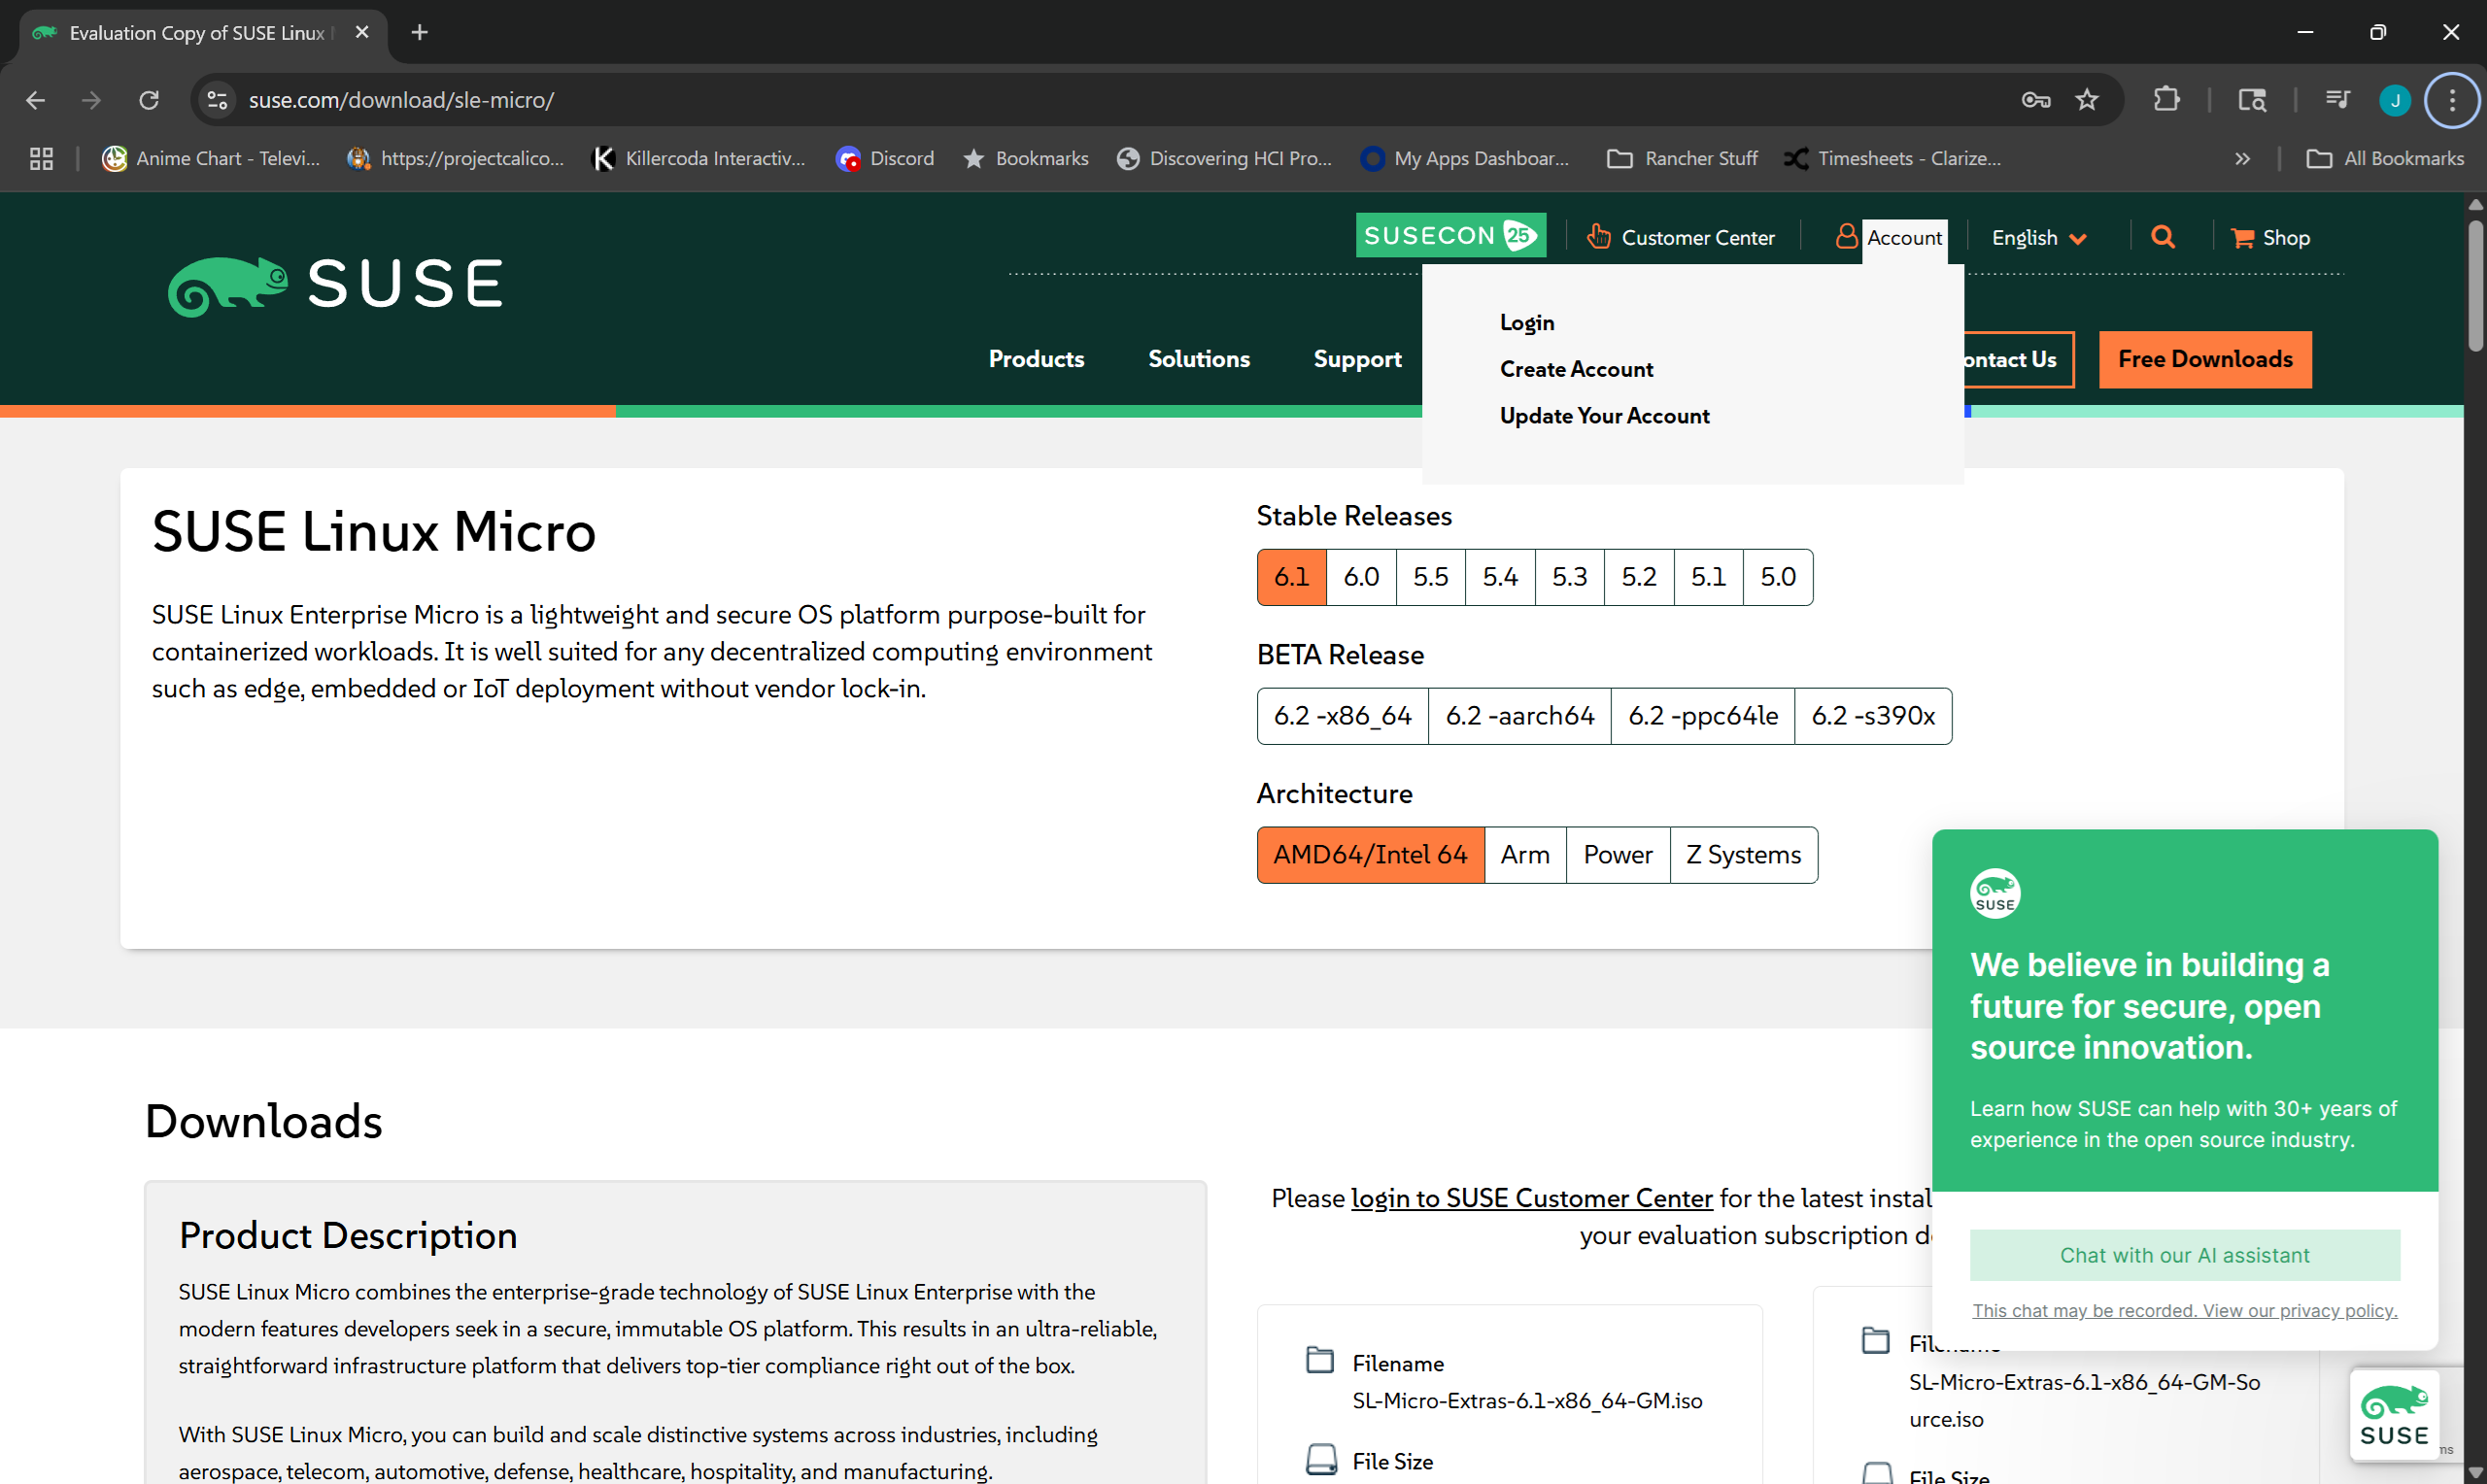
Login to the SUSE Customer Center by clicking from .
Fill in your credentials and, if prompted for two-factor authentication, follow the instructions.
Find the VMDK image and click .
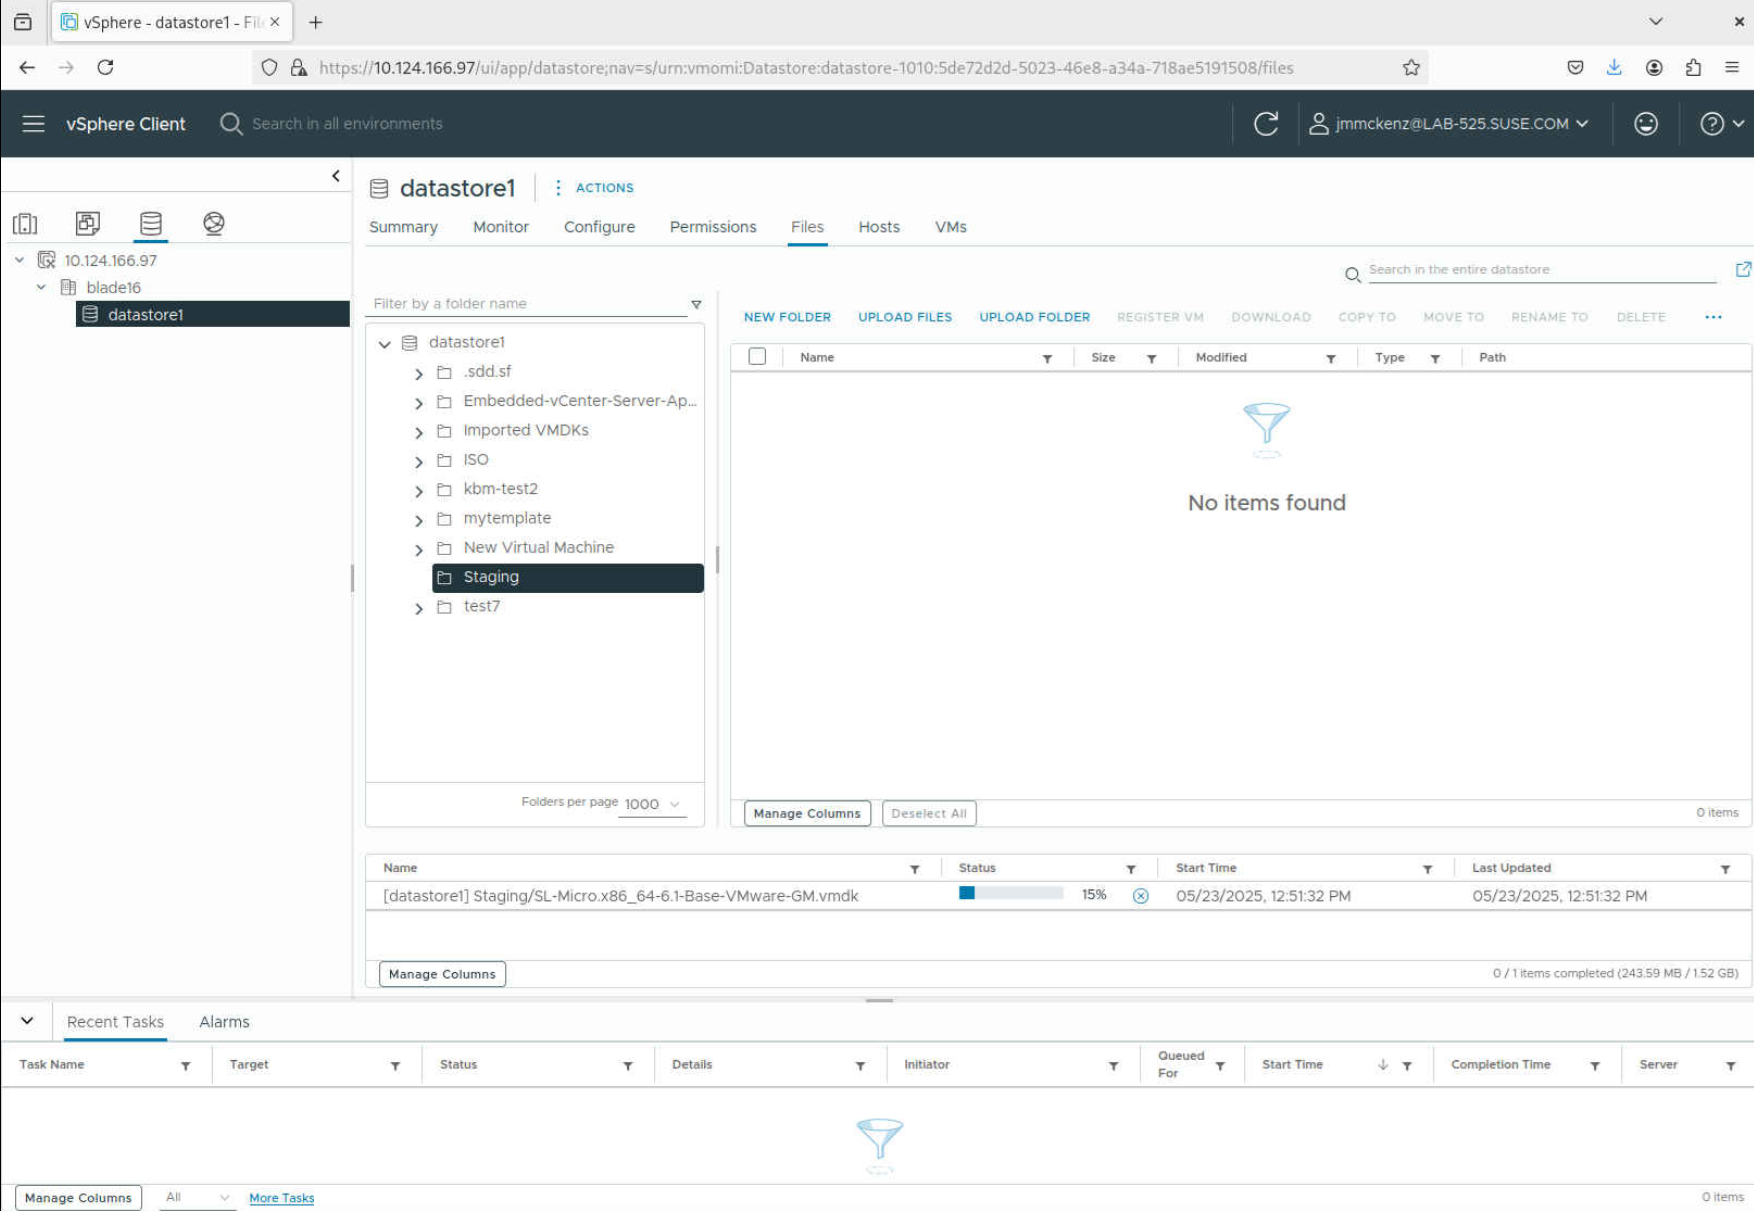
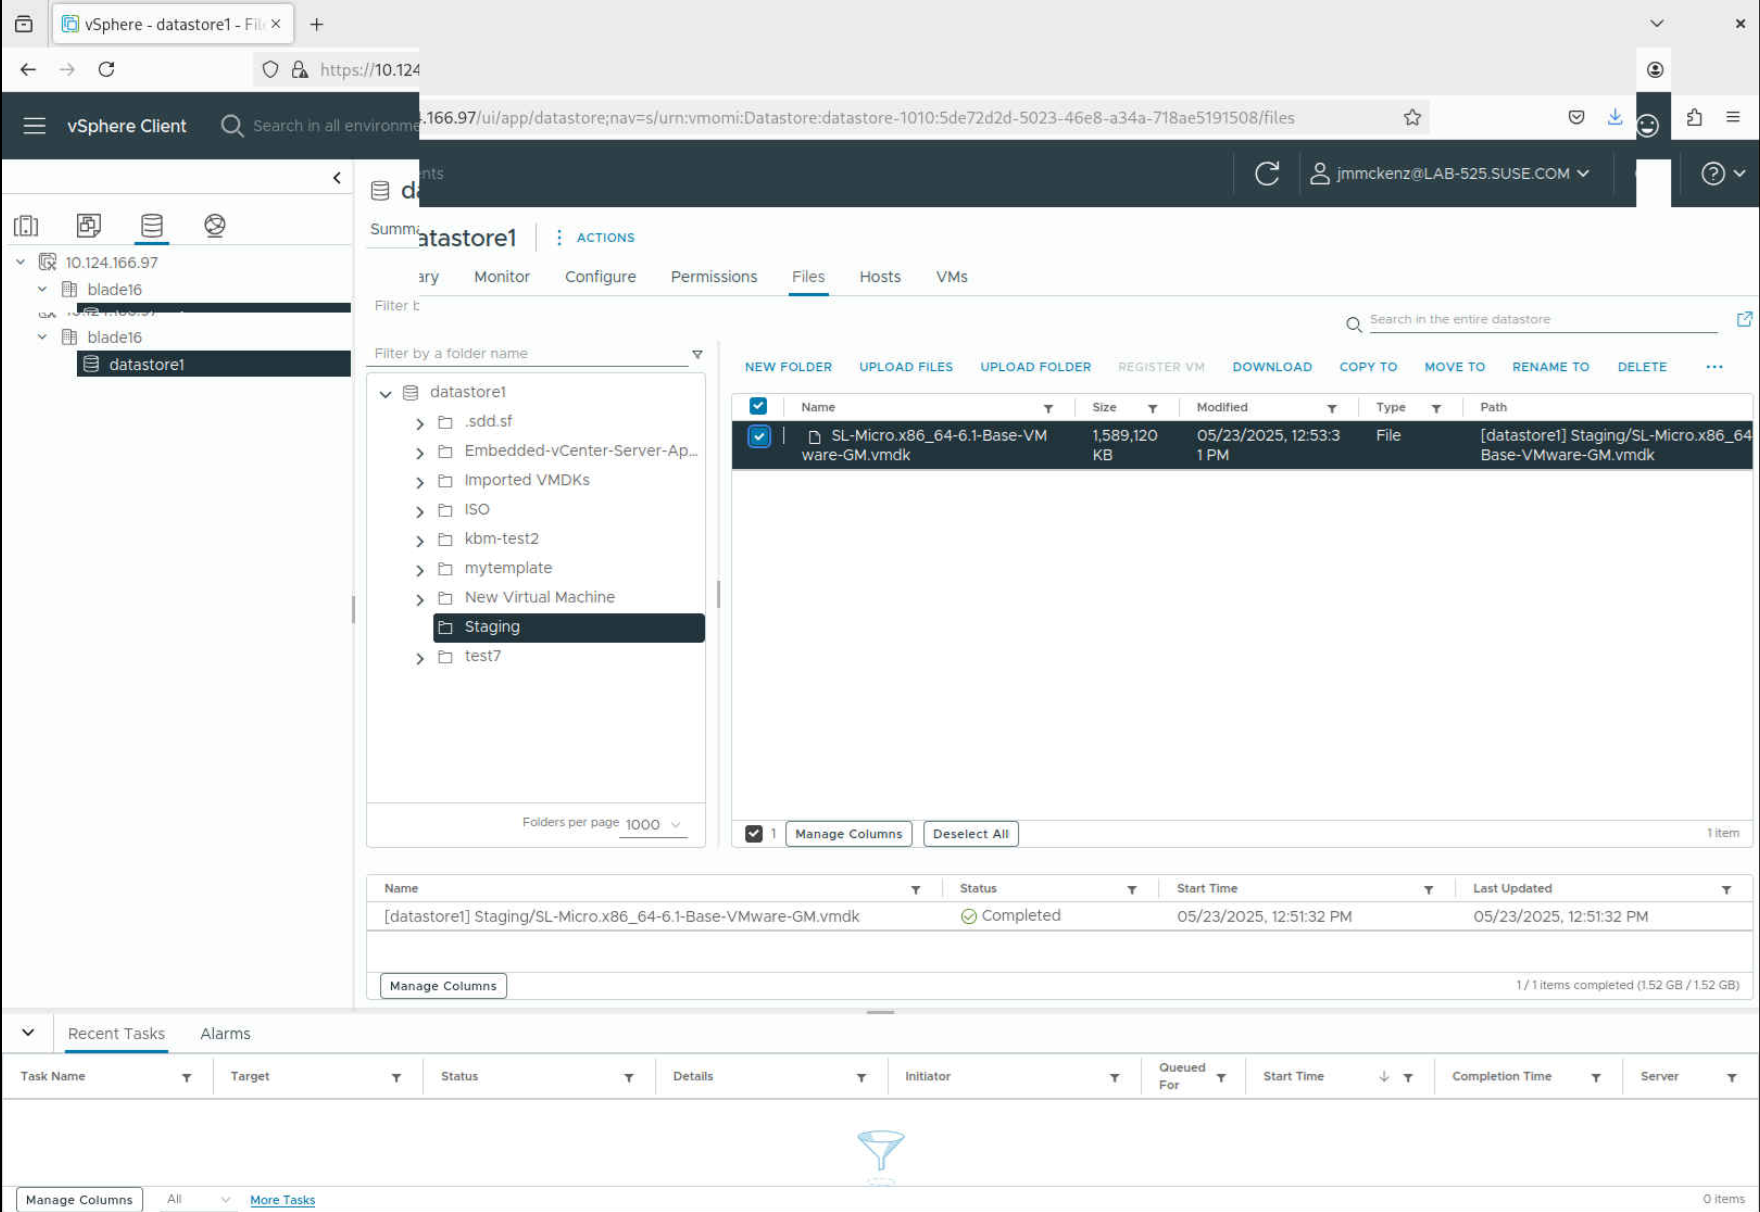
2.2 Uploading the image to the datastore staging area #
To upload the downloaded VMDK image to the vSphere datastore, proceed as described below:
3 Creating a template from the delivered VMDK image #
Creating a virtual machine template with a preconfigured SUSE Linux Micro accelerates future deployment and keeps the delivered image untouched.
To create the template, you first need to import the SUSE Linux Micro VMDK image, then create a machine from the imported image and then convert the machine into a template. All steps are described in the following sections.
3.1 Importing the VMDK image #
3.2 Creating a virtual machine #
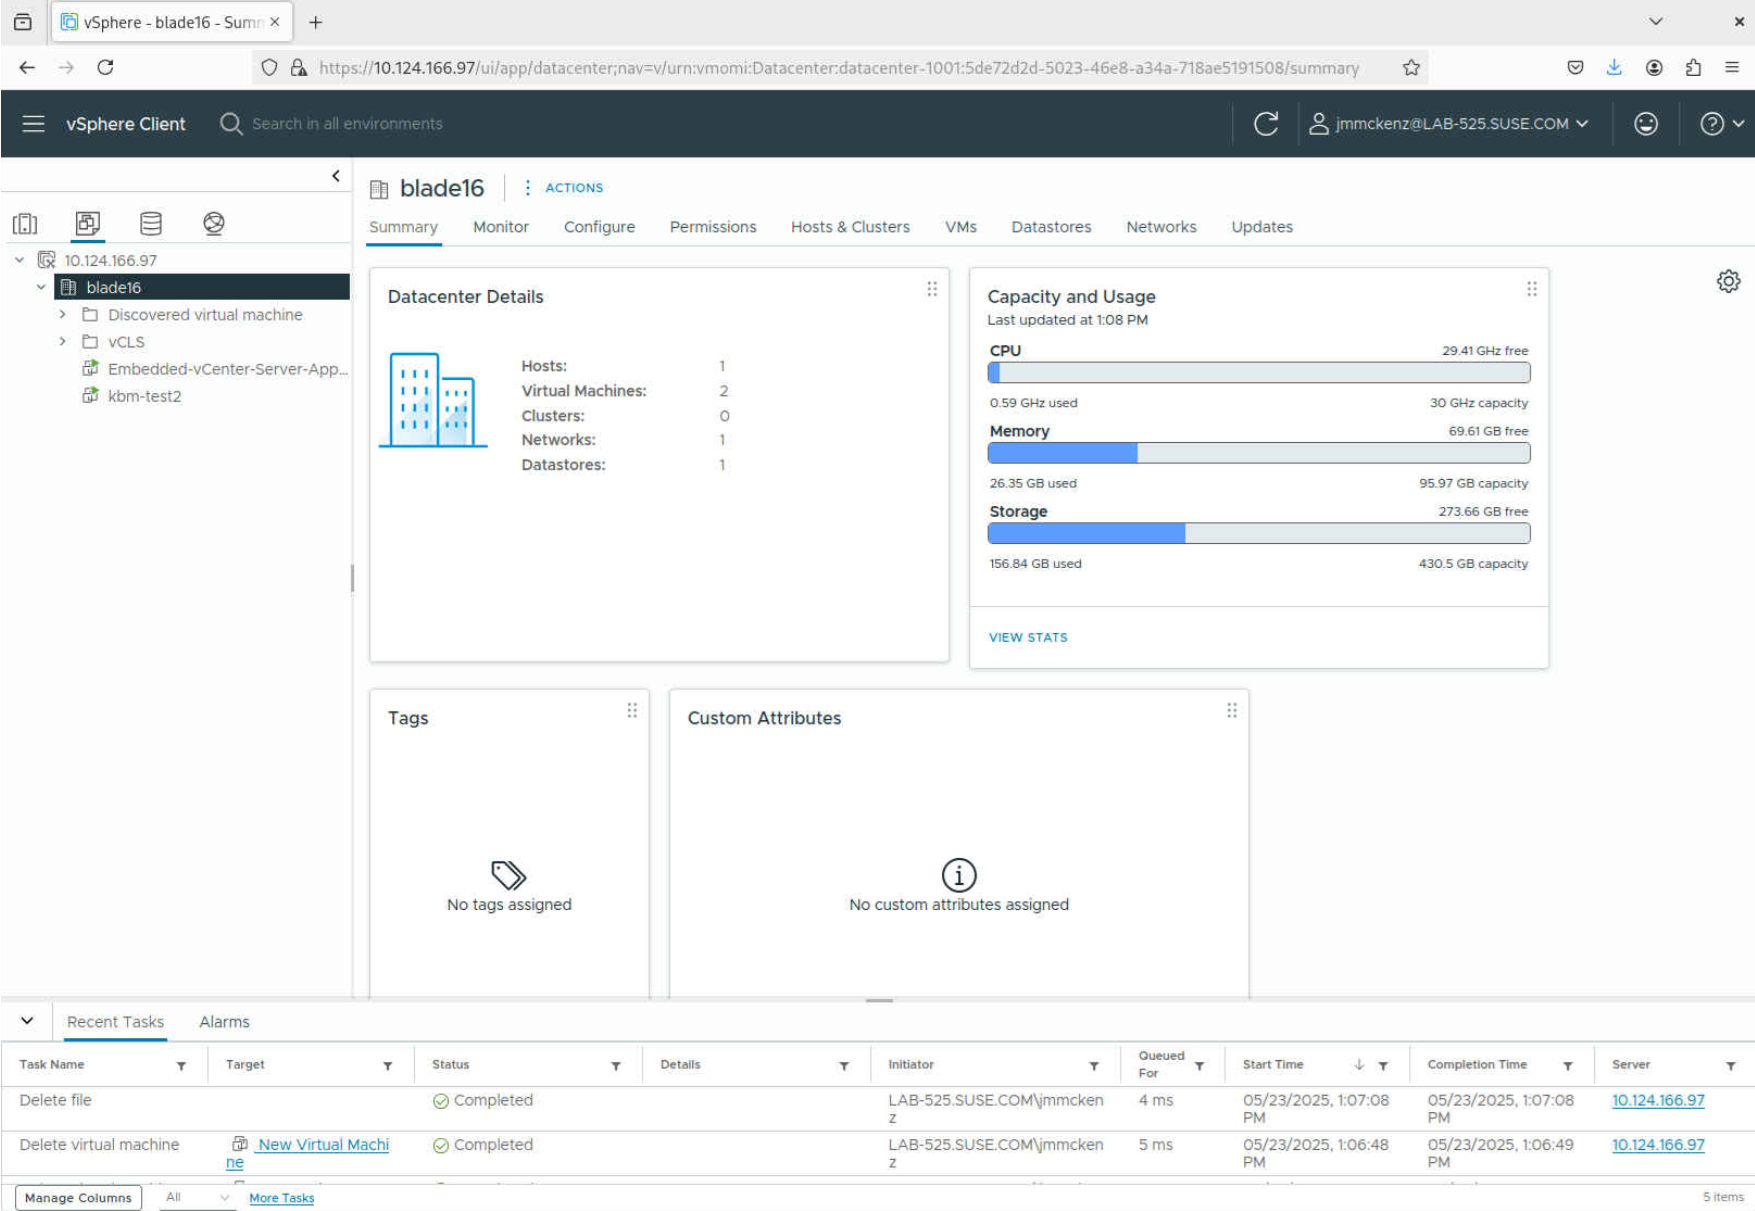
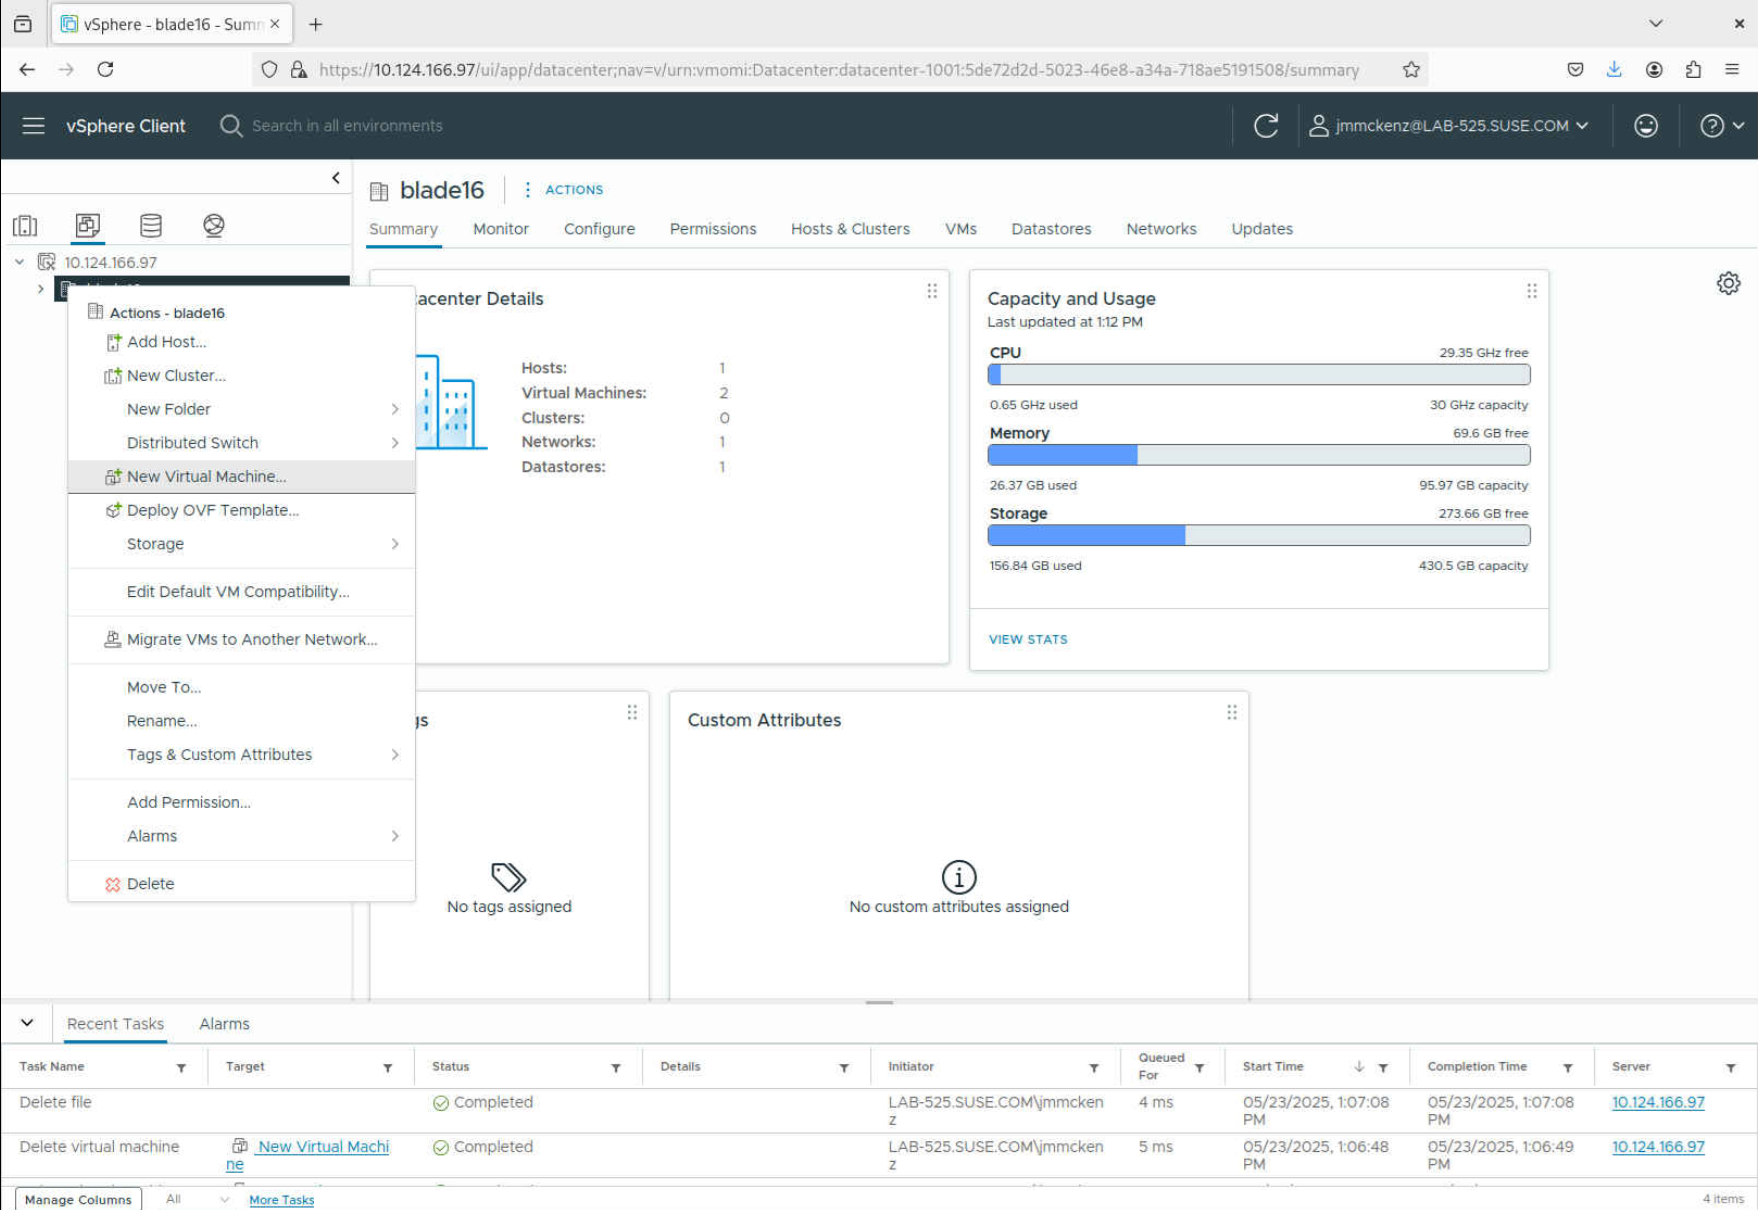
Now you need to create a virtual machine from the image. To do so, proceed as follows:
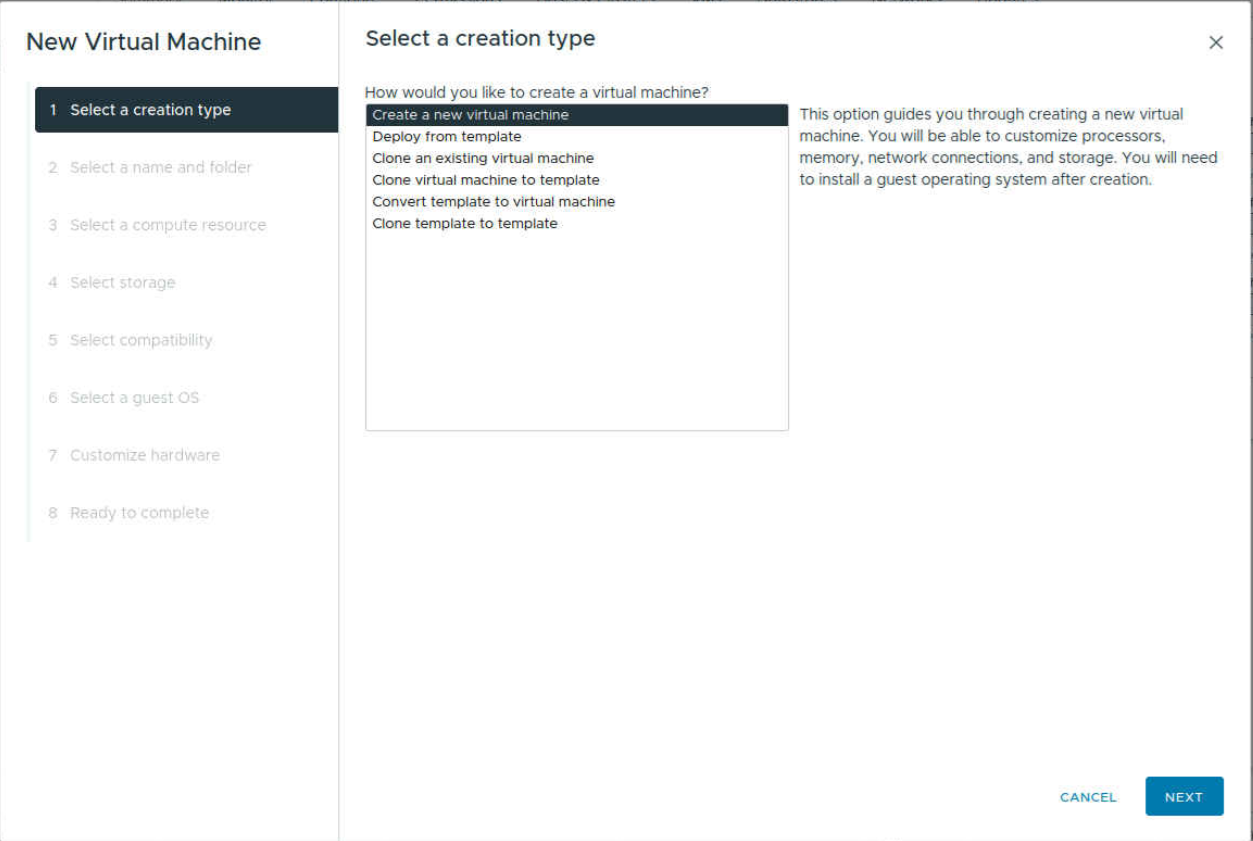
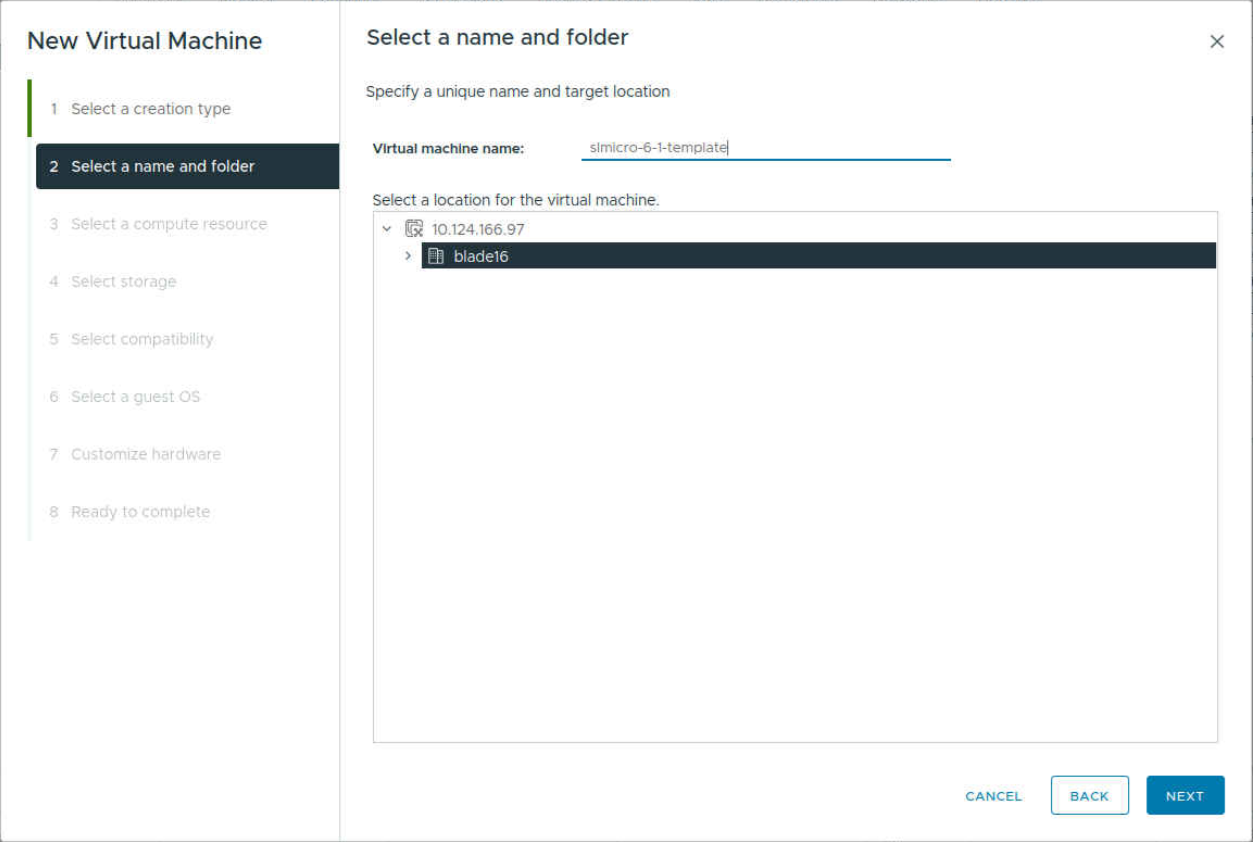
The following procedure describes how to provide virtual machine details.
Under , choose and proceed with .
Under , fill in the and select a location for the machine. Proceed with .
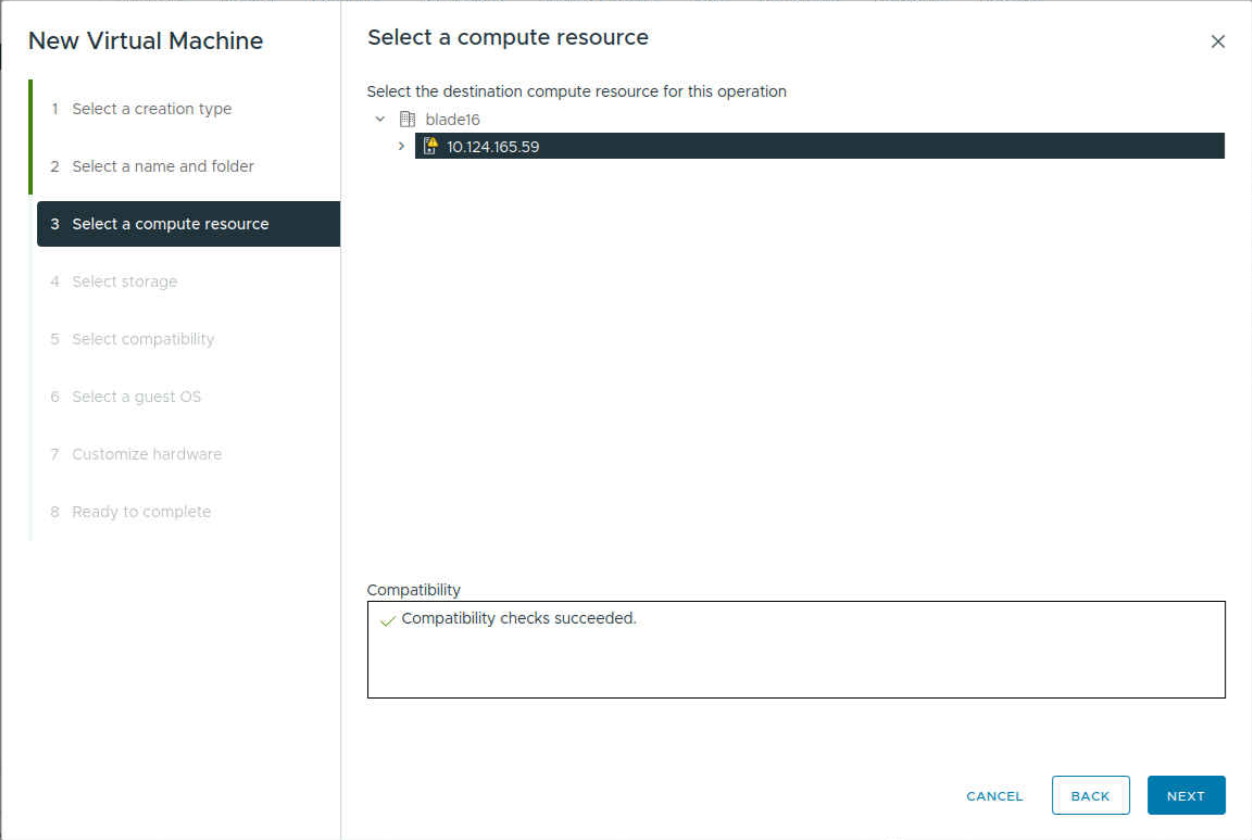
Under , click the destination machine IP address on the list. Proceed with .
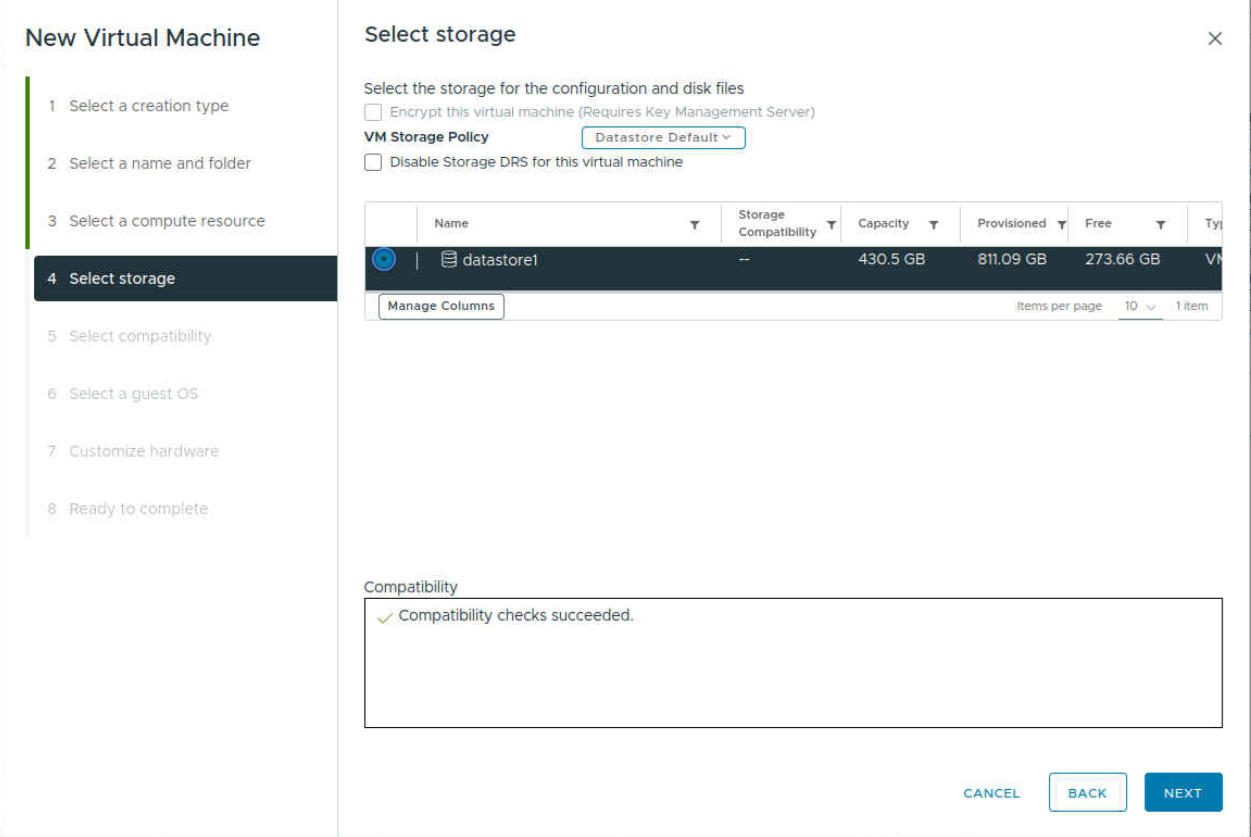
Under , click the target datastore on the right and click .
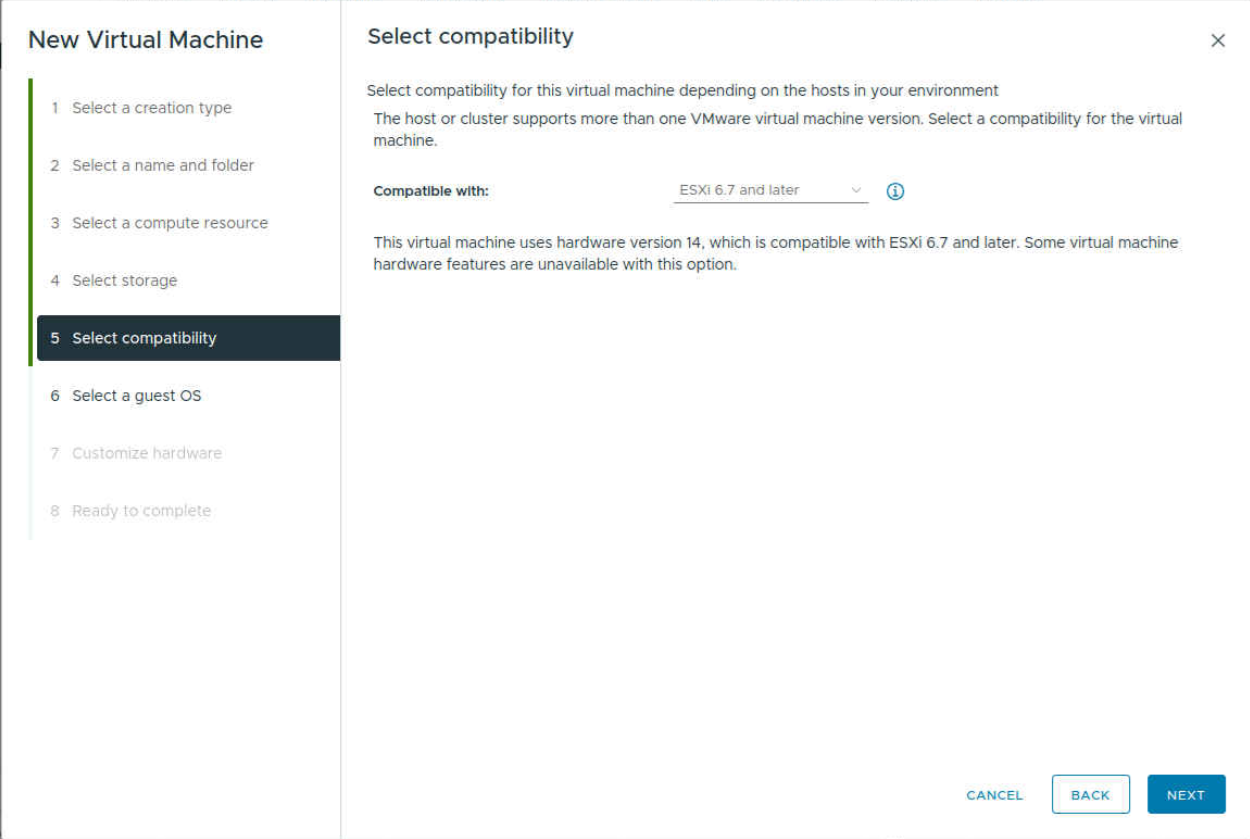
Under , select and proceed with .
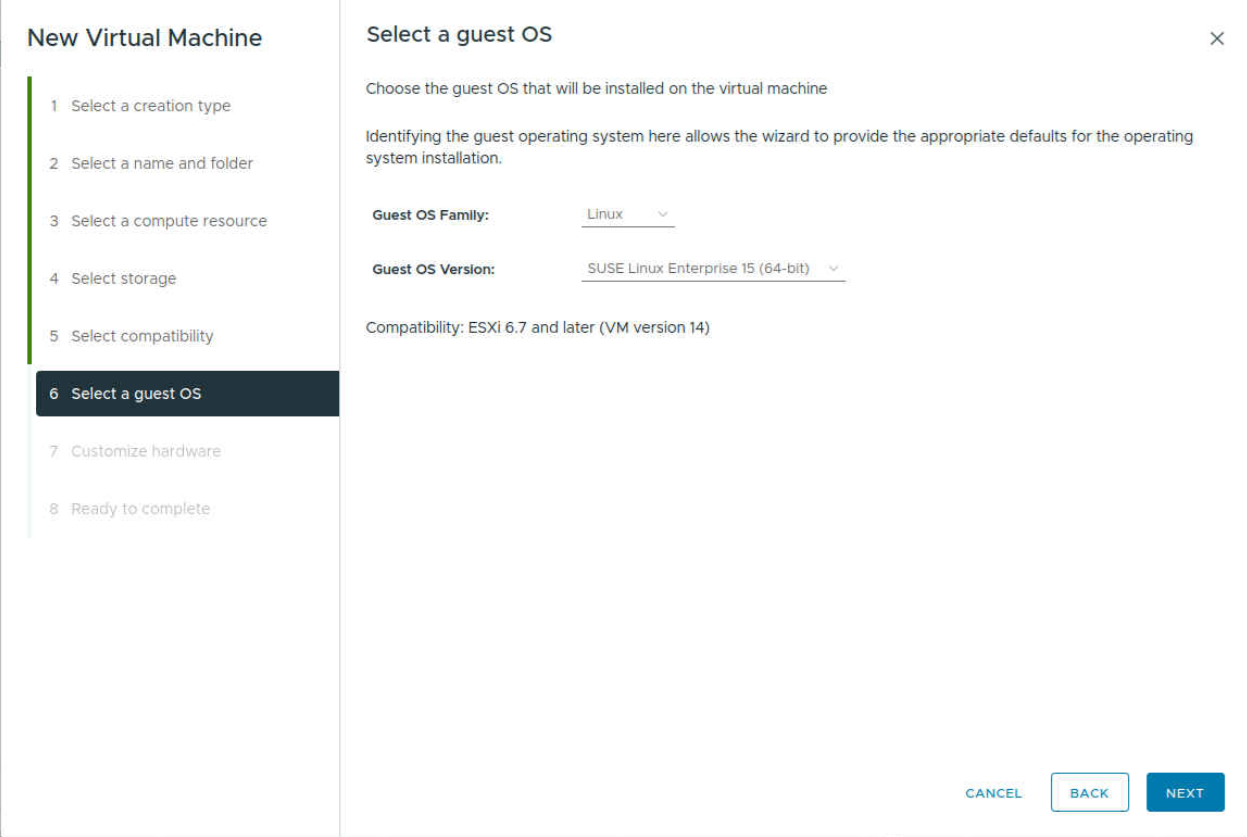
Under , choose as the and as the , select . Proceed with .
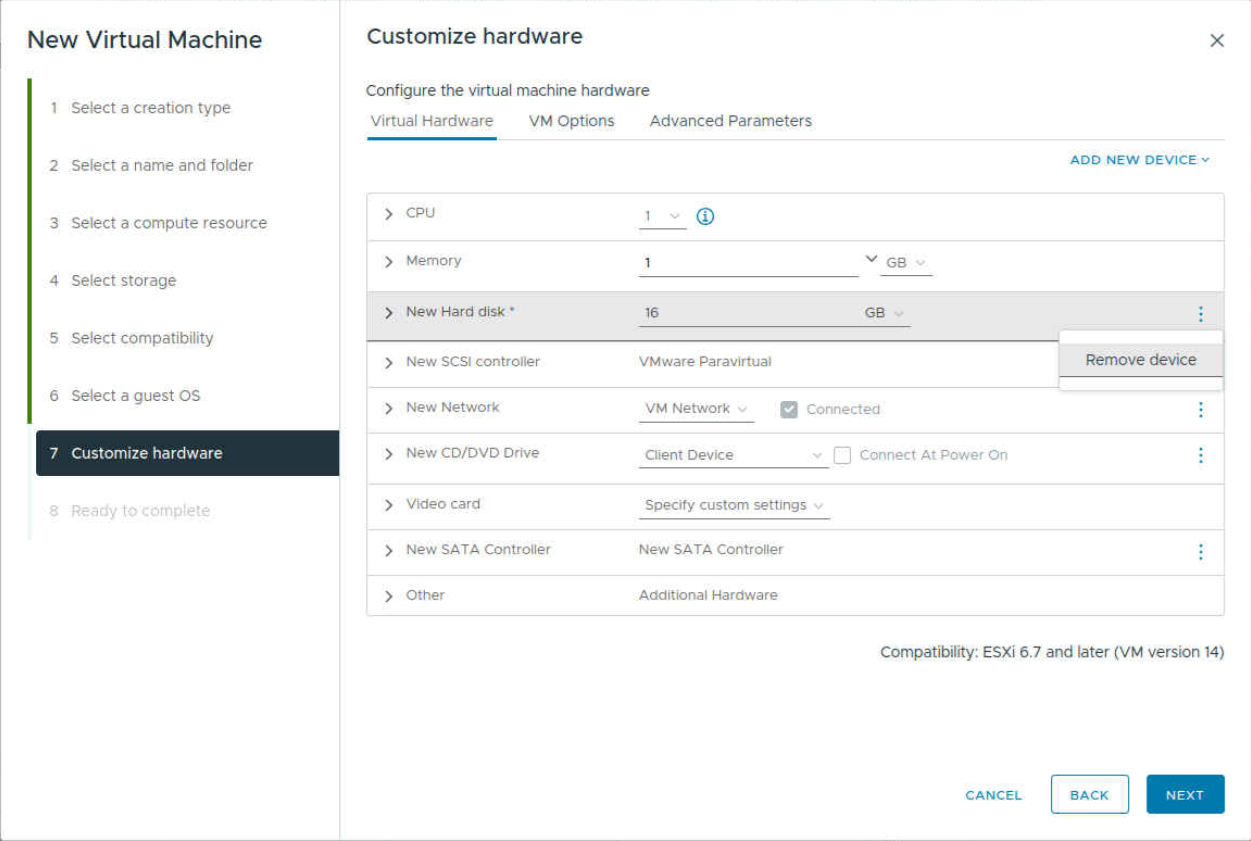
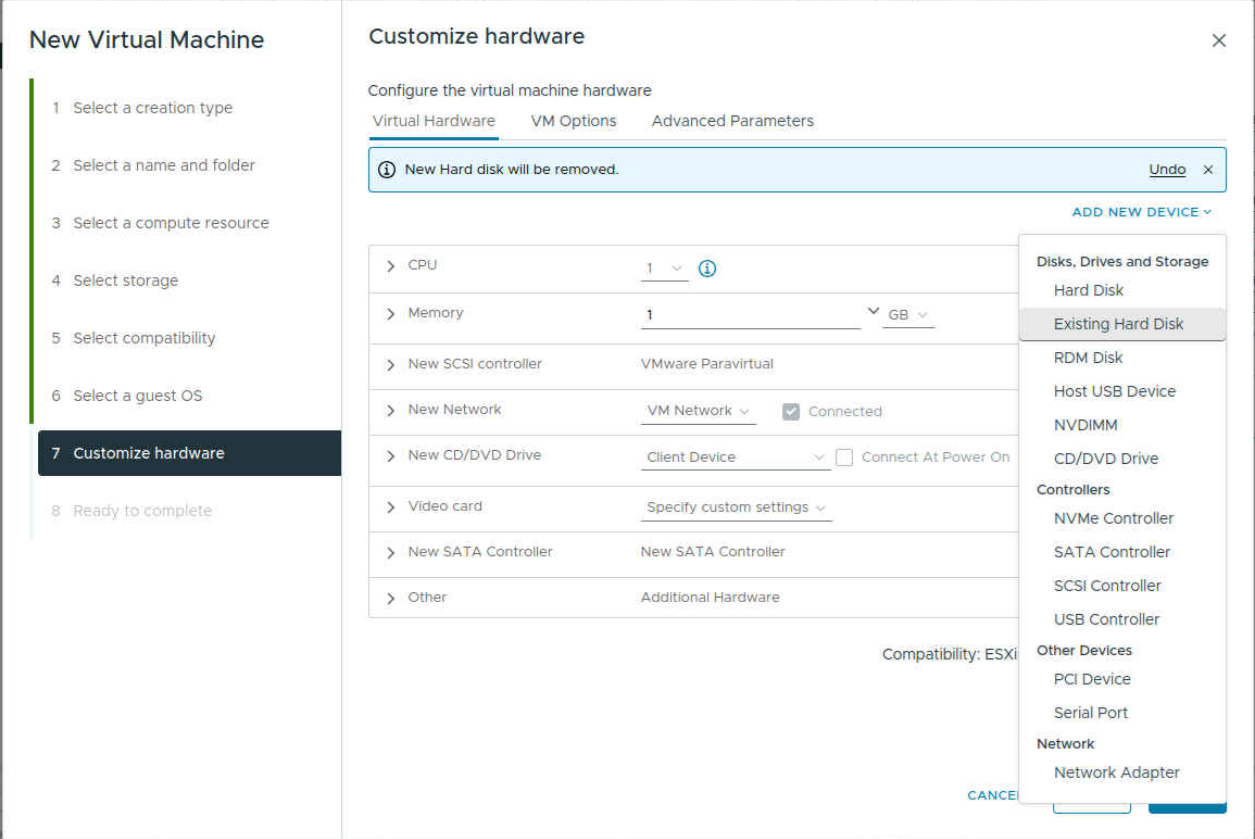
Under , perform the following steps:
Remove the preconfigured hard disk.
Click and .
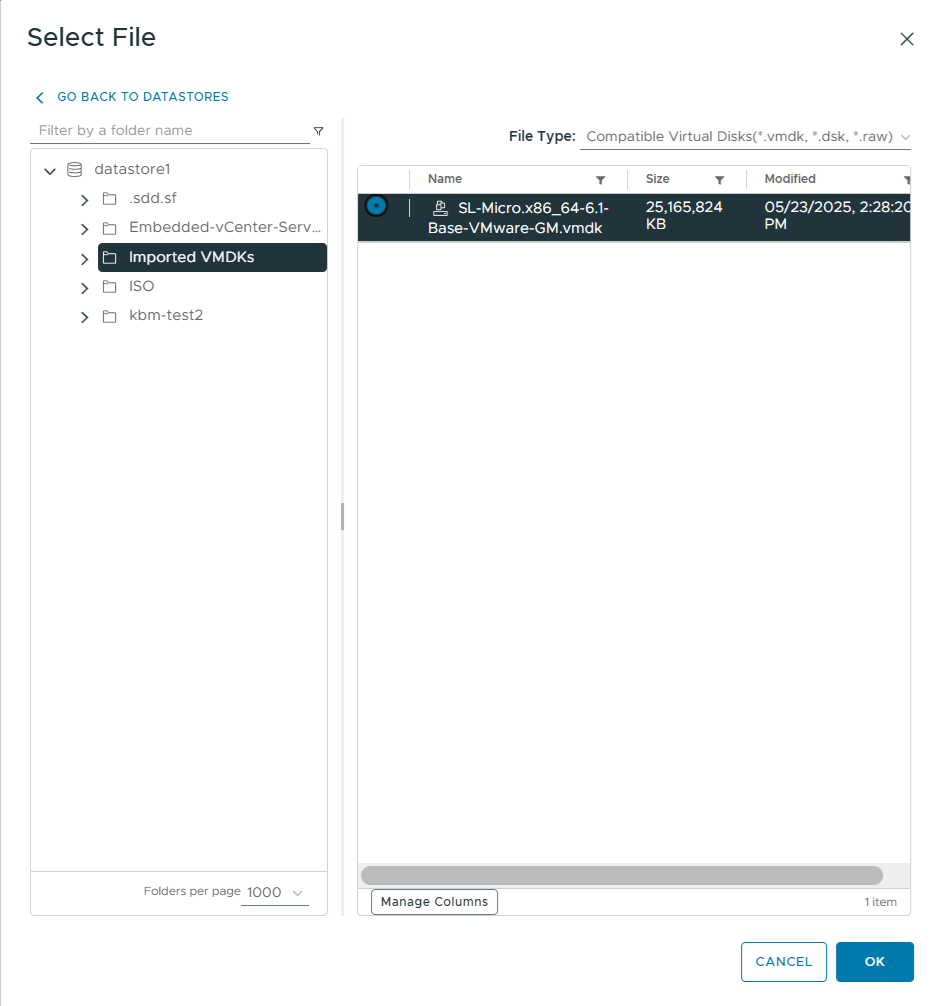
Select a datastore and click .
In the window, under , select the SUSE Linux Micro image and proceed with .
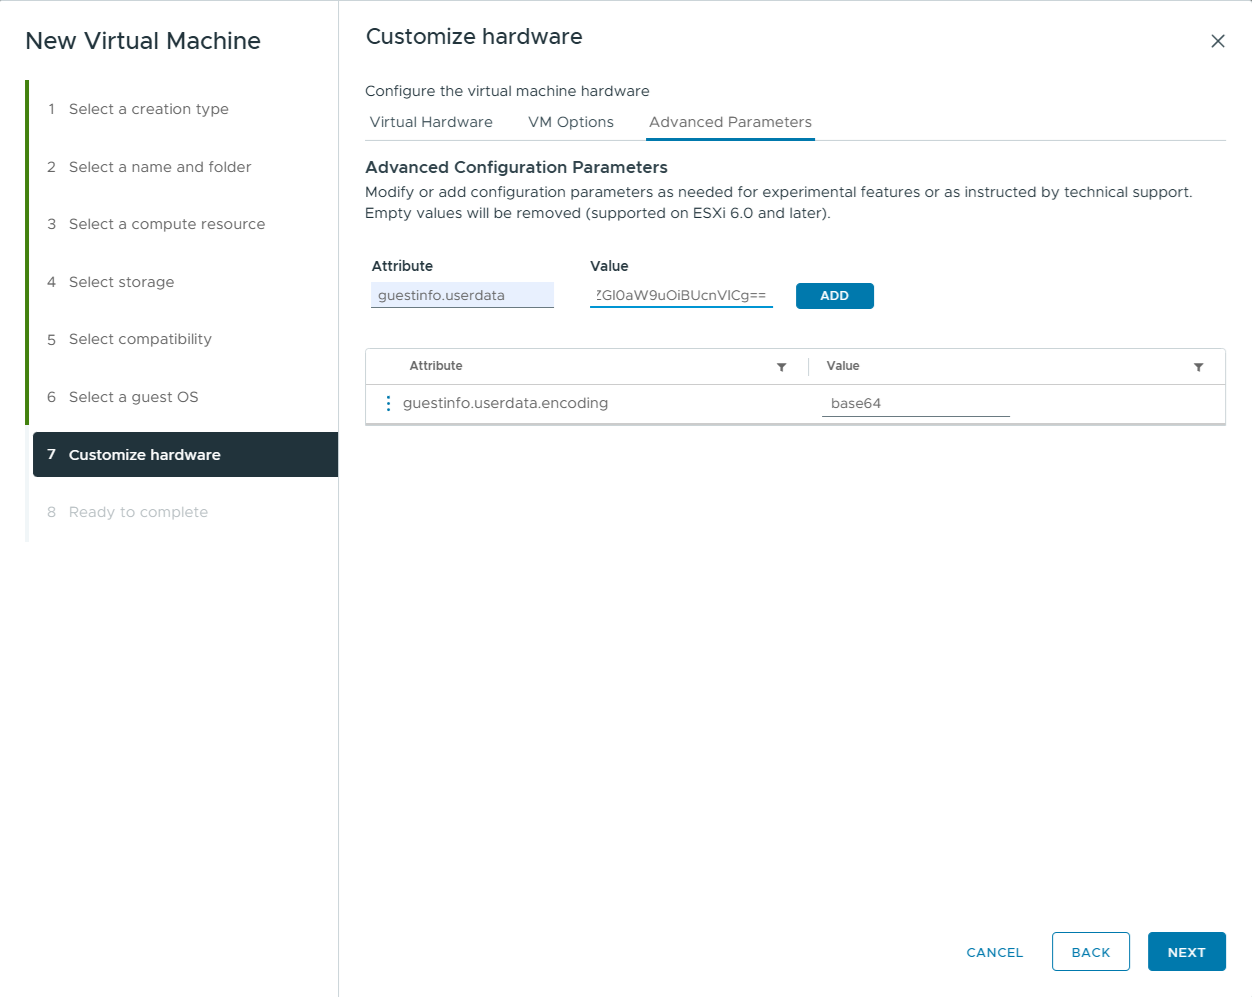
Click . Set the to
guestinfo.userdata.encodingand set its value tobase64. Click .Add another ,
guestinfo.userdata, and set its value field to the encoded user data.Proceed with .
In , review the configuration and if everything is correct, click .
The template should appear in the view.
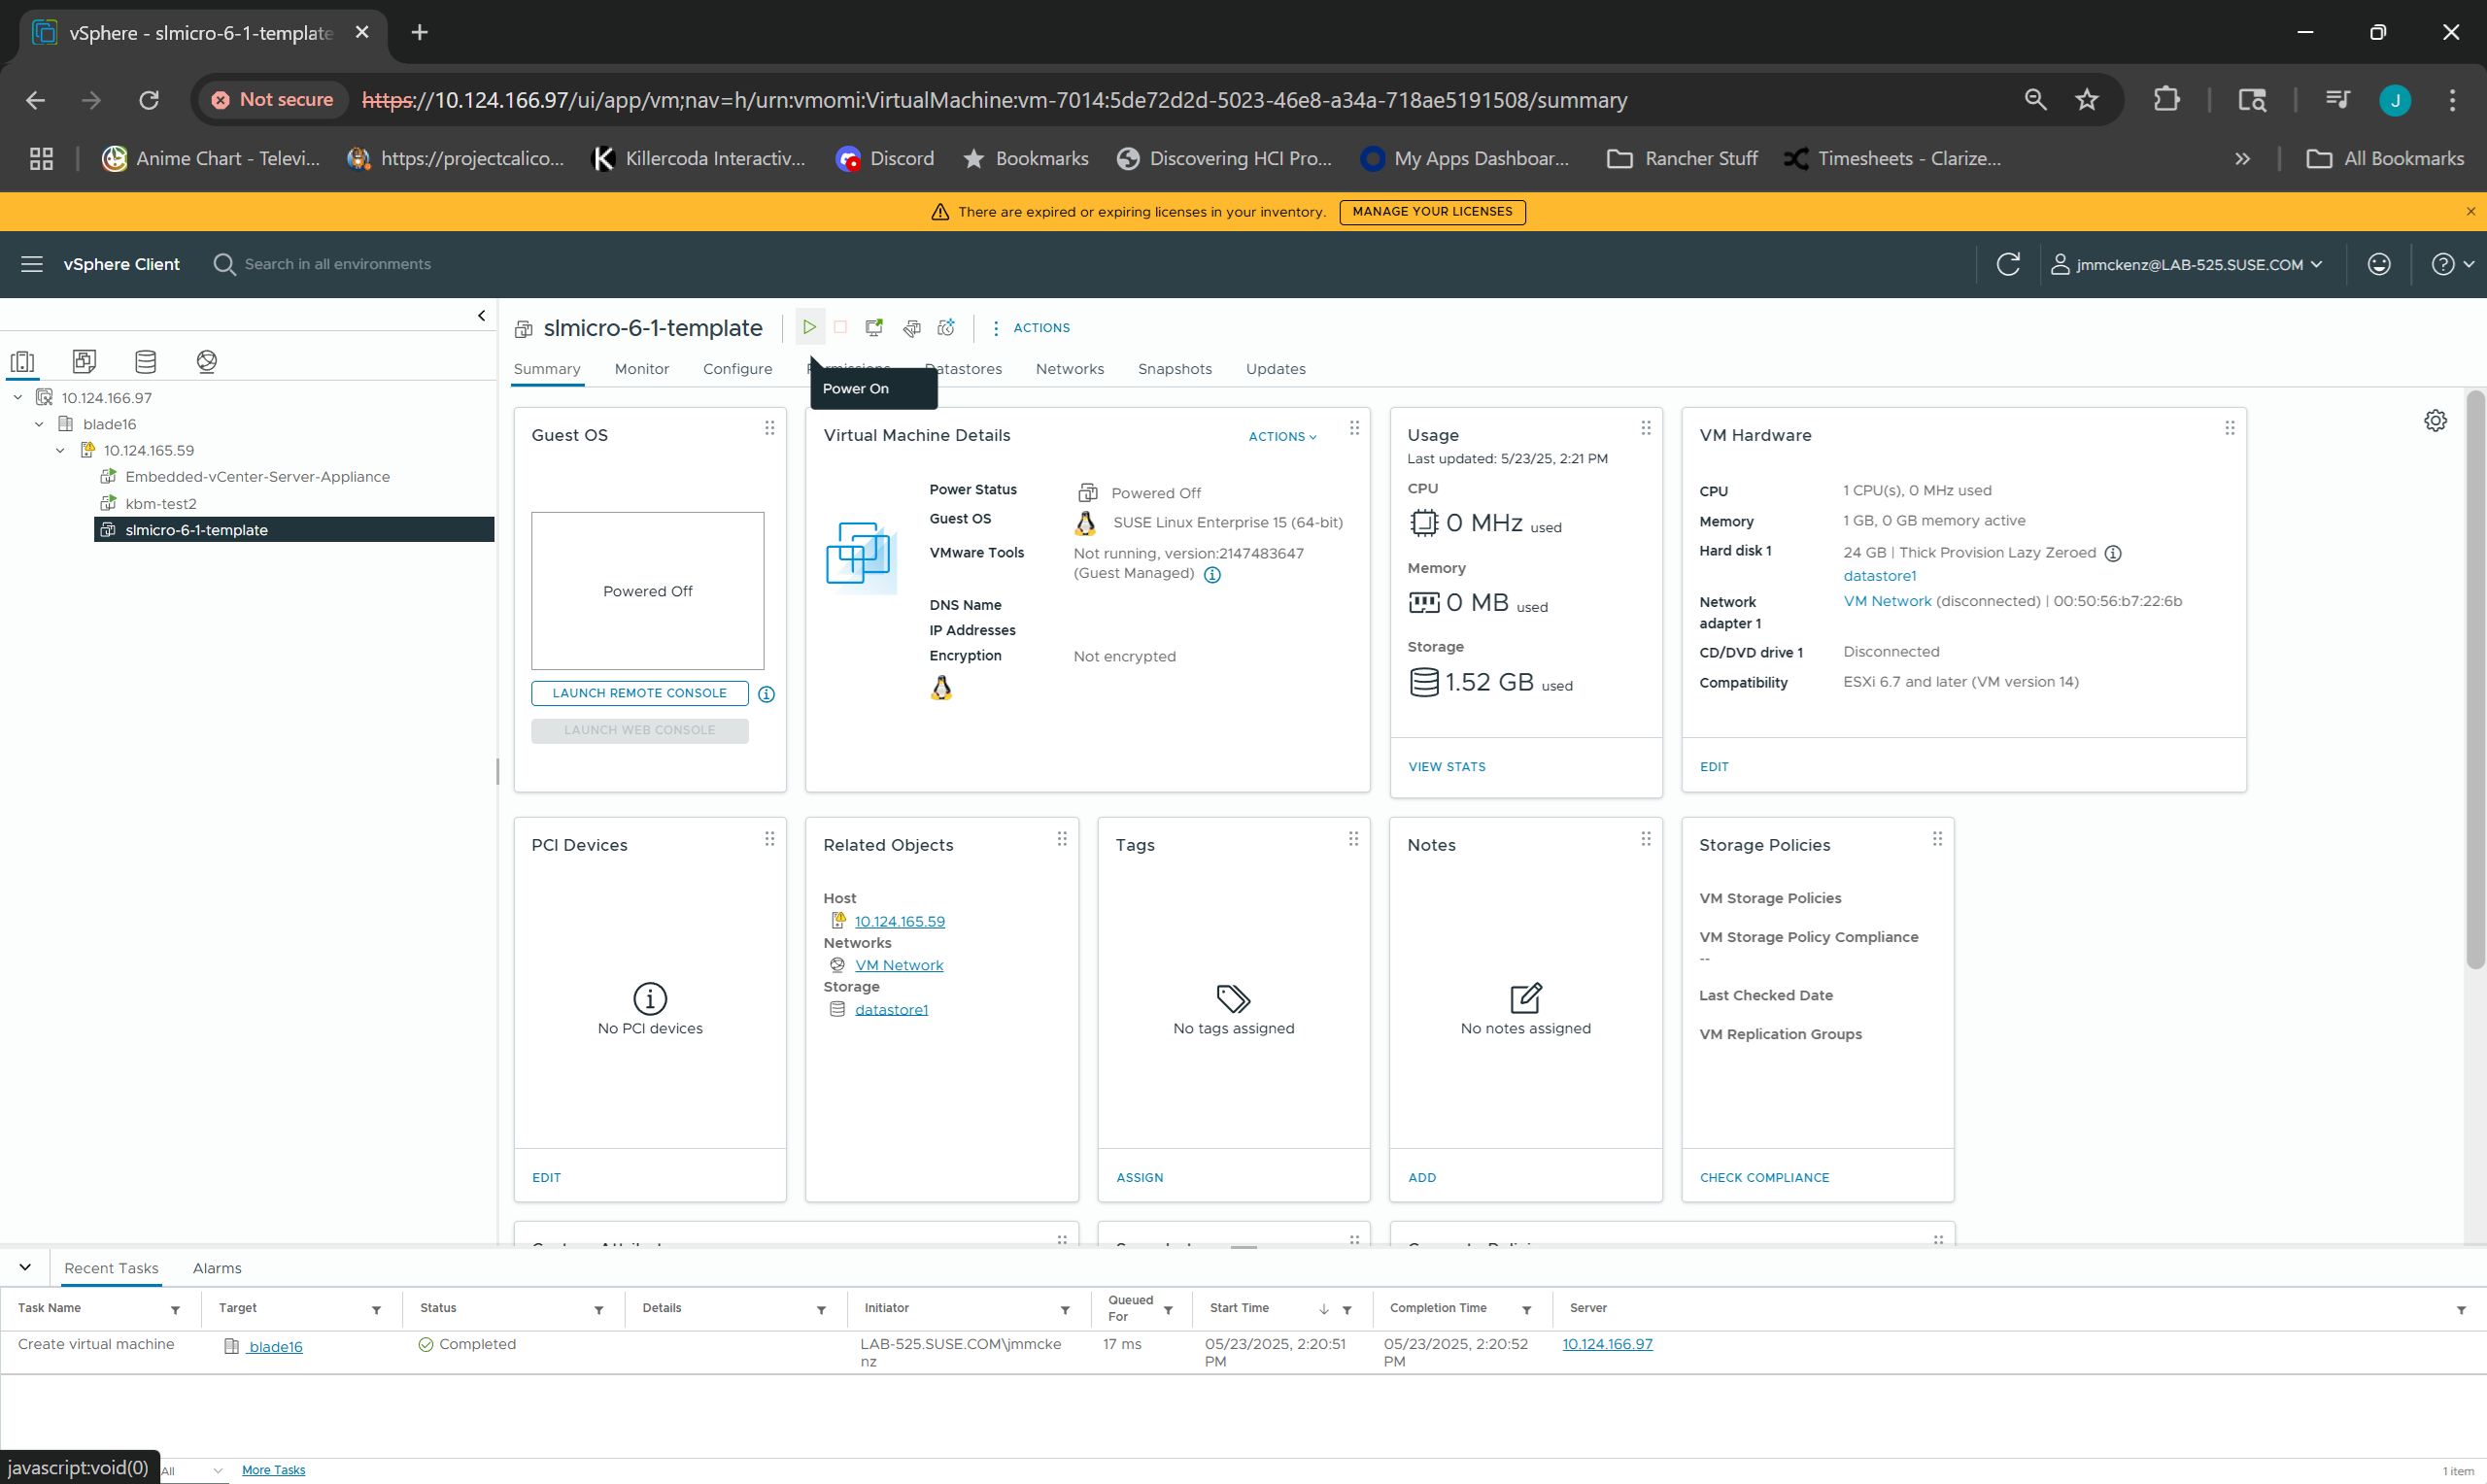
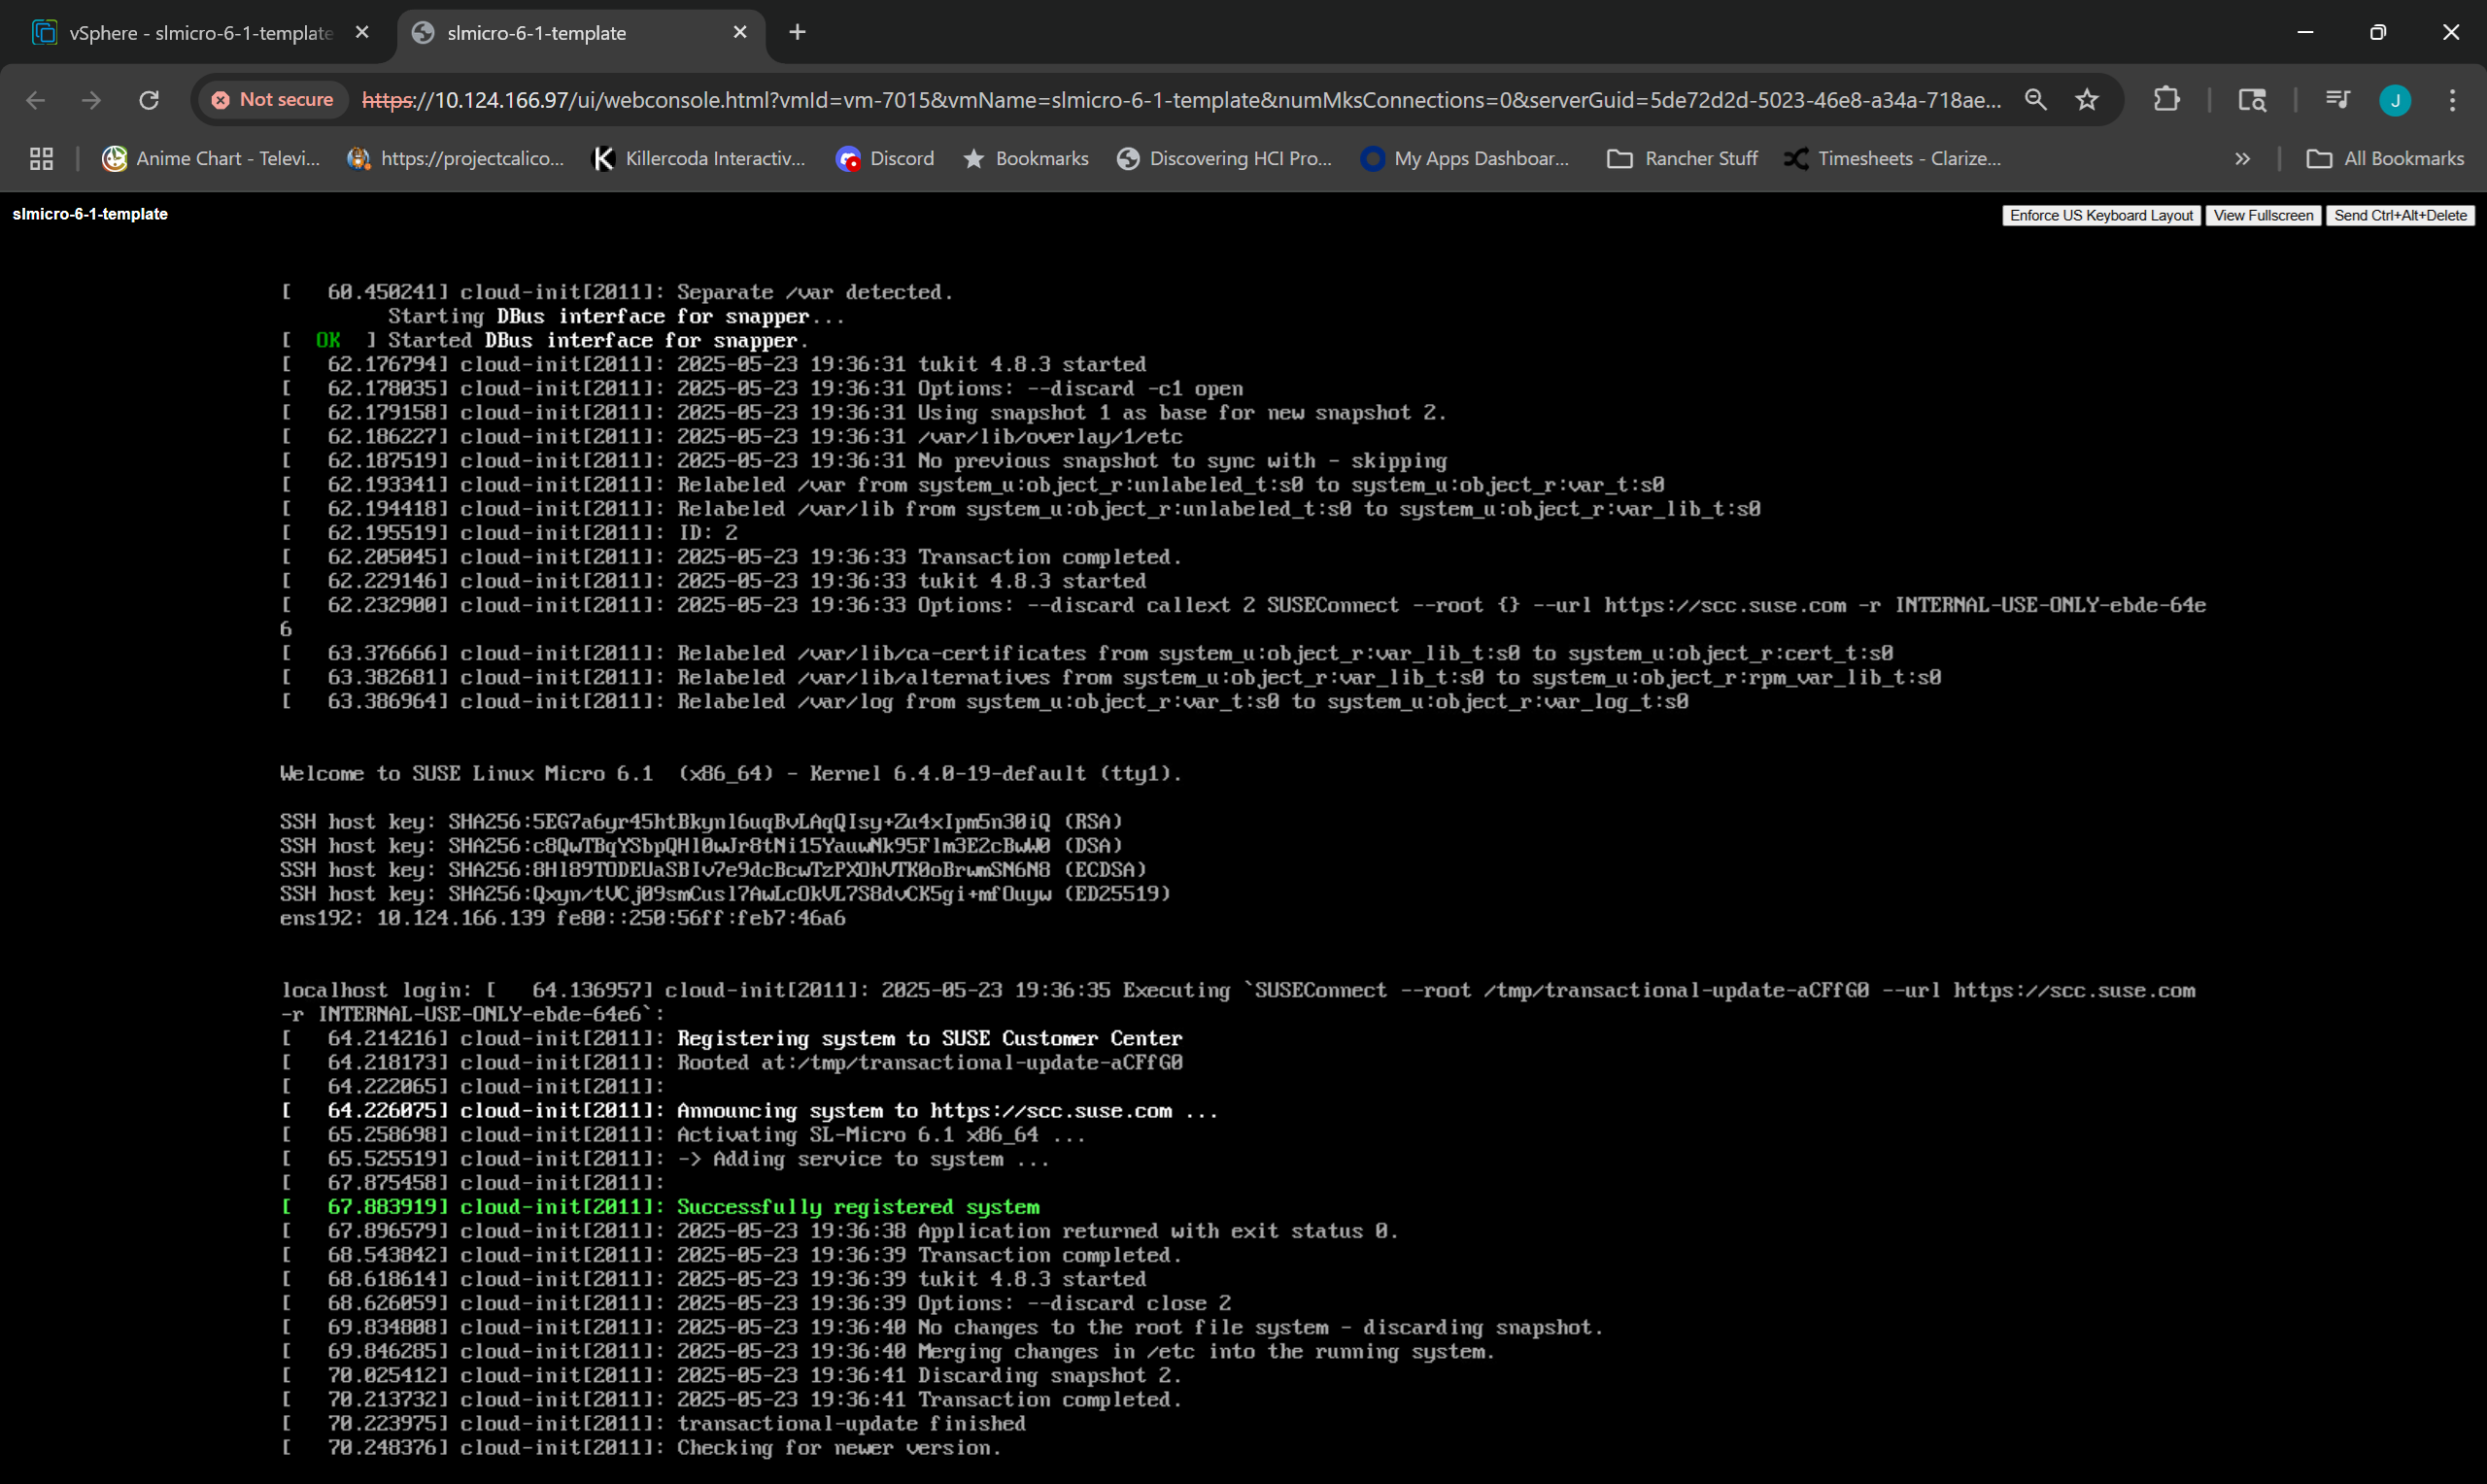
3.3 Installing the virtual machine #
After the configuration is finished, you can start the installation of the virtual machine as described below.
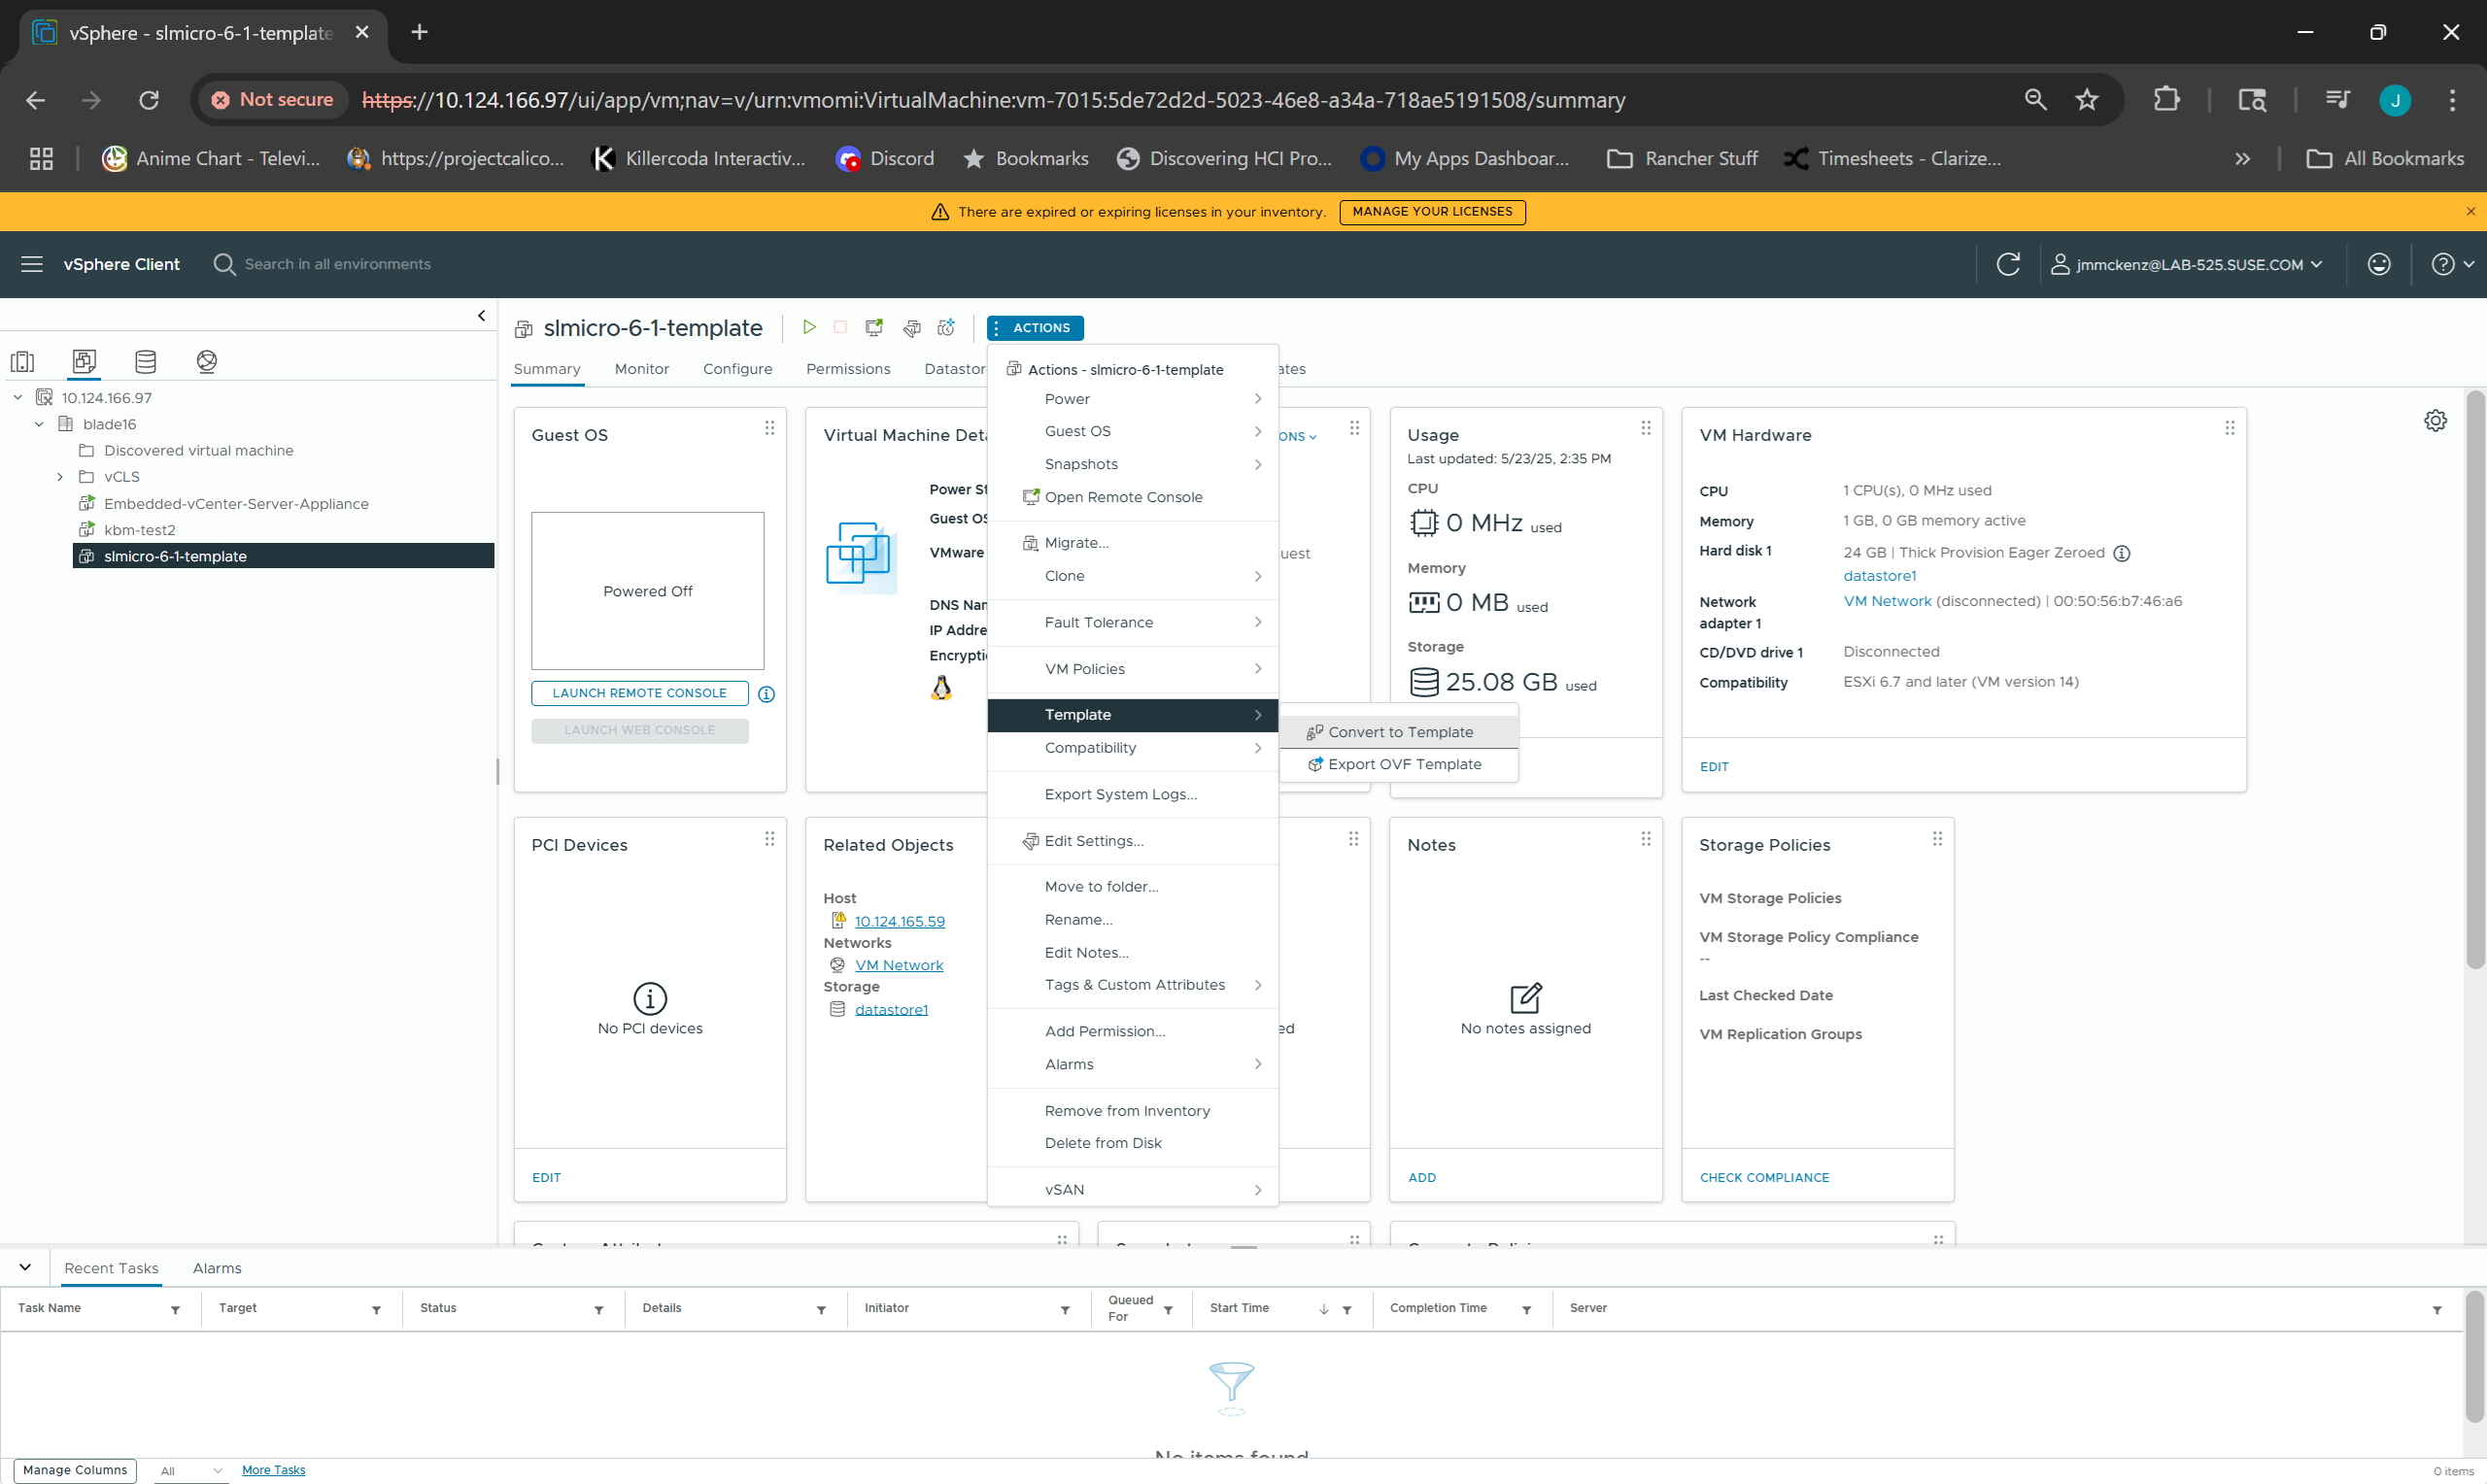
3.4 Converting the virtual machine into a template #
The final part of the deployment is to create a template from the configured machine that can be used to clone virtual machines from and thus speed up the later deployment.
4 Legal Notice #
Copyright© 2006–2026 SUSE LLC and contributors. All rights reserved.
Permission is granted to copy, distribute and/or modify this document under the terms of the GNU Free Documentation License, Version 1.2 or (at your option) version 1.3; with the Invariant Section being this copyright notice and license. A copy of the license version 1.2 is included in the section entitled “GNU Free Documentation License”.
For SUSE trademarks, see https://www.suse.com/company/legal/. All other third-party trademarks are the property of their respective owners. Trademark symbols (®, ™ etc.) denote trademarks of SUSE and its affiliates. Asterisks (*) denote third-party trademarks.
All information found in this book has been compiled with utmost attention to detail. However, this does not guarantee complete accuracy. Neither SUSE LLC, its affiliates, the authors, nor the translators shall be held liable for possible errors or the consequences thereof.
