Raspberry Pi Quick Start
This guide contains an overview of SUSE Linux Enterprise Server for Arm on the Raspberry Pi* platform and will guide you through the setup procedure.
1 Platform overview #
To use SUSE Linux Enterprise Server for Arm on Raspberry Pi, a 64-bit Arm* compatible Raspberry Pi* is required. SUSE Linux Enterprise Server for Arm 15 SP6 is tested to work on Raspberry Pi 3 Model A+, Model B, Model B+, and Raspberry Pi 4 Model B boards as well as on Raspberry Pi Compute Module 3 and 3+ on MyPi Industrial IoT Integrator Board.
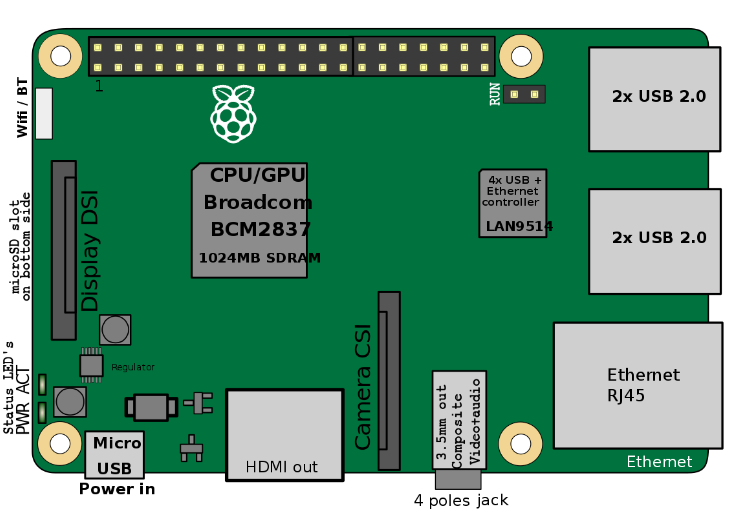
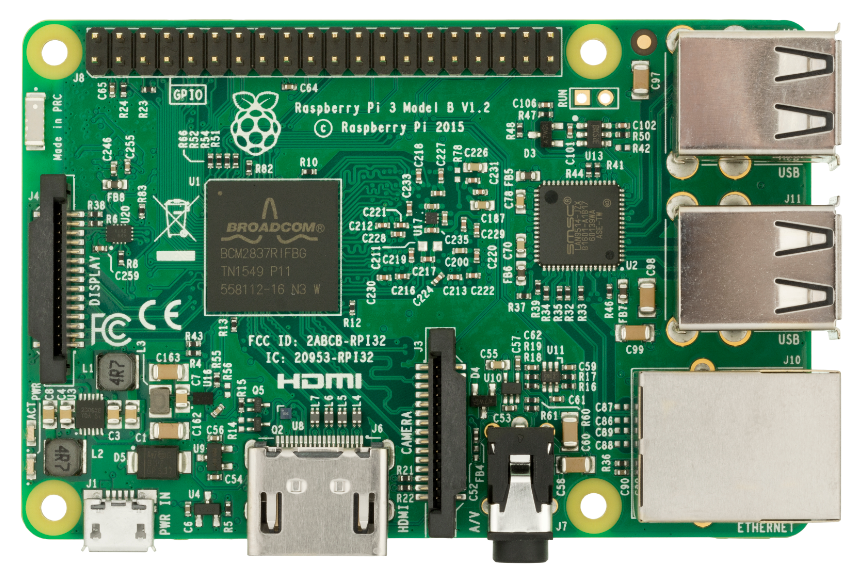
1.1 Technical details of the Raspberry Pi 3 model B #
Raspberry Pi is a series of small single-board computers based on a System-on-a-Chip (SoC) by Broadcom*, featuring various peripherals on the board.
- CPU
The Broadcom BCM2837 SoC includes a quad-core Arm* Cortex*-A53 Application Processor supporting the Armv8 32-bit and 64-bit instruction sets. With the default configuration, it is clocked up to 1.2 GHz.
- RAM
1024 MiB DDR2 memory mounted on the back of the board.
- Graphics
Broadcom* VideoCore* IV providing OpenGL* ES 2.0 support. Displays can be connected over HDMI*, composite (TRRS jack), or MIPI* DSI* (ribbon cable).
- Ethernet
A USB Ethernet controller on the board provides 10/100 Mbit/s Ethernet (Model B) or 10/100/1000 Mbit/s Ethernet with a maximum throughput of 300 Mbit/s (Model B+).
- WLAN
The BCM43438 chip on Model B supports IEEE-802.11b, IEEE-802.11g, and IEEE-802.11n in the 2.4 GHz band. It also provides Bluetooth 2.0 to 4.1 (Low Energy). The BCM43455 chip on Model B+ supports IEEE-802.11b, IEEE-802.11g, IEEE-802.11n, and IEEE-802.11ac in the 2.4 GHz and 5 GHz bands. It provides Bluetooth 4.2 (Low Energy).
- Storage
The microSDHC card slot allows for a memory card to be inserted as the primary boot medium.
- Power
Raspberry Pi 3's main power source is the Micro USB connector. If your Raspberry Pi comes with a power supply, it is recommended to use the bundled power supply only.
- USB
A total of four USB 2.0 ports are available.
- Connectors
A 0.1 inch multi-function pin header is also available. Note that not all functionality of this header is exposed in SUSE Linux Enterprise Server for Arm 15 SP6.
1.2 SUSE Linux Enterprise Server for Arm 15 SP6 #
SUSE Linux Enterprise Server for Arm is the first fully supported commercial Linux operating system product available for Raspberry Pi. You can purchase subscriptions which entitle you to receive all released bug and security fixes, feature updates, and technical assistance from SUSE's worldwide support. Learn more about subscription and support options at https://www.suse.com/support/programs/subscriptions/?id=SUSE_Linux_Enterprise_Server.
If you want to try out SUSE Linux Enterprise Server for Arm 15 SP6 on Raspberry Pi, SUSE will provide you with a trial version. This gives you access to free patches and updates for a period of 60 days. You must log in to the SUSE Customer Center at https://scc.suse.com/ using your Customer Center account credentials to receive this free offer. If you do not have a Customer Center account, you must create one to take advantage of the trial version.
Minimum System Requirements for Installation#
Raspberry Pi 3 Model A+, B, or B+, or Raspberry Pi 4 Model B
microSD card with at least 8 GB capacity
USB keyboard, mouse
HDMI cable and monitor
Power supply with at least 2.5 A capacity
1.2.1 Differences compared to Raspberry Pi OS #
Raspberry Pi OS is the de-facto default distribution for Raspberry Pi. The following paragraphs provide a short overview of differences between SUSE Linux Enterprise Server for Arm on Raspberry Pi and Raspberry Pi OS.
- Based on upstream kernel
Raspberry Pi OS uses a kernel with modifications especially for Raspberry Pi. SUSE Linux Enterprise Server for Arm uses the default SUSE Linux Enterprise kernel for AArch64, which is derived from the official mainline kernel.
- AArch64 instruction set
SUSE Linux Enterprise Server for Arm on Raspberry Pi is the first distribution for Raspberry Pi using the AArch64 instruction set.
- Boot process
In Raspberry Pi OS, the kernel is loaded directly. This is not supported by SUSE Linux Enterprise Server for Arm, where the U-Boot boot loader is used to provide an EFI boot environment. A GRUB2 EFI binary is chain-loaded to provide a graphical boot screen.
- Root file system
SUSE Linux Enterprise Server for Arm for Raspberry Pi uses Btrfs as the file system for the root partition. Compression is enabled by default for better SD card performance.
1.2.2 YaST #
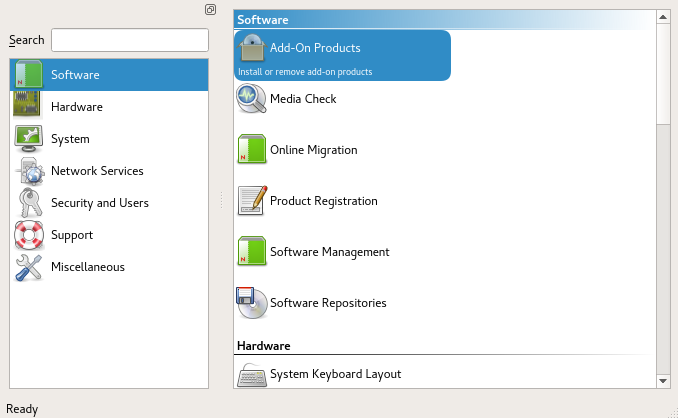
YaST is the installation and configuration framework for SUSE Linux Enterprise. It is
popular for its ease of use, flexible graphical interfaces and the capability
to customize your system quickly during and after installation. YaST
can be used to configure your entire system: You can configure hardware,
set up networking, manage system services, and tune your security settings.
All these tasks can be accessed from the YaST control center. To start
it, choose YaST in the menu or run the command xdg-su -c
yast2. You will be prompted to enter the password of the
root user.
When started, YaST shows an overview of available modules (Figure 3, “The YaST control center”). Simply click an icon to open a module.
1.2.3 Zypper #
Zypper is the package manager for SUSE Linux Enterprise. It is the tool for installing, updating and removing packages and for managing repositories.
The general syntax for Zypper invocations is:
zypper[global-options]command[command-options][arguments]...
For most commands, there is both a short and a long form. An overview is
available with zypper --help.
- Installing a package
#zypper install mplayer- Removing a package
#zypper remove mplayer- List available patches
>zypper list-patches- Install available patches
#zypper patch
The recommended way to install available software updates is by using the YaST Online Updater. To start it, choose “Online Update” in “Settings” under “Desktop Apps” in the IceWM menu.
1.2.4 Limitations #
- Graphics not hardware-accelerated
X.Org hardware acceleration is disabled to improve system stability and reliability.
For other limitations, refer to the online version of the Release Notes at https://www.suse.com/releasenotes/aarch64/SUSE-SLES/15-SP6/.
2 Installation #
SUSE Linux Enterprise Server for Arm for Raspberry Pi is distributed as an XZ-compressed image file for microSD cards. This section will guide you through the process of preparing the card for the first boot. If you already have a microSD card containing the image, you can skip this section and go straight to Section 3, “First boot”.
It is recommended to use a card with a capacity of at least 8 GB.
By following the procedure below, all data on the SD card will be overwritten and therefore irrevocably lost. Be very careful when choosing the destination device of the image writing process.
2.1 Preparing the card on Linux #
Before and after you plug in the SD card, run the lsblk
command. Between the two runs of lsblk, there should be
a difference of one or more lines. The first column and first row is the
name of the node representing the SD card in your system. To write the
image to the card, use the dd command:
xz -cd IMAGE | dd of=/dev/SDCARDDEV bs=4096
dd #
This command decompresses the image
SLES15-SP6-Minimal-Image.aarch64-15.6-RaspberryPi-GM.raw.xz to the SD
card mmcblk0:
> xz -cd SLES15-SP6-Minimal-Image.aarch64-15.6-RaspberryPi-GM.raw.xz | sudo dd of=/dev/mmcblk0 bs=4096 iflag=fullblock status=progress2.2 Preparing the card on Microsoft Windows operating systems #
The following steps will guide you through the installation of the image onto the SD card on Microsoft® Windows® operating systems. You need to meet these prerequisites:
Latest available image of SUSE Linux Enterprise Server for Arm for Raspberry Pi
Easy 7-Zip from http://www.e7z.org/
Win32 Disk Imager from https://sourceforge.net/projects/win32diskimager/
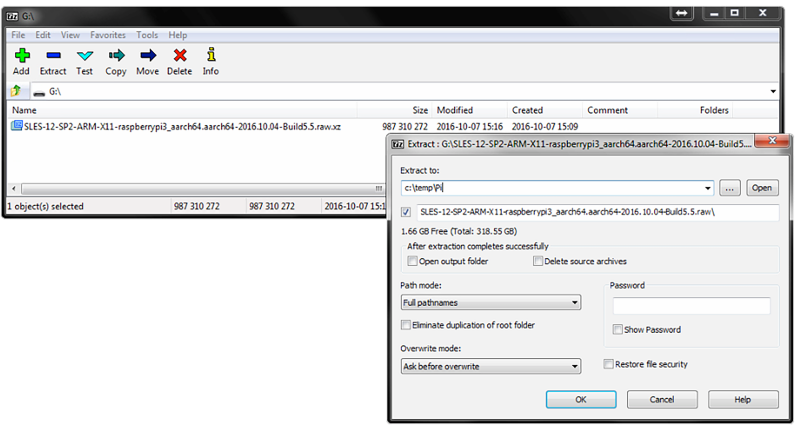
Open the downloaded image using Easy 7-Zip. Extract the file content into a directory with sufficient free space.
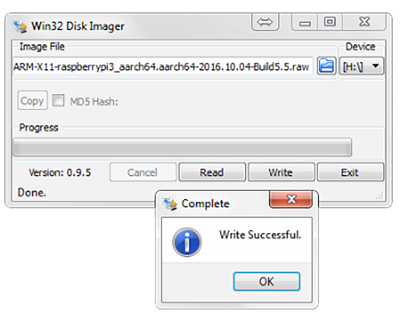
Run Win32 Disk Imager and select the extracted file as . Then, choose the correct drive letter as . Click to start the procedure.
Note: Finding the correct deviceIf you are unsure which drive letter to choose from in the list, remove the SD card and run Win32 Disk Imager again. The option that disappeared is the right target device.
2.3 Preparing the card on macOS #
The following steps will guide you through the installation of the image onto the SD card on macOS®. You need to meet these prerequisites:
Latest available image of SUSE Linux Enterprise Server for Arm for Raspberry Pi
The Unarchiver from https://unarchiver.c3.cx/unarchiver
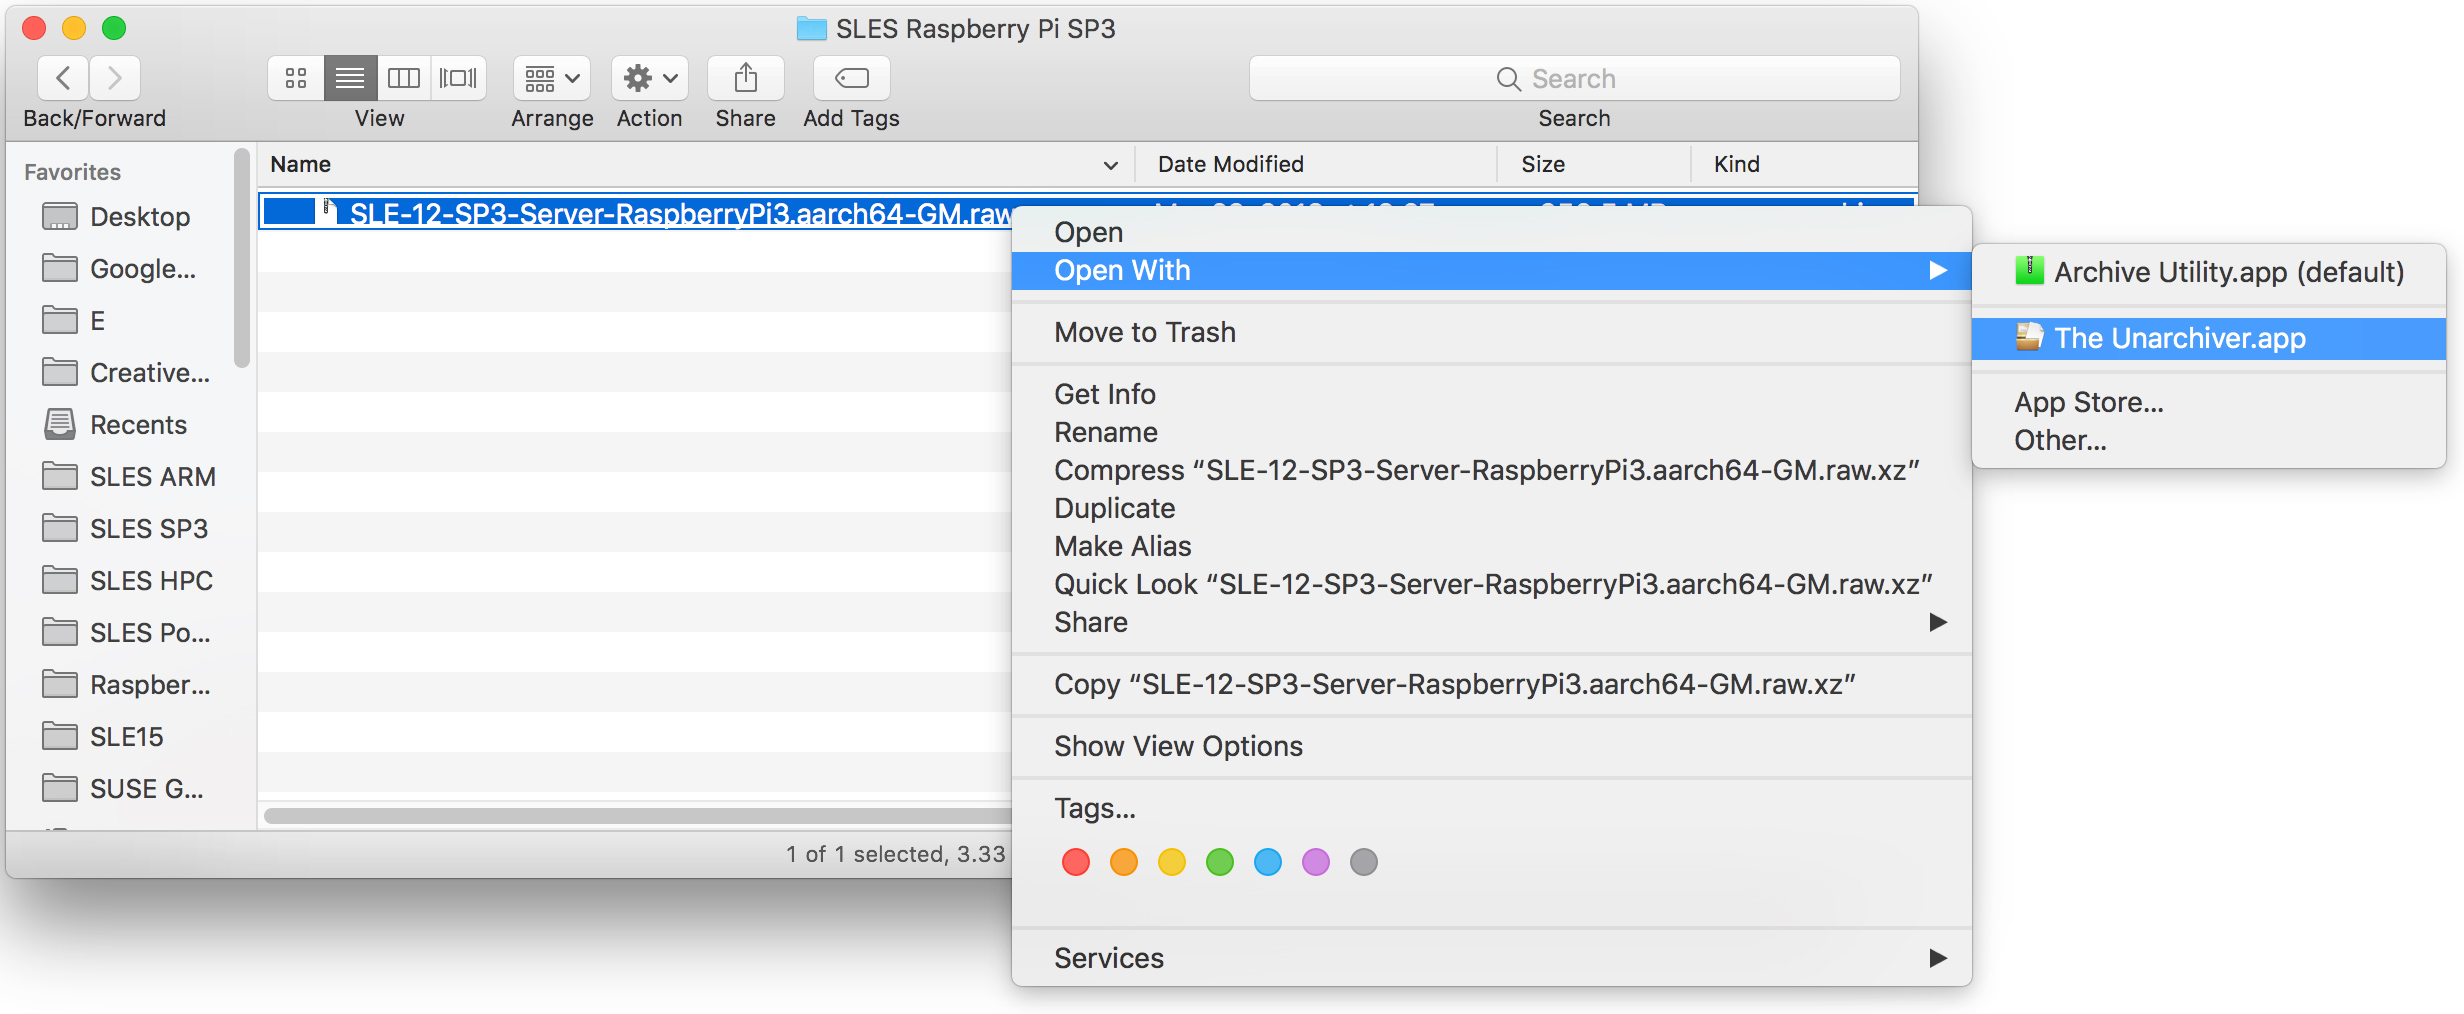
Open Finder at the location where the downloaded image is stored. Use the selection to choose The Unarchiver instead of the default Archive utility and extract the content into a directory with sufficient free space.
Open a terminal window and change into the destination directory of the uncompressed image. Enter
diskutil listbefore and after the SD card is inserted to find out which device to use.Run
diskutil unmountDisk
      /dev/diskX
, where X is the disk number from the previous step.Run
sudo dd bs=4096 if=imageFile.raw
      of=/dev/diskX
, where X is the disk number and imageFile.raw is the name of the uncompressed image.>sudodd bs=4096 if=SLES15-SP6-Minimal-Image.aarch64-15.6-RaspberryPi-GM.raw.xz of=/dev/disk4 Password: 5550+0 records in 5550+0 records out 5819596800 bytes transferred in 1131.796649 secs (5141910 bytes/sec)Now unmount the disk (which is now labelled ) as usual.
3 First boot #
To boot Raspberry Pi from the prepared microSD, insert the card into the card slot, then connect a display, an Ethernet cable, a USB keyboard, and a mouse. Power Raspberry Pi. If everything works, you should see the text on the screen.
The JeOS First Boot Assistant can be controlled using the keyboard only. Each user interface element has an accelerator, shown as a highlighted character. To activate an accelerator, press Alt and the appropriate character.
During the first boot, the system expands to make use of the entire storage card. This operation may take a while.
3.1 Initial system setup with JeOS First Boot Assistant #
After the boot is completed, the JeOS First Boot Assistant leads you through the initial system setup.
To run the JeOS First Boot Assistant wizard via a serial connection, you need to
remove the console=tty from the kernel command line
console=ttyS0,115200 console=tty in GRUB 2 even if there
is no HDMI cable connected.
The minimal JeOS image comes without language selection. After the
assistant finishes, you will be able to install and select your system
locale. You can start JeOS First Boot Assistant at any time using the jeos-config command.
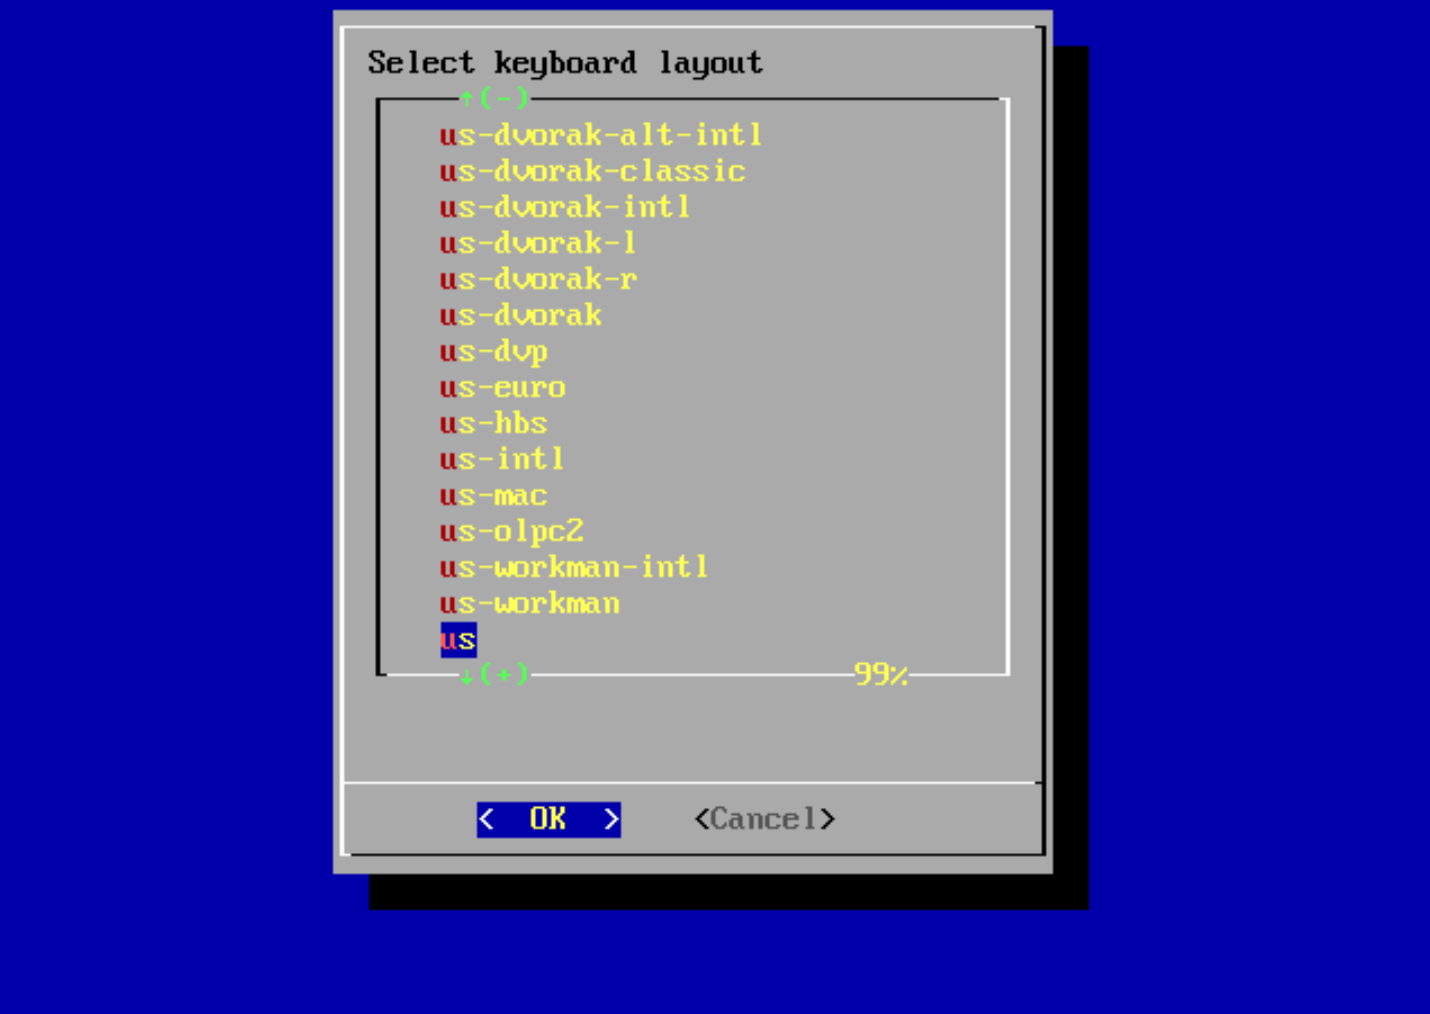
First, the keyboard layout needs to be configured. Use the arrow keys or first letter and select .
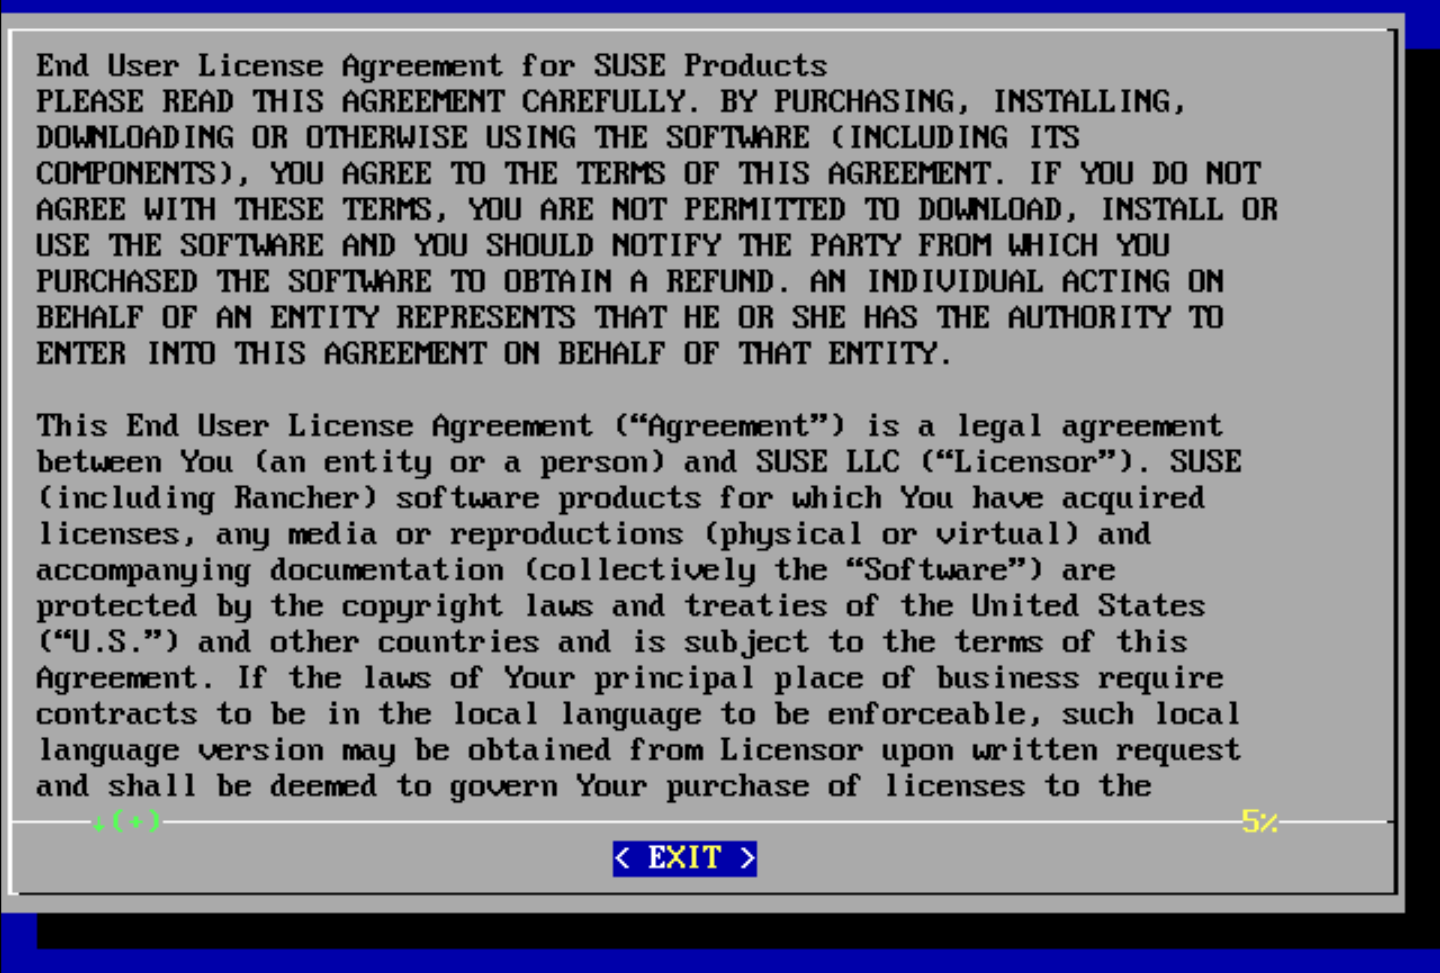
Read the License Agreement. You need to accept it.
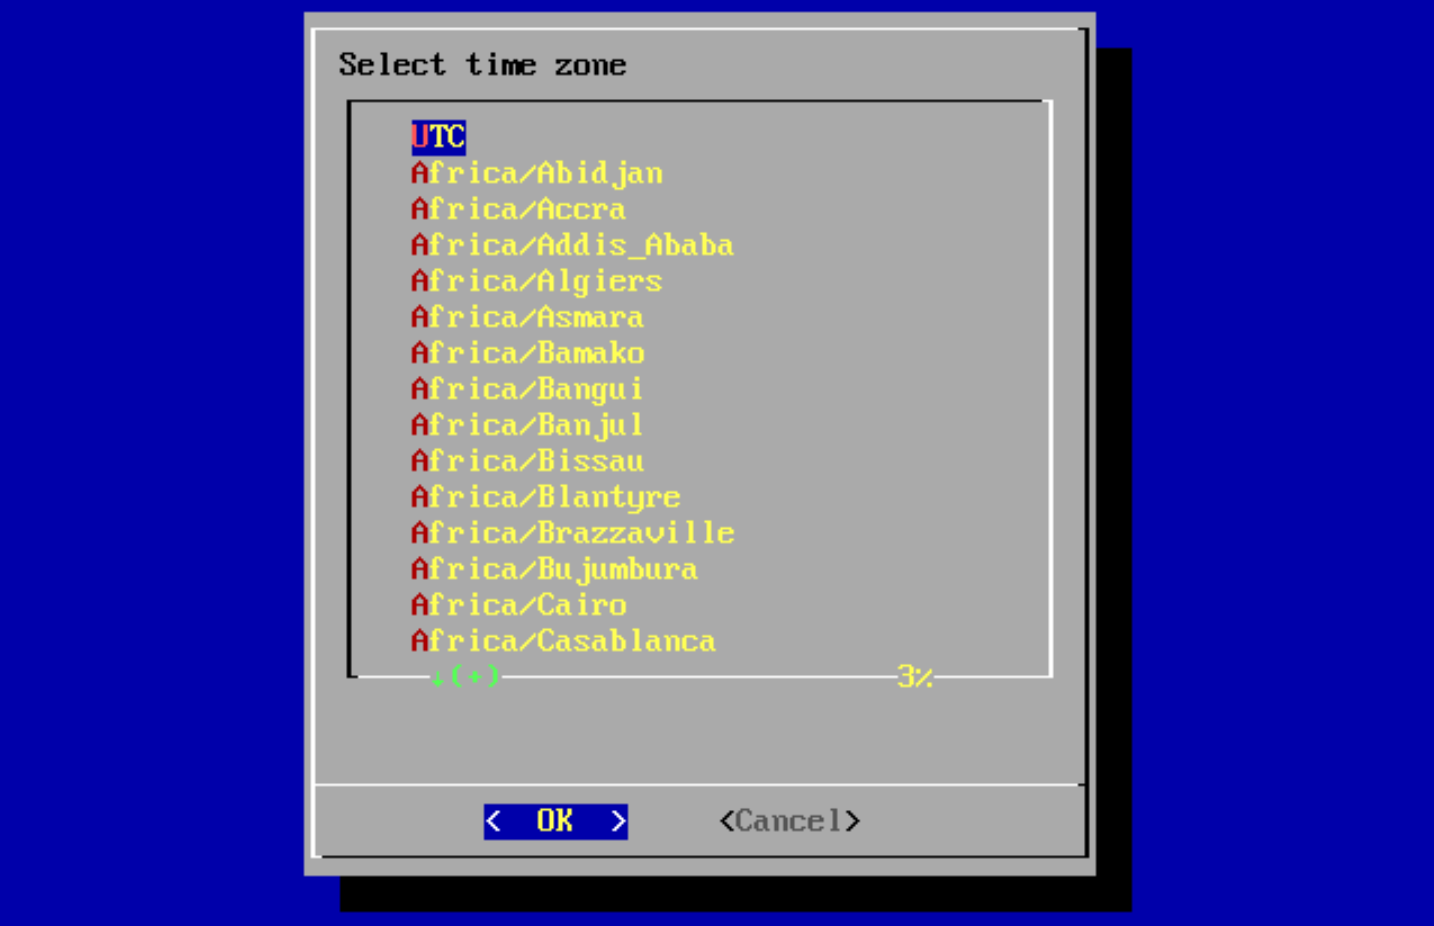
Select the time zone by using the arrow keys or first letter.
Select to proceed.
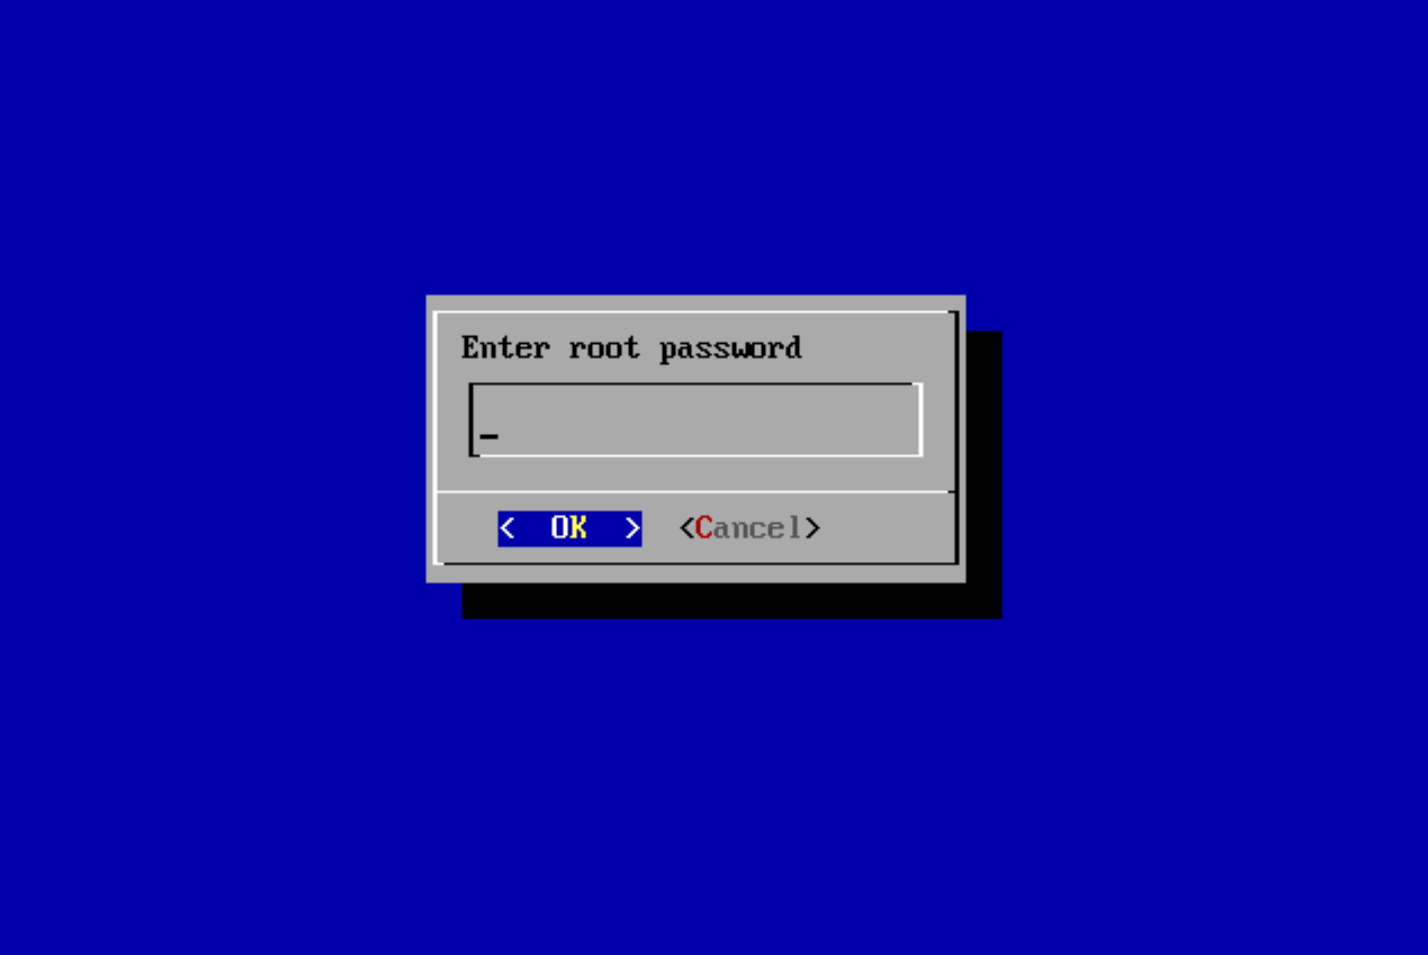
You will be asked to provide a root password now. Do not forget what you enter here, as you will need it for administration.
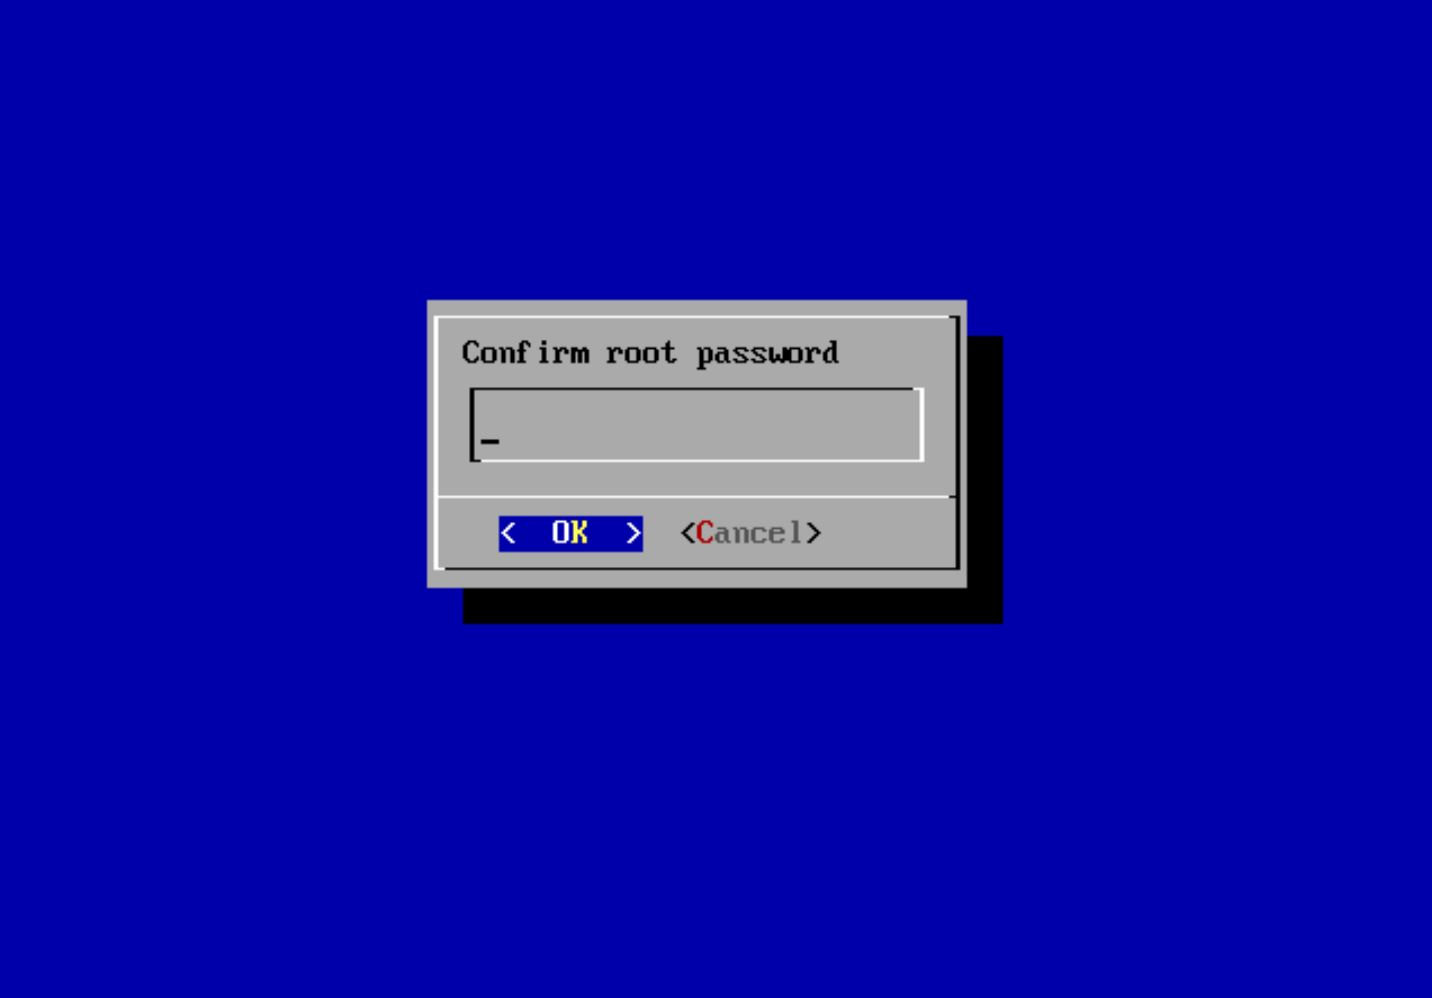
Confirm the root password you just provided by typing it in again.
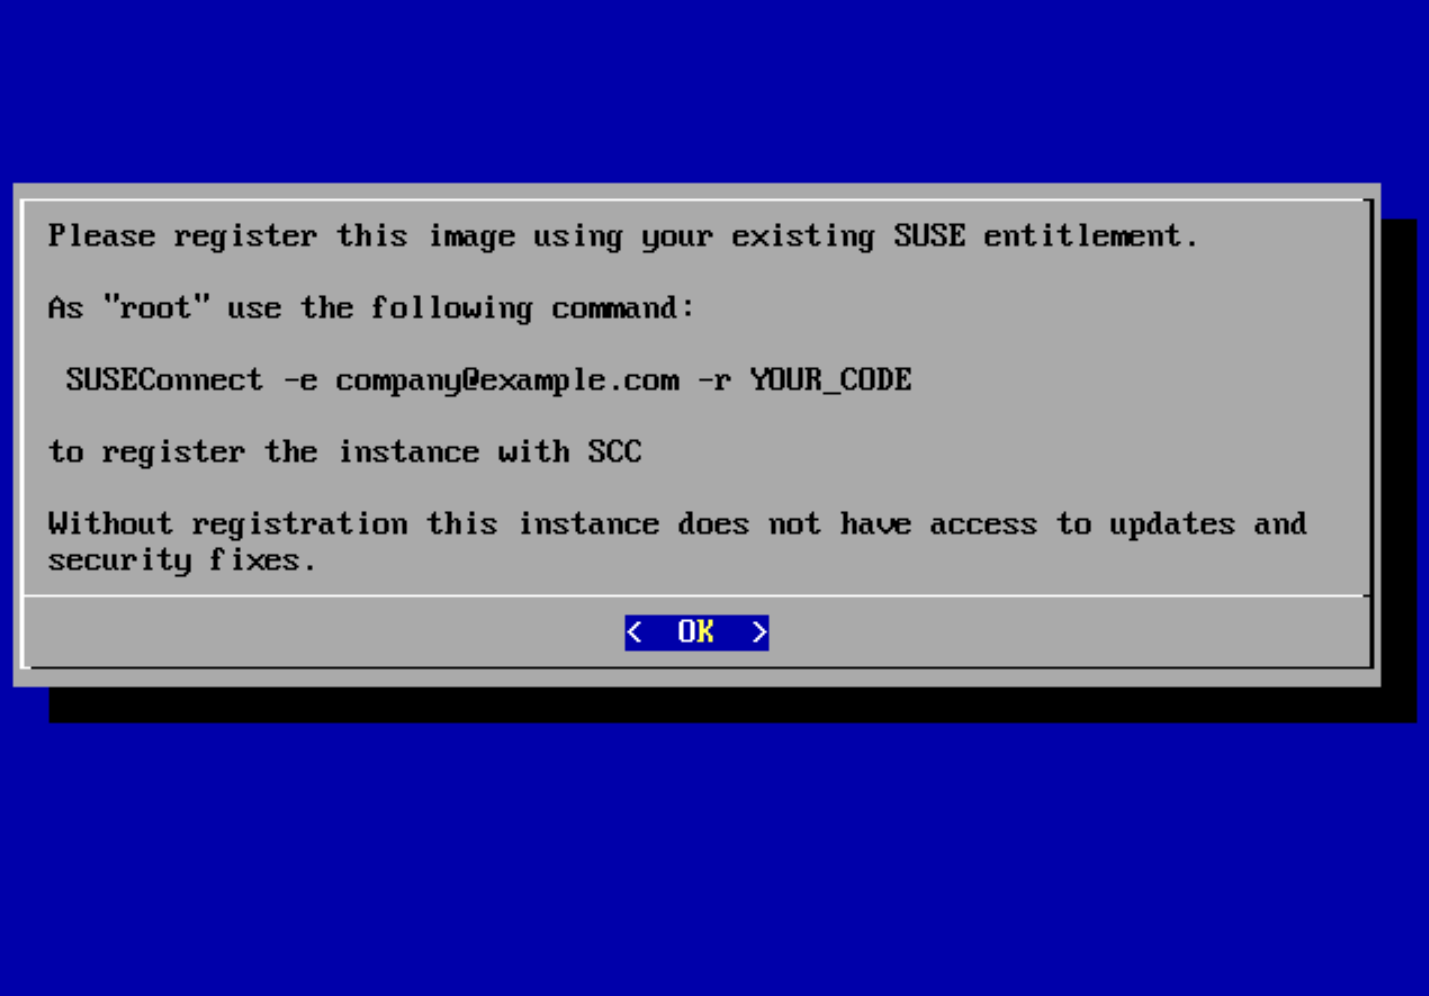
Note that you should register your system after installation, as detailed in Section 3.2, “Registration process”.
Note: Deferring registrationYou will not receive updates or patches until you register using SUSEConnect.
Select to continue.
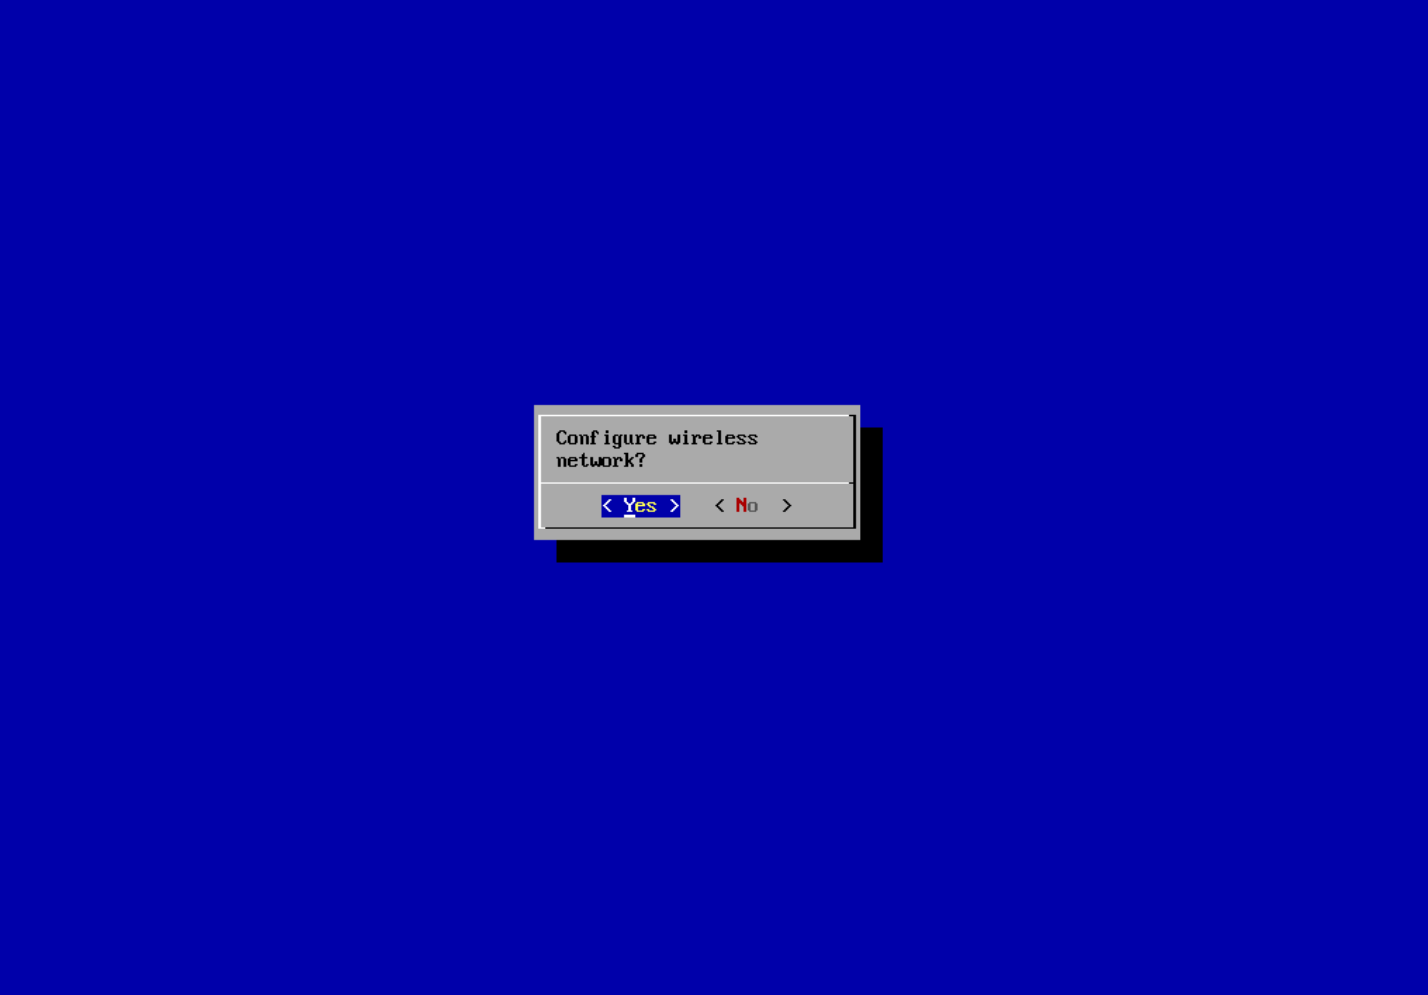
Finally, you are offered the option to configure a wireless network. If you have a wired Ethernet connection, you can skip this step by selecting .
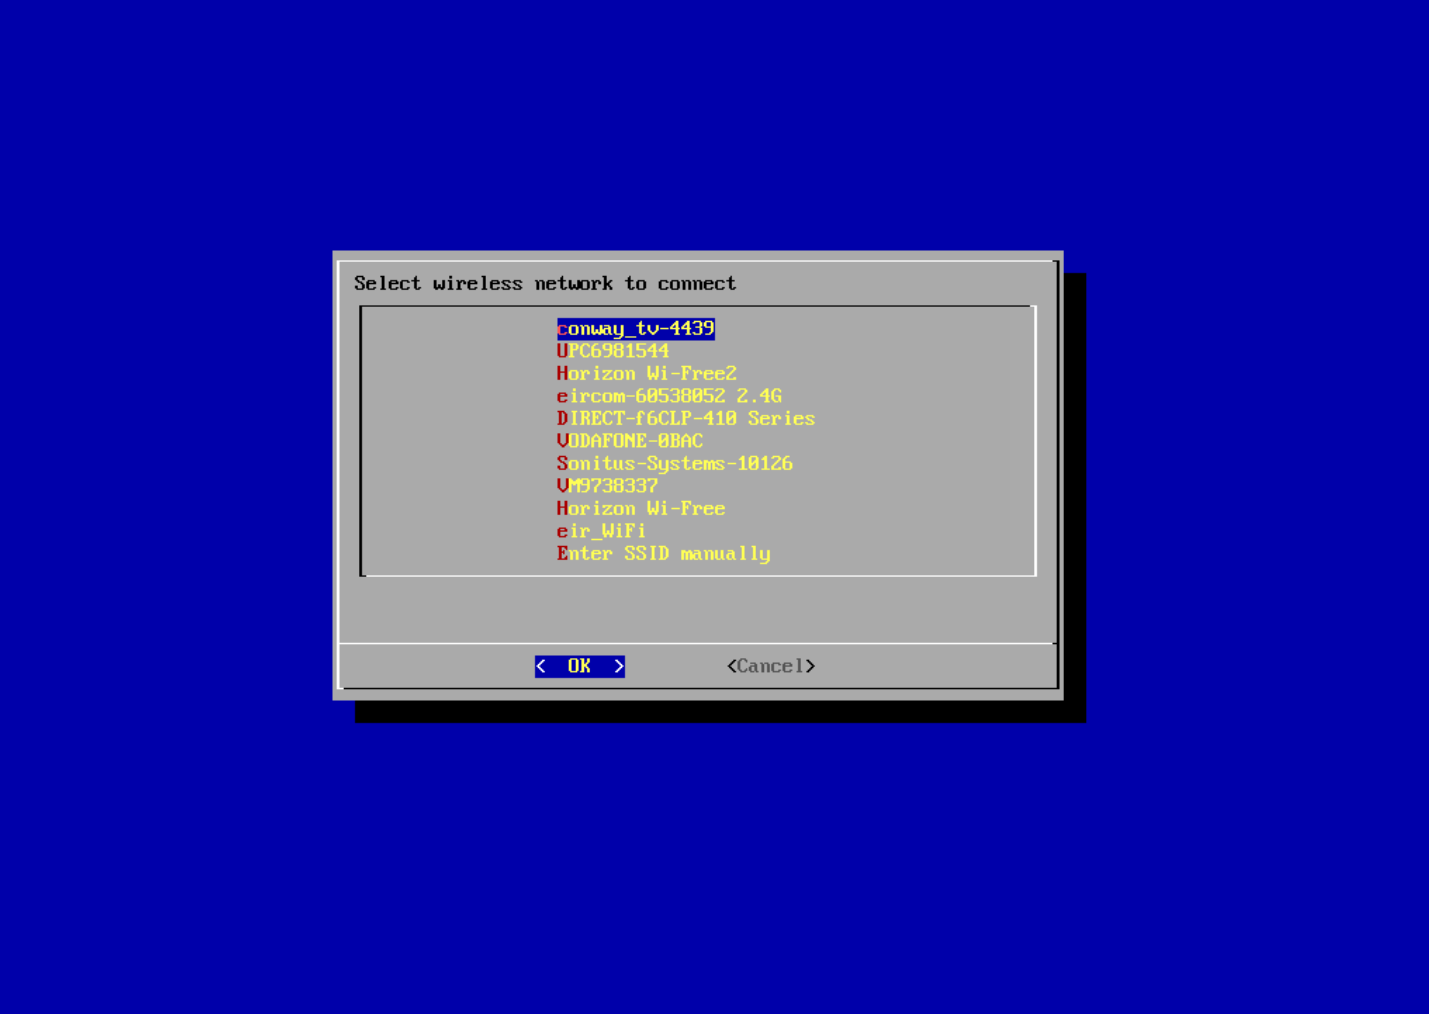
If you select , you will see the following screens:
Select a wireless network to connect to and proceed with .
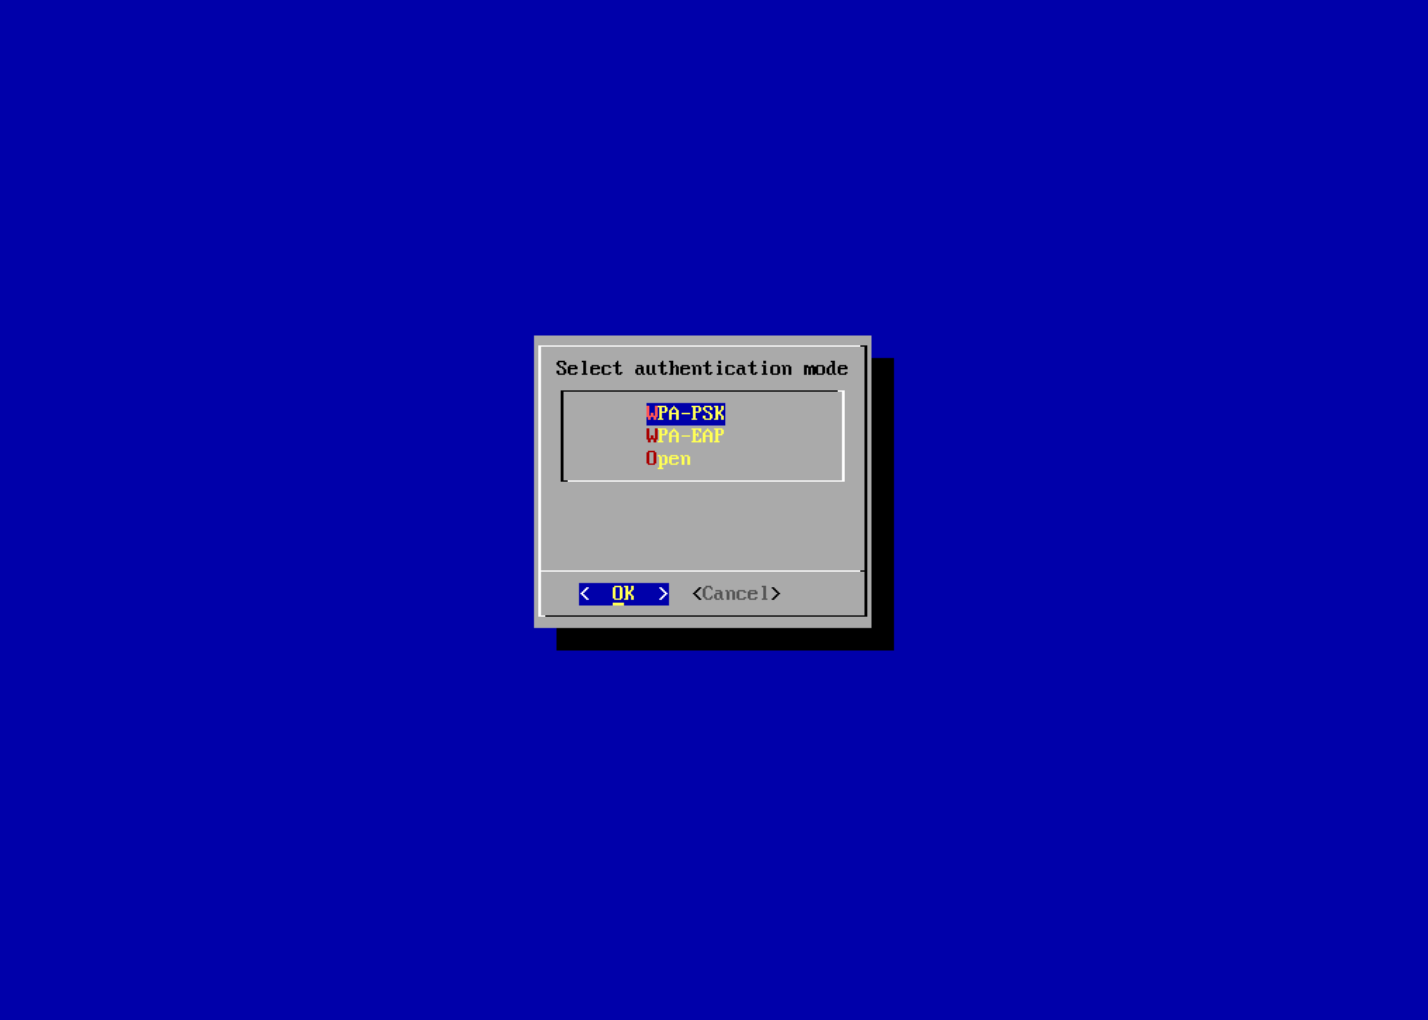
Select the authentication method for the wireless network and proceed with .
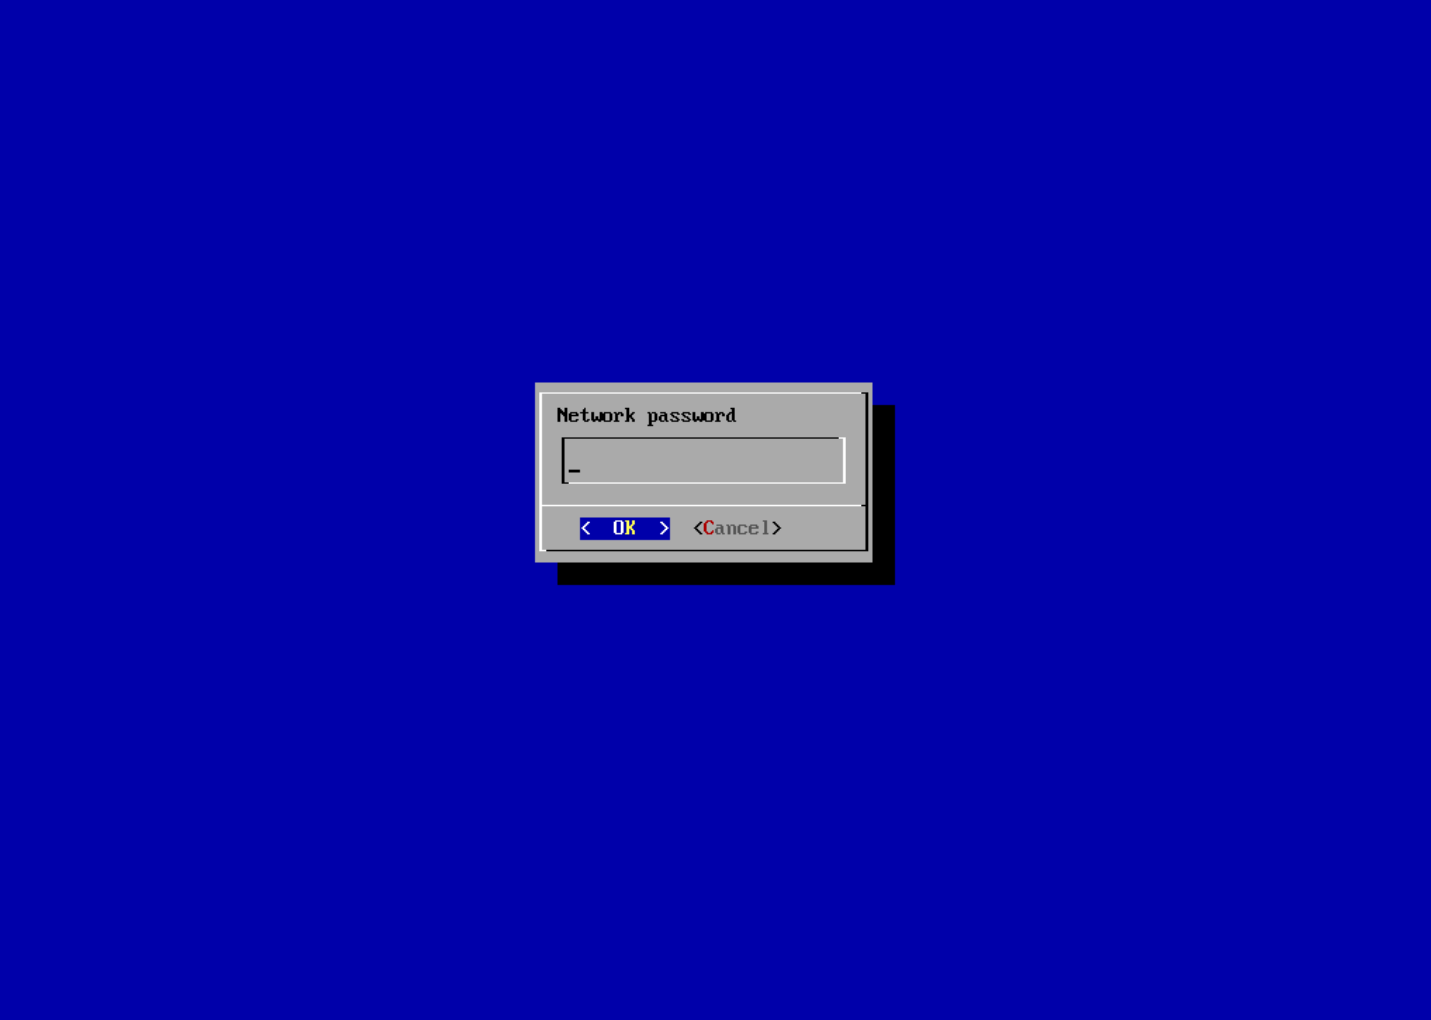
Enter the passphrase for the wireless network and proceed with .
WPA authentication supports just the mschapv2 EPA authentication, which is used as default.
If you chose to skip configuration of wireless networks or if you fully completed their configuration, the JeOS First Boot Assistant will exit. The system continues to boot to a login prompt.
You can now log in as root user with the password you chose earlier.
If at any point you select to the assistant, the system will shut down. You can then disconnect the power supply, make any necessary changes, and start over.
3.2 Registration process #
It is very important to register your SUSE Linux Enterprise Server for Arm subscription to ensure full functionality of your Raspberry Pi system. The SD card image provided by SUSE contains a minimal set of packages that are intended for the initial boot process and to get your Raspberry Pi onto the network.
When you have registered your SUSE Linux Enterprise Server for Arm subscription, you can download other packages you may need, such as compilers. The SUSE Linux Enterprise Server version that runs on your Raspberry Pi is the same version that runs on AMD64/Intel 64, POWER, IBM Z, or on other Arm-based systems.
Because Raspberry Pi does not have a persistent Real Time Clock, make sure that the clock is set to the current date and time before attempting to use Zypper or YaST to install additional packages.
You can initially register your system with the SUSEConnect tool. Afterwards, you can also make use of the YaST Product Registration module.
Sixty-day evaluation subscriptions may be requested at the following page: https://www.suse.com/products/arm/.
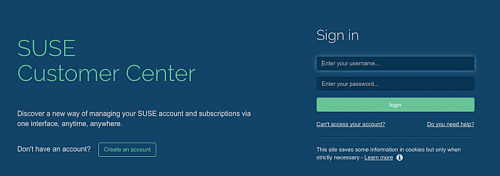
After you have obtained a registration code from a subscription card, you need to activate your subscription on the SUSE Customer Center at:
To register your subscription, perform the following steps:
Log in to the SUSE Customer Center using a browser on another machine. Create an account if required:
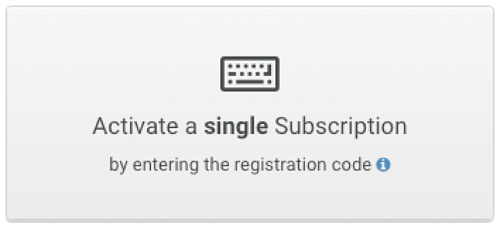
Click :
Click the dialog field :
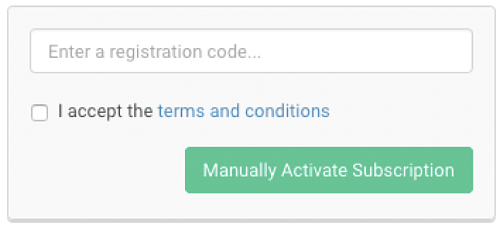
Enter the registration code and accept the terms and conditions:
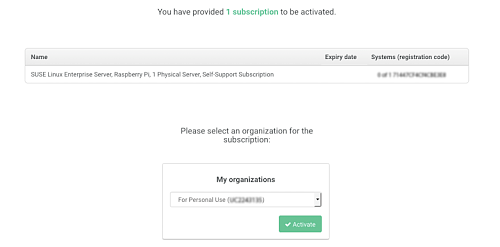
Confirm the subscription activation and the organization assignment. Click :
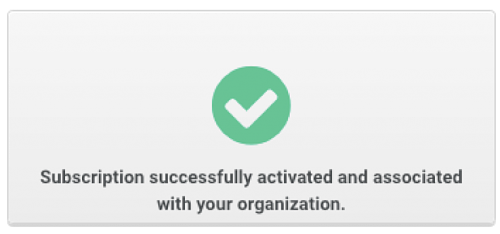
Your subscription is now active and ready to be used:
To register the system, use the SUSEConnect tool as instructed earlier:
# SUSEConnect -e company@example.com -r YOUR_CODE
Registering system to SUSE Customer Center
Using E-Mail: company@example.com

Announcing system to https://scc.suse.com ...

Activating SLES 15.6 aarch64 ...
-> Adding service to system ...

Activating sle-module-basesystem 15.6 aarch64 ...
-> Adding service to system ...
-> Installing release package ...

Activating sle-module-server-applications 15.6 aarch64 ...
-> Adding service to system ...
-> Installing release package ...

Successfully registered system
This may take a few moments. Afterwards, you will have access to online repositories for installing more packages, as described in Section 1.2.3, “Zypper”.
Later sections may assume you have installed YaST for system configuration:
# zypper in -t pattern yast2_basisYour subscription gives you access to more than the above Basesystem Module and Server Applications Module. To activate additional modules, you can use the YaST System Extensions module.
4 Initial system configuration #
In this section, it is explained how to perform the initial system configuration for SUSE Linux Enterprise Server for Arm for Raspberry Pi 15 SP6.
4.1 Changing the language #
Follow these steps to change the default language:
Install the
glibc-localepackage:#zypper in glibc-localeSet the language as desired:
#localectl set-locale LANG=de_DE.UTF-8
Certain applications may require you to install an additional
-lang package before you can see texts translated to the chosen
language.
4.2 Changing the host name #
Follow these steps to change the default host name:
Open the YaST network module either by running
yast2
      lan
or clicking the network icon in the YaST control center.Select in the top tab bar.
Type the new host name into the field.
Click to save the change. After YaST exits, you need to log out and in again.
4.3 Setting up networking #
The default configuration has DHCP enabled on the Ethernet port. If that suits your network environment, you can skip this section. If you require the use of a static IP address, use YaST:
Open the YaST network module either by running
yast2
      lan
or clicking the network icon in the YaST control center.In YaST, you will see the network interface being selected. Select the built-in Ethernet and choose to open the address configuration.
Select and type in the desired values for and . Click .
With a static network configuration, you will also need to specify a DNS server (if applicable) and a gateway. For the gateway, select in the tab bar and enter the IPs of the gateways into the specific fields.
The DNS server is set in the tab. After choosing that tab, enter the IPs of the name servers into the respective fields.
Similarly to the procedure described above, YaST also lets you configure the built-in Wi-Fi network adapter.
For detailed information about the network configuration in SUSE Linux Enterprise Server for Arm, consult the respective sections of the SUSE Linux Enterprise Server Deployment and Administration guides at https://documentation.suse.com/sles/.
5 General system usage #
After the initial configuration procedure and the first boot of the system, you can now use various components of the system.
5.1 Desktop #
SUSE Linux Enterprise Server for Arm for Raspberry Pi 15 GA had packages for a minimal X11 desktop (IceWM) preinstalled.
SUSE Linux Enterprise Server for Arm for Raspberry Pi 15 SP6 comes as a tiny text-based appliance,
allowing you to install any available desktop of your choice or none for
headless usage.
Should you want to re-create the package selection of the previous images,
a pattern x11_raspberrypi is provided for convenience.
If not done already, you will need to enable the Desktop Applications Module. Assuming you have registered the base product already, as described in Section 3.2, “Registration process”, the fastest way to enable the module is:
# SUSEConnect -p sle-module-desktop-applications/15.6/aarch64
Registering system to SUSE Customer Center

Updating system details on https://scc.suse.com ...

Activating sle-module-desktop-applications 15.6 aarch64 ...
-> Adding service to system ...
-> Installing release package ...

Successfully registered system
You can then install the desktop packages pattern:
# zypper install -t pattern x11_raspberrypi5.2 Bluetooth #
Raspberry Pi 3 and later models have a Bluetooth* controller onboard that can be used for various purposes, such as wireless keyboards, mice or audio devices.
To use the Bluetooth controller, install the bluez package:
# zypper install bluez
Then start and enable the bluetooth systemd service:
# systemctl enable --now bluetooth
You can use bluetoothctl to operate the Bluetooth device.
6 Product documentation #
This introduction only covered the most basic tasks.
6.1 Product documentation #
You can find the complete documentation for SUSE Linux Enterprise Server for Arm 15 SP6 at https://documentation.suse.com/.
Not all content in the product documentation applies to SUSE Linux Enterprise Server for Arm on Raspberry Pi, because Raspberry Pi differs significantly from other hardware platforms.
6.2 SUSE forums #
A valid and activated subscription entitles you to receive bug and security fixes, feature updates, and technical assistance from SUSE's support organization. Learn more at https://www.suse.com/support/. Via the SUSE Customer Center at https://scc.suse.com/, you can open an incident.
In addition, SUSE provides a community site where you can get answers to questions. Go to https://community.suse.com/.
The SUSE forum is not an official support channel from SUSE. The individual articles or statements were contributed voluntarily by community members and users of the respective products. SUSE cannot verify either that the actions described in the articles do what they claim to do, or that they do not have unintended consequences. Therefore, neither SUSE LLC, its affiliates, nor the authors may be held liable for possible errors or the consequences thereof.
Visit https://www.suse.com/support/ for more information about official support options.
7 Trademarks #
For SUSE trademarks, see https://www.suse.com/company/legal/. All other third-party trademarks are the property of their respective owners. Trademark symbols (®, ™ etc.) denote trademarks of SUSE and its affiliates. Asterisks (*) denote third-party trademarks.
8 Legal notice #
Copyright ©2006–2020 SUSE LLC and contributors. All rights reserved.
Permission is granted to copy, distribute and/or modify this document under the terms of the GNU Free Documentation License, Version 1.2 or (at your option) version 1.3; with the Invariant Section being this copyright notice and license. A copy of the license version 1.2 is included in the section entitled “GNU Free Documentation License”.
SUSE, the SUSE logo and YaST are registered trademarks of SUSE LLC in the United States and other countries. For SUSE trademarks, see https://www.suse.com/company/legal/. Linux is a registered trademark of Linus Torvalds. Other names or trademarks mentioned in this document may be trademarks or registered trademarks of their respective owners.
All information found in this book has been compiled with utmost attention to detail. However, this does not guarantee complete accuracy. Neither SUSE LLC, its affiliates, the authors, nor the translators shall be held liable for possible errors or the consequences thereof.
9 GNU Free Documentation License #
Copyright (C) 2000, 2001, 2002 Free Software Foundation, Inc. 51 Franklin St, Fifth Floor, Boston, MA 02110-1301 USA. Everyone is permitted to copy and distribute verbatim copies of this license document, but changing it is not allowed.
0. PREAMBLE #
The purpose of this License is to make a manual, textbook, or other functional and useful document "free" in the sense of freedom: to assure everyone the effective freedom to copy and redistribute it, with or without modifying it, either commercially or non-commercially. Secondarily, this License preserves for the author and publisher a way to get credit for their work, while not being considered responsible for modifications made by others.
This License is a kind of "copyleft", which means that derivative works of the document must themselves be free in the same sense. It complements the GNU General Public License, which is a copyleft license designed for free software.
We have designed this License to use it for manuals for free software, because free software needs free documentation: a free program should come with manuals providing the same freedoms that the software does. But this License is not limited to software manuals; it can be used for any textual work, regardless of subject matter or whether it is published as a printed book. We recommend this License principally for works whose purpose is instruction or reference.
1. APPLICABILITY AND DEFINITIONS #
This License applies to any manual or other work, in any medium, that contains a notice placed by the copyright holder saying it can be distributed under the terms of this License. Such a notice grants a world-wide, royalty-free license, unlimited in duration, to use that work under the conditions stated herein. The "Document", below, refers to any such manual or work. Any member of the public is a licensee, and is addressed as "you". You accept the license if you copy, modify or distribute the work in a way requiring permission under copyright law.
A "Modified Version" of the Document means any work containing the Document or a portion of it, either copied verbatim, or with modifications and/or translated into another language.
A "Secondary Section" is a named appendix or a front-matter section of the Document that deals exclusively with the relationship of the publishers or authors of the Document to the Document's overall subject (or to related matters) and contains nothing that could fall directly within that overall subject. (Thus, if the Document is in part a textbook of mathematics, a Secondary Section may not explain any mathematics.) The relationship could be a matter of historical connection with the subject or with related matters, or of legal, commercial, philosophical, ethical or political position regarding them.
The "Invariant Sections" are certain Secondary Sections whose titles are designated, as being those of Invariant Sections, in the notice that says that the Document is released under this License. If a section does not fit the above definition of Secondary then it is not allowed to be designated as Invariant. The Document may contain zero Invariant Sections. If the Document does not identify any Invariant Sections then there are none.
The "Cover Texts" are certain short passages of text that are listed, as Front-Cover Texts or Back-Cover Texts, in the notice that says that the Document is released under this License. A Front-Cover Text may be at most 5 words, and a Back-Cover Text may be at most 25 words.
A "Transparent" copy of the Document means a machine-readable copy, represented in a format whose specification is available to the general public, that is suitable for revising the document straightforwardly with generic text editors or (for images composed of pixels) generic paint programs or (for drawings) some widely available drawing editor, and that is suitable for input to text formatters or for automatic translation to a variety of formats suitable for input to text formatters. A copy made in an otherwise Transparent file format whose markup, or absence of markup, has been arranged to thwart or discourage subsequent modification by readers is not Transparent. An image format is not Transparent if used for any substantial amount of text. A copy that is not "Transparent" is called "Opaque".
Examples of suitable formats for Transparent copies include plain ASCII without markup, Texinfo input format, LaTeX input format, SGML or XML using a publicly available DTD, and standard-conforming simple HTML, PostScript or PDF designed for human modification. Examples of transparent image formats include PNG, XCF and JPG. Opaque formats include proprietary formats that can be read and edited only by proprietary word processors, SGML or XML for which the DTD and/or processing tools are not generally available, and the machine-generated HTML, PostScript or PDF produced by some word processors for output purposes only.
The "Title Page" means, for a printed book, the title page itself, plus such following pages as are needed to hold, legibly, the material this License requires to appear in the title page. For works in formats which do not have any title page as such, "Title Page" means the text near the most prominent appearance of the work's title, preceding the beginning of the body of the text.
A section "Entitled XYZ" means a named subunit of the Document whose title either is precisely XYZ or contains XYZ in parentheses following text that translates XYZ in another language. (Here XYZ stands for a specific section name mentioned below, such as "Acknowledgements", "Dedications", "Endorsements", or "History".) To "Preserve the Title" of such a section when you modify the Document means that it remains a section "Entitled XYZ" according to this definition.
The Document may include Warranty Disclaimers next to the notice which states that this License applies to the Document. These Warranty Disclaimers are considered to be included by reference in this License, but only as regards disclaiming warranties: any other implication that these Warranty Disclaimers may have is void and has no effect on the meaning of this License.
2. VERBATIM COPYING #
You may copy and distribute the Document in any medium, either commercially or non-commercially, provided that this License, the copyright notices, and the license notice saying this License applies to the Document are reproduced in all copies, and that you add no other conditions whatsoever to those of this License. You may not use technical measures to obstruct or control the reading or further copying of the copies you make or distribute. However, you may accept compensation in exchange for copies. If you distribute a large enough number of copies you must also follow the conditions in section 3.
You may also lend copies, under the same conditions stated above, and you may publicly display copies.
3. COPYING IN QUANTITY #
If you publish printed copies (or copies in media that commonly have printed covers) of the Document, numbering more than 100, and the Document's license notice requires Cover Texts, you must enclose the copies in covers that carry, clearly and legibly, all these Cover Texts: Front-Cover Texts on the front cover, and Back-Cover Texts on the back cover. Both covers must also clearly and legibly identify you as the publisher of these copies. The front cover must present the full title with all words of the title equally prominent and visible. You may add other material on the covers in addition. Copying with changes limited to the covers, as long as they preserve the title of the Document and satisfy these conditions, can be treated as verbatim copying in other respects.
If the required texts for either cover are too voluminous to fit legibly, you should put the first ones listed (as many as fit reasonably) on the actual cover, and continue the rest onto adjacent pages.
If you publish or distribute Opaque copies of the Document numbering more than 100, you must either include a machine-readable Transparent copy along with each Opaque copy, or state in or with each Opaque copy a computer-network location from which the general network-using public has access to download using public-standard network protocols a complete Transparent copy of the Document, free of added material. If you use the latter option, you must take reasonably prudent steps, when you begin distribution of Opaque copies in quantity, to ensure that this Transparent copy will remain thus accessible at the stated location until at least one year after the last time you distribute an Opaque copy (directly or through your agents or retailers) of that edition to the public.
It is requested, but not required, that you contact the authors of the Document well before redistributing any large number of copies, to give them a chance to provide you with an updated version of the Document.
4. MODIFICATIONS #
You may copy and distribute a Modified Version of the Document under the conditions of sections 2 and 3 above, provided that you release the Modified Version under precisely this License, with the Modified Version filling the role of the Document, thus licensing distribution and modification of the Modified Version to whoever possesses a copy of it. In addition, you must do these things in the Modified Version:
Use in the Title Page (and on the covers, if any) a title distinct from that of the Document, and from those of previous versions (which should, if there were any, be listed in the History section of the Document). You may use the same title as a previous version if the original publisher of that version gives permission.
List on the Title Page, as authors, one or more persons or entities responsible for authorship of the modifications in the Modified Version, together with at least five of the principal authors of the Document (all of its principal authors, if it has fewer than five), unless they release you from this requirement.
State on the Title page the name of the publisher of the Modified Version, as the publisher.
Preserve all the copyright notices of the Document.
Add an appropriate copyright notice for your modifications adjacent to the other copyright notices.
Include, immediately after the copyright notices, a license notice giving the public permission to use the Modified Version under the terms of this License, in the form shown in the Addendum below.
Preserve in that license notice the full lists of Invariant Sections and required Cover Texts given in the Document's license notice.
Include an unaltered copy of this License.
Preserve the section Entitled "History", Preserve its Title, and add to it an item stating at least the title, year, new authors, and publisher of the Modified Version as given on the Title Page. If there is no section Entitled "History" in the Document, create one stating the title, year, authors, and publisher of the Document as given on its Title Page, then add an item describing the Modified Version as stated in the previous sentence.
Preserve the network location, if any, given in the Document for public access to a Transparent copy of the Document, and likewise the network locations given in the Document for previous versions it was based on. These may be placed in the "History" section. You may omit a network location for a work that was published at least four years before the Document itself, or if the original publisher of the version it refers to gives permission.
For any section Entitled "Acknowledgements" or "Dedications", Preserve the Title of the section, and preserve in the section all the substance and tone of each of the contributor acknowledgements and/or dedications given therein.
Preserve all the Invariant Sections of the Document, unaltered in their text and in their titles. Section numbers or the equivalent are not considered part of the section titles.
Delete any section Entitled "Endorsements". Such a section may not be included in the Modified Version.
Do not retitle any existing section to be Entitled "Endorsements" or to conflict in title with any Invariant Section.
Preserve any Warranty Disclaimers.
If the Modified Version includes new front-matter sections or appendices that qualify as Secondary Sections and contain no material copied from the Document, you may at your option designate some or all of these sections as invariant. To do this, add their titles to the list of Invariant Sections in the Modified Version's license notice. These titles must be distinct from any other section titles.
You may add a section Entitled "Endorsements", provided it contains nothing but endorsements of your Modified Version by various parties--for example, statements of peer review or that the text has been approved by an organization as the authoritative definition of a standard.
You may add a passage of up to five words as a Front-Cover Text, and a passage of up to 25 words as a Back-Cover Text, to the end of the list of Cover Texts in the Modified Version. Only one passage of Front-Cover Text and one of Back-Cover Text may be added by (or through arrangements made by) any one entity. If the Document already includes a cover text for the same cover, previously added by you or by arrangement made by the same entity you are acting on behalf of, you may not add another; but you may replace the old one, on explicit permission from the previous publisher that added the old one.
The author(s) and publisher(s) of the Document do not by this License give permission to use their names for publicity for or to assert or imply endorsement of any Modified Version.
5. COMBINING DOCUMENTS #
You may combine the Document with other documents released under this License, under the terms defined in section 4 above for modified versions, provided that you include in the combination all of the Invariant Sections of all of the original documents, unmodified, and list them all as Invariant Sections of your combined work in its license notice, and that you preserve all their Warranty Disclaimers.
The combined work need only contain one copy of this License, and multiple identical Invariant Sections may be replaced with a single copy. If there are multiple Invariant Sections with the same name but different contents, make the title of each such section unique by adding at the end of it, in parentheses, the name of the original author or publisher of that section if known, or else a unique number. Make the same adjustment to the section titles in the list of Invariant Sections in the license notice of the combined work.
In the combination, you must combine any sections Entitled "History" in the various original documents, forming one section Entitled "History"; likewise combine any sections Entitled "Acknowledgements", and any sections Entitled "Dedications". You must delete all sections Entitled "Endorsements".
6. COLLECTIONS OF DOCUMENTS #
You may make a collection consisting of the Document and other documents released under this License, and replace the individual copies of this License in the various documents with a single copy that is included in the collection, provided that you follow the rules of this License for verbatim copying of each of the documents in all other respects.
You may extract a single document from such a collection, and distribute it individually under this License, provided you insert a copy of this License into the extracted document, and follow this License in all other respects regarding verbatim copying of that document.
7. AGGREGATION WITH INDEPENDENT WORKS #
A compilation of the Document or its derivatives with other separate and independent documents or works, in or on a volume of a storage or distribution medium, is called an "aggregate" if the copyright resulting from the compilation is not used to limit the legal rights of the compilation's users beyond what the individual works permit. When the Document is included in an aggregate, this License does not apply to the other works in the aggregate which are not themselves derivative works of the Document.
If the Cover Text requirement of section 3 is applicable to these copies of the Document, then if the Document is less than one half of the entire aggregate, the Document's Cover Texts may be placed on covers that bracket the Document within the aggregate, or the electronic equivalent of covers if the Document is in electronic form. Otherwise they must appear on printed covers that bracket the whole aggregate.
8. TRANSLATION #
Translation is considered a kind of modification, so you may distribute translations of the Document under the terms of section 4. Replacing Invariant Sections with translations requires special permission from their copyright holders, but you may include translations of some or all Invariant Sections in addition to the original versions of these Invariant Sections. You may include a translation of this License, and all the license notices in the Document, and any Warranty Disclaimers, provided that you also include the original English version of this License and the original versions of those notices and disclaimers. In case of a disagreement between the translation and the original version of this License or a notice or disclaimer, the original version will prevail.
If a section in the Document is Entitled "Acknowledgements", "Dedications", or "History", the requirement (section 4) to Preserve its Title (section 1) will typically require changing the actual title.
9. TERMINATION #
You may not copy, modify, sublicense, or distribute the Document except as expressly provided for under this License. Any other attempt to copy, modify, sublicense or distribute the Document is void, and will automatically terminate your rights under this License. However, parties who have received copies, or rights, from you under this License will not have their licenses terminated so long as such parties remain in full compliance.
10. FUTURE REVISIONS OF THIS LICENSE #
The Free Software Foundation may publish new, revised versions of the GNU Free Documentation License from time to time. Such new versions will be similar in spirit to the present version, but may differ in detail to address new problems or concerns. See https://www.gnu.org/copyleft/.
Each version of the License is given a distinguishing version number. If the Document specifies that a particular numbered version of this License "or any later version" applies to it, you have the option of following the terms and conditions either of that specified version or of any later version that has been published (not as a draft) by the Free Software Foundation. If the Document does not specify a version number of this License, you may choose any version ever published (not as a draft) by the Free Software Foundation.
ADDENDUM: How to use this License for your documents #
Copyright (c) YEAR YOUR NAME.
Permission is granted to copy, distribute and/or modify this document
under the terms of the GNU Free Documentation License, Version 1.2
or any later version published by the Free Software Foundation;
with no Invariant Sections, no Front-Cover Texts, and no Back-Cover Texts.
A copy of the license is included in the section entitled “GNU
Free Documentation License”.
If you have Invariant Sections, Front-Cover Texts and Back-Cover Texts, replace the “with...Texts.” line with this:
with the Invariant Sections being LIST THEIR TITLES, with the
Front-Cover Texts being LIST, and with the Back-Cover Texts being LIST.
If you have Invariant Sections without Cover Texts, or some other combination of the three, merge those two alternatives to suit the situation.
If your document contains nontrivial examples of program code, we recommend releasing these examples in parallel under your choice of free software license, such as the GNU General Public License, to permit their use in free software.
