3 Installing the Operating System #
The following section provides instructions for installing the base operating system. Using the installation workflow, you can install either using a local installation medium or over the network. Alternatively, you can install using AutoYaST.
3.1 Using the Installation Workflow #
The installation workflow is a guided installation of the operating system with optimized settings for SAP applications. During the installation workflow, you can choose whether you want to install an SAP application. If so, you will be asked to provide SAP installation media when the SUSE Linux Enterprise Server installation is finished. You can also choose whether to install third-party extensions.
This section assumes that you are starting the installation from a local medium. To learn how to start the installation from a remote medium, see Section 3.2, “Using SLES for SAP media from the Network”.
For more information, see Section 2.5, “Overview of the Installation Workflow”.
This section guides you through the installation of the SUSE Linux Enterprise Server for SAP applications operating system.
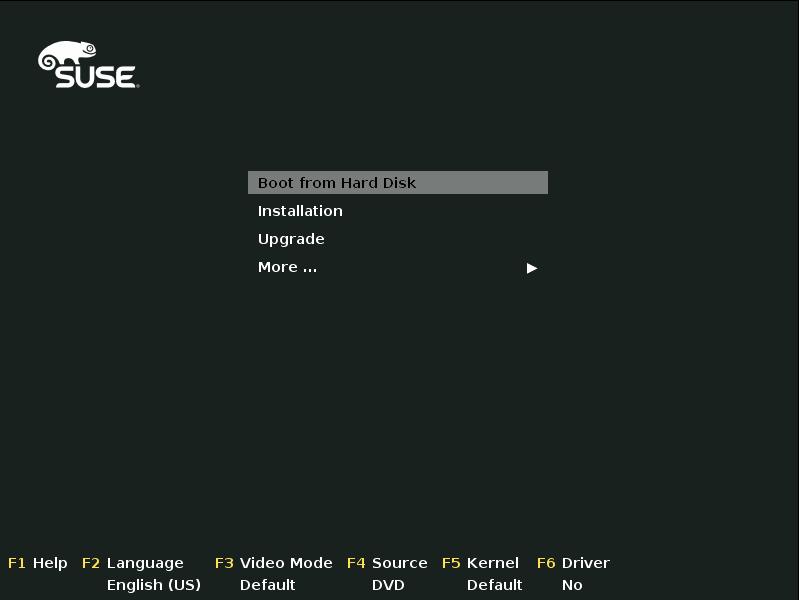
On AMD64/Intel 64, boot from the DVD. From the DVD boot menu, select .
On POWER, follow the instructions in the SUSE Linux Enterprise Server documentation, see Deployment Guide, Part “Installation Preparation”, Chapter “Installation on IBM POWER” (https://documentation.suse.com/sles-12).
While the initial operating system is starting, you can view boot messages by pressing Esc. When this process has completed, the graphical installation workflow will start.
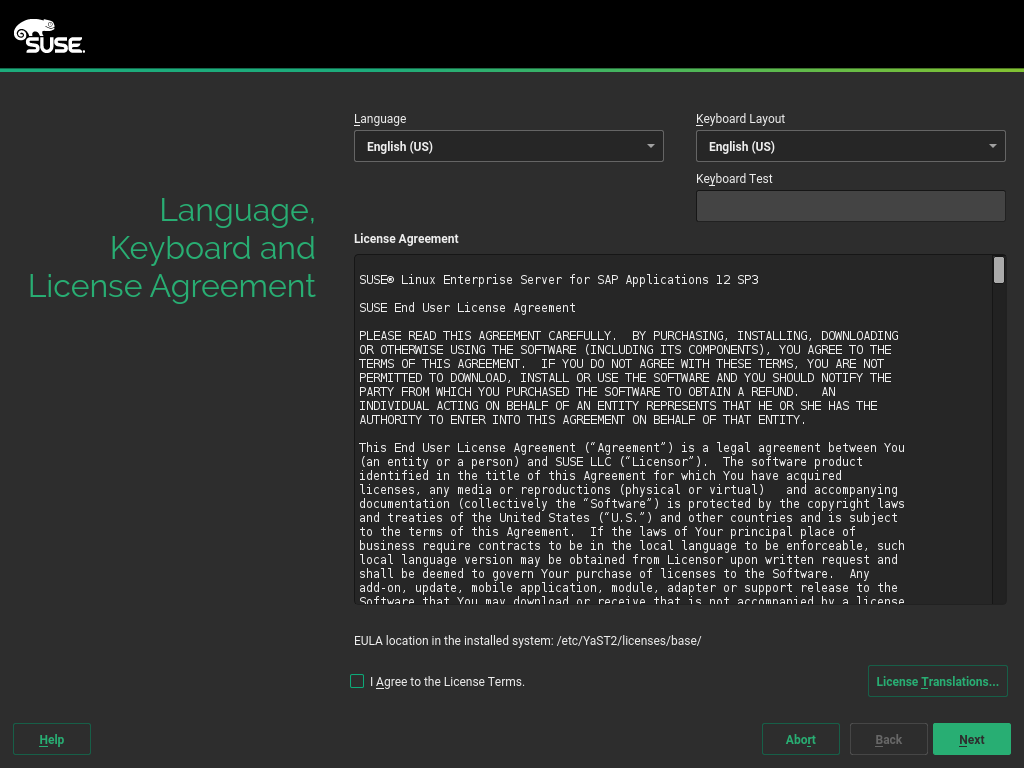
Select the default system language under .
Figure 3.2: Language, Keyboard and License Agreement #Select the appropriate keyboard layout under . To test whether the selected layout matches your physical keyboard, use the text box .
Read the license agreement. If you agree, select . Proceed with .
Otherwise, cancel the installation with › .
(Optional) If automatic network configuration via DHCP fails, the screen will open.
If instead the screen appears, your network connection works. To change network settings anyway, click .
When you are finished configuring networking, proceed with .
Important: Configure Networking as Recommended by SAPMake sure to configure the network connection as recommended in the documentation provided to you by SAP.
For information about configuring networking, see Administration Guide, Chapter “Basic Networking”, Section “Configuring a Network Connection with YaST” (https://documentation.suse.com/sles-12).
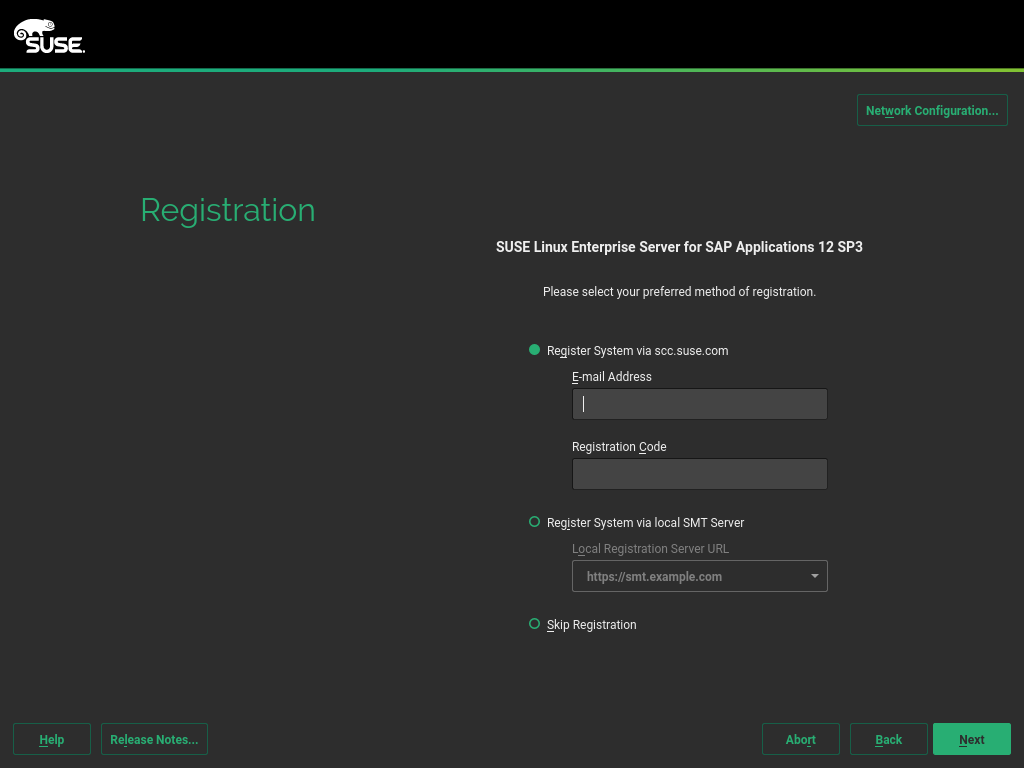
On the screen , enter your and . Successful registration is a prerequisite for receiving product updates and the entitlement to technical support.
Proceed with .
Important: Register at This StepMake sure to register your system at this step in the installation. Otherwise, you will not receive package updates immediately.
Figure 3.3: Registration #When asked whether to enable update repositories, choose .
After the system is successfully registered, YaST lists additional software that is available for your product from the SUSE Customer Center. The list contains modules, which are free, and extensions, which require a registration key that is liable for costs. To enable a module or an extension, activate its entry.
Proceed with .
The following screen allows you to choose the . You can now choose between:
A SUSE Linux Enterprise Server Installation. To install a SLES system without SAP-specific customization, choose . For details, see Installation Quick Start, Section “Installing SUSE Linux Enterprise Server” (https://documentation.suse.com/sles-12).
Important: Installing Oracle DatabasesTo be able to install an Oracle database later, choose and later convert your installation to SLES for SAP.
This is necessary because the installer for Oracle databases queries for the existence of certain files, not all of which are included in a SLES for SAP installation.
For more information about converting, see Section 3.4, “Converting a SLES Installation to a SLES for SAP Installation”.
A SUSE Linux Enterprise Server for SAP applications Installation. To install a SLES system with SAP-specific customization, choose .
To install an SAP Application together with the system, activate .
To enable RDP access (Remote Desktop Protocol) to this machine, activate .
For more information about connecting via RDP, see Chapter 12, Connecting via RDP.
Proceed with .
Figure 3.4: Installation Type #
You can now choose whether to install an . Proceed with .
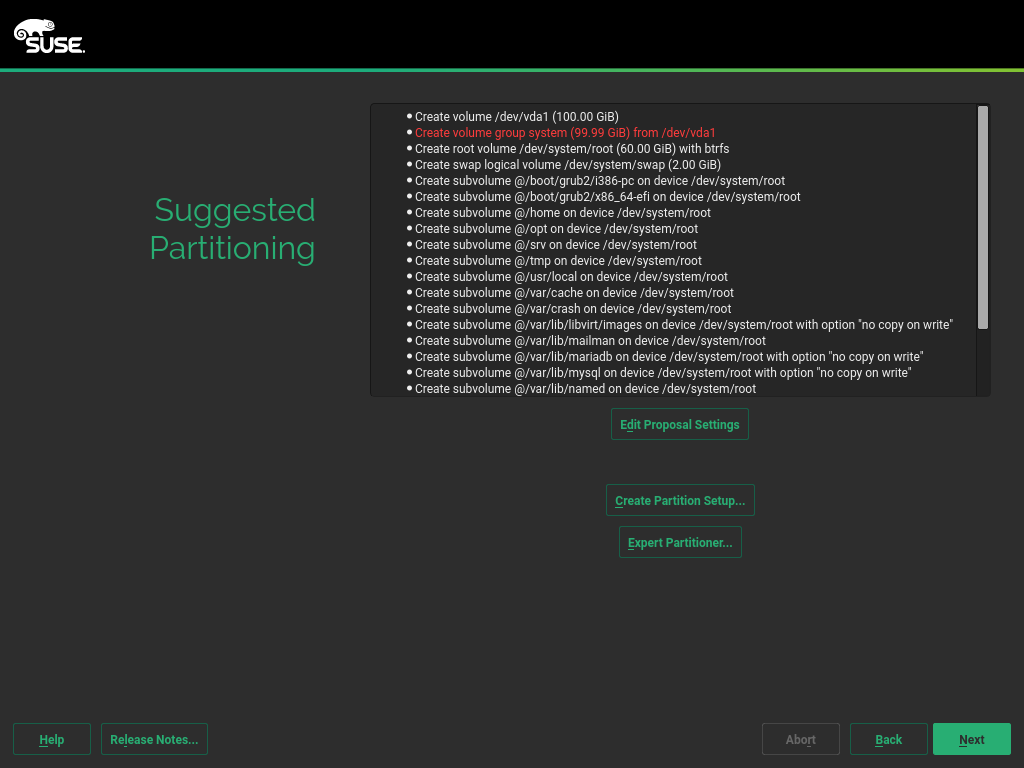
Review the proposed partition setup for the volumes
/dev/system/rootand/dev/system/swap. The volume/dev/system/datawill be created later, as described in Section 2.7, “Partitioning”.Suitable values are preselected. However, if necessary, change the partition layout. You have the following options:
Allows you to change the options for the proposed settings, but not the suggested partition layout itself.
Select a disk to which to apply the proposal.
Open the described in Deployment Guide, Chapter “Advanced Disk Setup”, Section “Using the YaST Partitioner” (https://documentation.suse.com/sles-12).
For partitioning advice specific to SUSE Linux Enterprise Server for SAP applications, see Section 2.7, “Partitioning”.
To accept the proposed setup without changes, proceed with .
Figure 3.5: Suggested Partitioning #Note: Release NotesFrom this point on, the Release Notes can be viewed from any screen during the installation process by selecting .
Select the clock and time zone to use on your system. To manually adjust the time or to configure an NTP server for time synchronization, choose . For detailed information, see Deployment Guide, Chapter “Installation with YaST”, Section “Clock and Time Zone” (https://documentation.suse.com/sles-12).
Proceed with .
Type a password for the system administrator account (called
root) and repeat the password under . You can use the text box to make sure that all special characters appear correctly.For more information, see Deployment Guide, Chapter “Installation with YaST”, Section “Password for the System Administrator root” (https://documentation.suse.com/sles-12).
Proceed with .
Important: Do Not Forget therootPasswordThe user
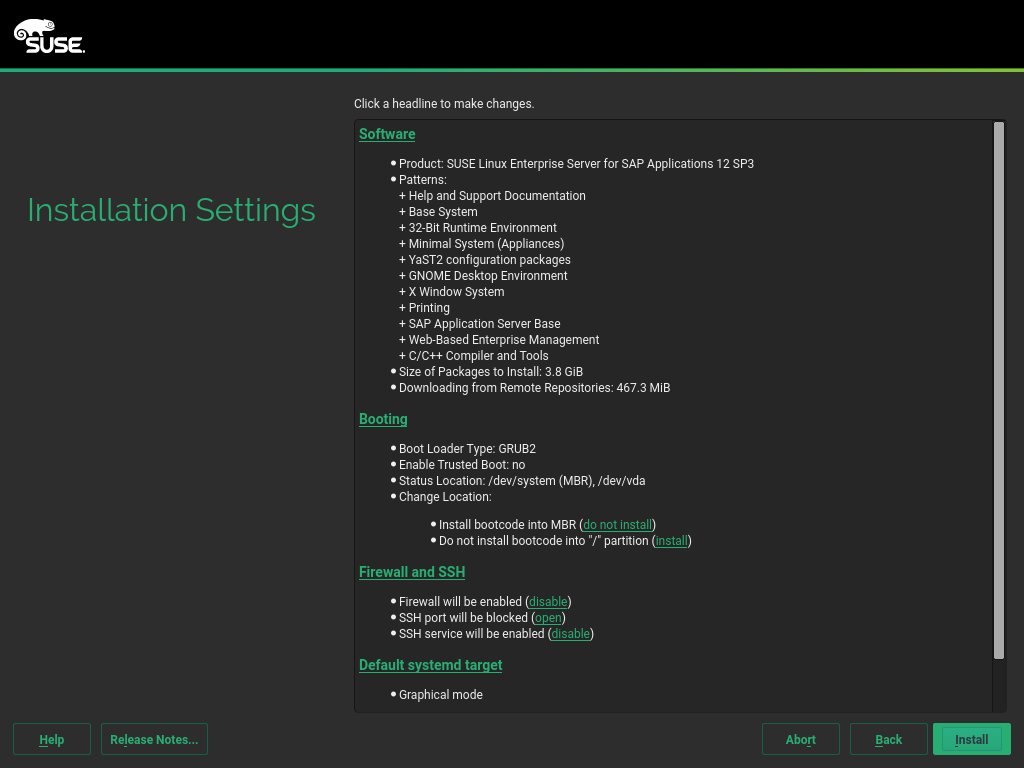
roothas the permission to carry out all administrative tasks. Without this password, you cannot log in to the system asroot. The password entered here cannot be retrieved later.On the screen , you can review and, if necessary, change several proposed installation settings. Each setting is shown alongside its current configuration. To change parts of the configuration, click the appropriate headline or other underlined items.
Important: Firewall ConfigurationThe software firewall of SLES for SAP is enabled by default. However, often, the ports your SAP product requires to be open are not opened automatically. This means that there may be network issues until you open the required ports manually.
For details, see Section 9.1, “Configuring SuSEfirewall2”.
Figure 3.6: Installation Settings #When you are satisfied with the system configuration, click .
Depending on your software selection, you may need to agree to further license agreements before you are asked to confirm that you want to start the installation process.
Warning: Deletion of DataThe installation process fully or partially overwrites existing data on the disk.
In the installation confirmation box, click .
When the installation of the operating system is finished, the system will reboot automatically:
If you chose to only prepare the system for installation, the system will boot to a desktop login screen.
If you chose to install an SAP application immediately after the operating system, the installation will continue after the reboot.
In this case, continue with Chapter 4, Installing SAP Applications.
3.2 Using SLES for SAP media from the Network #
This section provides a short description of how to install from an installation medium served over the network. This allows, for example, using a regular SLES medium to install SLES for SAP.
Copy the content of the SUSE Linux Enterprise Server for SAP applications DVD to a Web server (for example,
example.com), to the directory/srv/www/htdocs/sap_repo.Boot from a SUSE DVD.
Select one of the boot menu options using the keys ↓/↑. Then add to the command line. To do so, specify the parameters listed below:
To allow network usage, add
ifcfg=*=dhcp(though this should be the default).Add the parameter
install=SERVER/DIRECTORY.
Follow the instructions in Section 3.1, “Using the Installation Workflow”.
For more information, see Deployment Guide, Chapter “Remote Installation” (https://documentation.suse.com/sles-12).
To avoid having to use a DVD to initialize the system, you can boot over the network via PXE. For details, see AutoYaST Guide, Chapter “Booting via PXE over the Network” (https://documentation.suse.com/sles-12).
3.3 Using an External AutoYaST Profile #
For more information about installing with AutoYaST, see:
Deployment Guide, Part “Automated Installations”, Chapter “Automated Installation” (https://documentation.suse.com/sles-12).
AutoYaST Guide (https://documentation.suse.com/sles-12).
For more information about partitioning for SAP applications with AutoYaST, see Section 2.7, “Partitioning”.
If you plan to deploy SUSE Linux Enterprise Server for SAP applications from a SUSE Manager server, refer to SUSE Manager “Reference Manual”, “Systems”, “Autoinstallation” and SUSE Manager “Advanced Topics”, Chapter “Minimalist AutoYaST Profile for Automated Installations and Useful Enhancements” (https://documentation.suse.com/suma;).
3.4 Converting a SLES Installation to a SLES for SAP Installation #
To convert an installation of SUSE Linux Enterprise Server 12 SP5 or JeOS
12 SP5 to an installation of SLES for SAP, use the script
Migrate_SLES_to_SLES-for-SAP.sh. The script will
register the system correctly and subscribe it to the appropriate
repositories.
Make sure that you have an e-mail address for registration and a registration code for SLES for SAP.
Execute the following command to install the required packages:
#zypper in perl-XML-Twig migrate-sles-to-sles4sapExecute the following command:
#Migrate_SLES_to_SLES-for-SAP.shWhen asked to confirm to continue the migration, press Y, then Enter.
When asked, type the e-mail address to use for registration, then press Enter.
When asked, type the registration key, then press Enter.
Wait until the script is finished. Afterward, you are subscribed to the SUSE Linux Enterprise Server for SAP applications software repositories and the package SLES-release is removed in favor of SLES_SAP-release.
The script does not install all packages that are included with a default SLES for SAP installation. However, you can install these yourself manually. To install the default package selection, use:
#zypper in patterns-sles-sap_server
