4 Installing SAP applications #
This section guides you through the installation of SAP media sets you received from SAP.
If you are installing an SAP application within the installation workflow, continue with Section 4.2, “First steps”.
If you are installing an SAP application within an installed system, continue with Section 4.3, “Using the SAP Installation Wizard”.
4.1 Products that can be installed using SAP Installation Wizard #
Using the SAP Installation Wizard, you can install stand-alone SAP HANA database instances. Additionally, the following SAP products (along with a database) can be installed using the SAP Installation Wizard:
SAP S/4HANA, on-premise edition 1511
SAP NetWeaver 7.5
SAP NetWeaver 7.4 Support Release 2
SAP NetWeaver 7.4 Support Release 1
SAP NetWeaver 7.4
SAP Enhancement Package 1 for SAP NetWeaver 7.3
SAP NetWeaver 7.3
SAP NetWeaver Composition Environment (CE) 7.2
SAP EHP1 for SAP NetWeaver Composition Environment (CE) 7.1
SAP NetWeaver Composition Environment (CE) 7.1
SAP EHP1 for SAP NetWeaver Mobile/Banking 7.1
SAP EHP1 SAP NetWeaver Process Integration 7.1
SAP EHP1 for SAP NetWeaver Adaptive Computing Controller 7.1
SAP NetWeaver Mobile/Banking 7.1
SAP NetWeaver Process Integration 7.1
SAP NetWeaver Adaptive Computing Controller 7.1
SAP Business Suite powered by SAP HANA
SAP Business Suite 7i 2016
SAP Business Suite 7i 2013 Support Release 2
SAP Business Suite 7i 2013 Support Release 1
SAP Business Suite 7i 2011 Java
SAP Business Suite 7i 2010 Java
SAP Business Suite 7 Support Release 1 Java
SAP Solution Manager 7.2 Support Release 1
SAP Solution Manager 7.1 powered by SAP HANA
SAP NetWeaver AS ABAP 7.4, OEM version 1.0
The SAP Installation Wizard does not allow installing products together with Oracle databases. To install an Oracle database, install the base product SUSE Linux Enterprise Server first, then install the Oracle database and later convert your installation to SLES for SAP. This is necessary because the Oracle databases installer queries for the existence of certain files, not all of which are included in a SLES for SAP installation.
For more information about converting, see Section 3.4, “Converting an SLES installation to an SLES for SAP installation”.
4.2 First steps #
These first steps are only relevant during the installation workflow.
When the system is booted, it displays the screen . Proceed with .
The screen will now open. This gives you an opportunity to change the network settings.
When you are finished configuring networking, proceed with .
Important: Configure networking as recommended by SAPMake sure to configure the network connection according to the documentation of your SAP application.
For information about configuring networking, see Administration Guide, Chapter “Basic Networking”, Section “Configuring a Network Connection with YaST” (https://documentation.suse.com/sles-15).
(While the next screen loads, the screen may appear again for a few seconds.)
Choose one of the following options:
Allows installing an SAP application and setting up the system as a server providing SAP installation routines to other systems.
Continue with Section 4.3, “Using the SAP Installation Wizard”.
Create an SAP HANA file system on SAP BusinessOne-certified hardware.
Important: Hardware requirementsMake sure your machine fulfills the hardware requirements for SAP HANA detailed in Section 2.1, “Hardware requirements”. Otherwise, this option will not create a new file system and the installation workflow ends at this point.
Do not install an SAP application and continue to the login screen of SUSE Linux Enterprise Server for SAP applications.
Proceed with .
4.3 Using the SAP Installation Wizard #
Use the SAP Installation Wizard to install an SAP NetWeaver system (including database) or an SAP HANA system.
To install other SAP applications or to create a more advanced SAP HANA setup, directly use one of the installation methods provided by SAP instead of this wizard.
This process is documented as it appears during the installation workflow. However, it also applies to the YaST module which is available in the installed system.
To start the SAP Installer, from the desktop, choose › › , continue in the YaST control center by choosing › .
The SAP Installation Wizard configuration is specified and
documented in
/etc/sysconfig/sap-installation-wizard. You can
change it according to your needs.
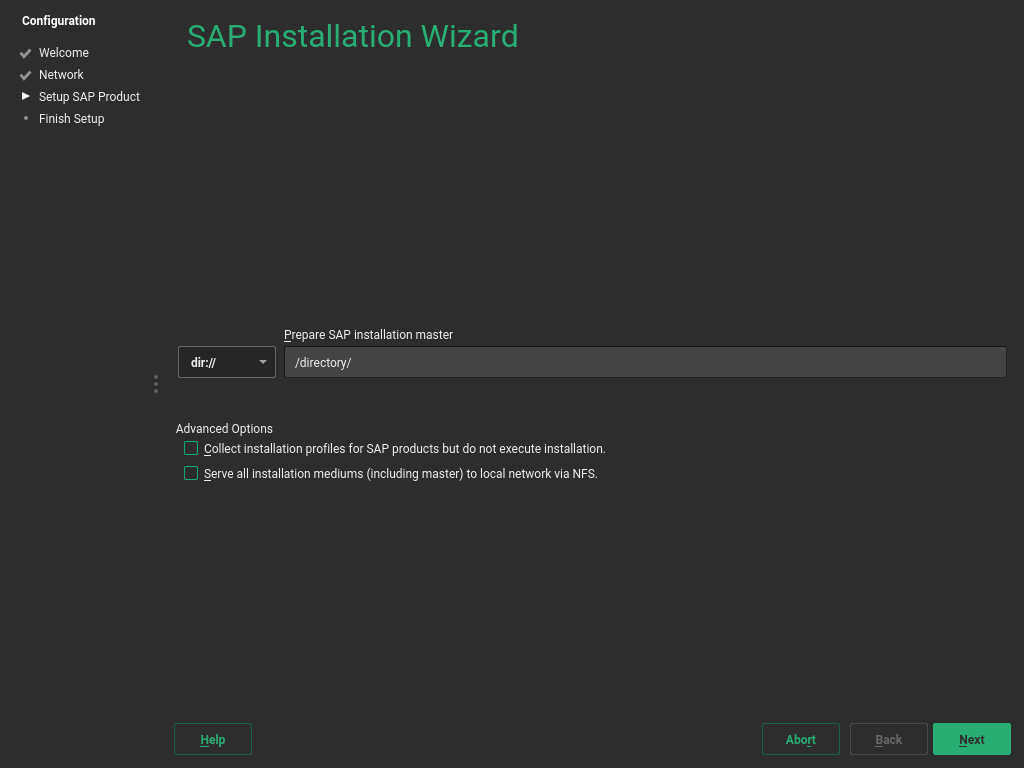
In the screen , provide the (Figure 4.1, “Location of SAP installation master”). The location can either be a local, removable, or remote installation source.
Figure 4.1: Location of SAP installation master #Select the appropriate option from the drop-down box. In the text box, specify the path to your source according to the format given in the following table.
Table 4.1: Media source path #Option
Description
Format of Path
Local Sources a local directory
/path/to/dir/Removable Sources a locally connected hard disk
devicename/path/to/dir/on/devicea USB mass storage device
/path/to/dir/on/USBa CD or DVD
//Remote Sources an NFS share
server_name/path/to/dir/on/devicean SMB share
[user_name:password@]server_name//path/to/dir/on/server[?workgroup=workgroup_name]Tip: Remote location specificationTo install from an NFS source, specify the name of the server and the complete path to the media data. For information about setting up a remote installation server, see Chapter 6, Setting up an installation server for SAP media sets.
If you have installed an SAP application from an installation server before or set up your system to be an installation server, you can also directly choose that server as the provider of the Installation Master. To do so, use the drop-down box below .
Under , choose from the following options:
Use this option to set the installation parameters, but not perform the actual installation. With this option, the SAP Installer (SAPinst) will stop without performing the actual SAP product installation. However, the steps that follow fully apply.
For more information, see Section 4.4, “Continuing an installation using an installation profile”.
Set up this system as an installation server for other SUSE Linux Enterprise Server for SAP applications systems. The media copied to this installation server will be offered through NFS and can be discovered via Service Location Protocol (SLP).
Proceed with .
The SAP Installation Wizard will now copy the Installation Master to your local disk. Depending on the type of Installation Master you selected, the installation will continue differently:
If you are installing an SAP HANA database, skip ahead to Step 8.
If you are installing an SAP NetWeaver application, continue with the next step.
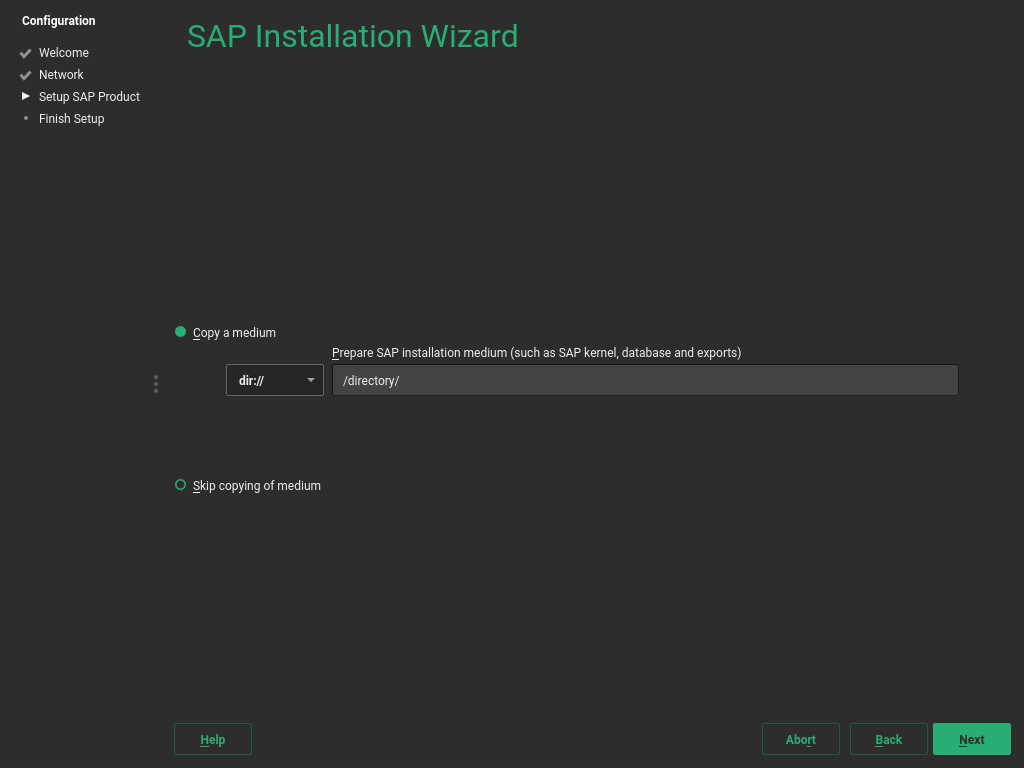
On the screen , provide the location of additional Installation Media you want to install. This can include an SAP kernel, a database, and database exports.
Specify a path to additional Installation Media. For more information about specifying the path, see Table 4.1, “Media source path”.
Do not copy additional Installation Media. Choose this option if you do not need additional Installation Media or to install additional Installation Media directly from their source, for example CDs/DVDs or flash disks.
When choosing this option despite your SAP product requiring additional Installation Media, you will later need to provide the SAP Installer (SAPinst) with the relevant paths.
Proceed with .
If you chose to copy Installation Media, the SAP Installation Wizard will copy the relevant files to your local hard disk.
Figure 4.2: SAP Installation Wizard: additional Installation Media #After copying the Installation Media, you will be asked whether you want to prepare additional Installation Media. To do so, click . Then follow the instructions in Step 3.
Otherwise, click .
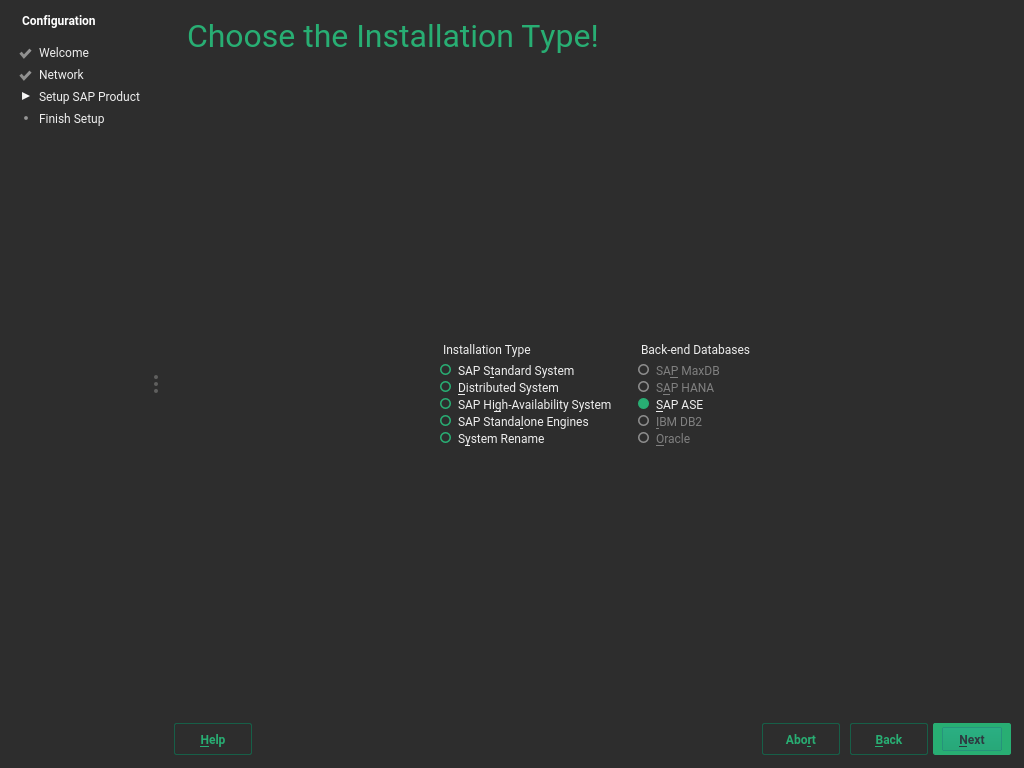
In the screen , under , choose how you want to install the product:
Install an SAP application including its database.
Engines that add functionality to a standard product: SAP TREX, SAP Gateway, and Web Dispatcher.
An SAP application that is separated onto multiple servers.
Installation of SAP NetWeaver in a high-availability setup.
Allows changing the various system properties such as the SAP system ID, database ID, instance number, or host name. This can be used to install the same product in a very similar configuration on different systems.
Figure 4.3: SAP Installation Wizard: installation type and database #If you selected , , or , additionally choose a back-end database under .
Proceed with .
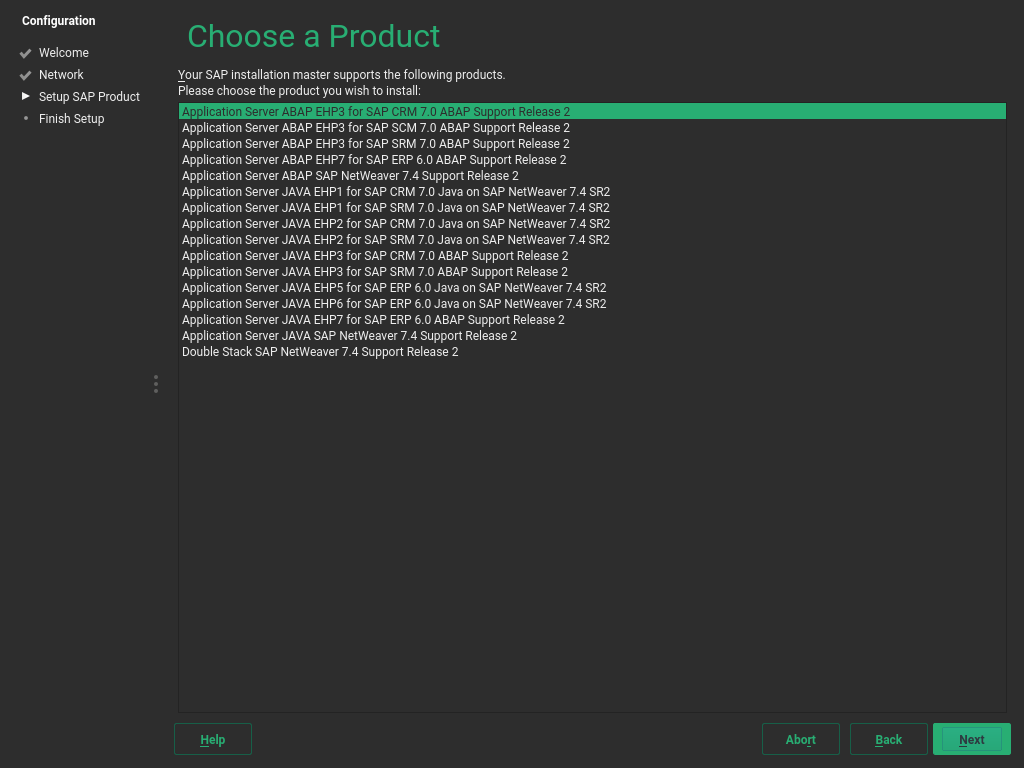
You will now see the screen . The products shown depend on the Media Set and Installation Master you received from SAP. From the list, select the product you want to install.
Proceed with .
Figure 4.4: SAP Installation Wizard: choose a product #You will be asked whether to copy Supplementary Media or Third-Party Media. To do so, click and then follow the instructions in Step 3.
Otherwise, click .
Note: Difference between Supplementary Media/Third-Party Media and additional software repositoriesBoth types of delivery mechanisms allow installing software that is neither part of the SUSE Linux Enterprise Server for SAP applications media nor part of your Media Set from SAP. However, the delivery mechanism is different:
Supplementary Media/Third-Party Media is installed using an AutoYaST file which allows creating an installation wizard and custom installation scripts.
Additional software repositories are RPM package repositories that you will remain subscribed to. This means you receive updates for Third-Party Media along with your regular system updates.
For information on creating Supplementary Media, see Appendix C, Supplementary Media.
On the screen , you can add further software repositories. For example, for add-ons that are packaged as RPM. To do so, click . For more information about adding repositories, see Deployment Guide, Chapter “Installing and Removing Software”, Section “Adding Software Repositories” (https://documentation.suse.com/sles-15).
Proceed with .
Note: Location of copied SAP mediaAt this point, all data required for the SAP installation has been copied to
/data/SAP_CDs(unless you chose to skip the process of copying). Each Installation Medium is copied to a separate directory. You might find the following directory structure, for example:>ls /data/SAP_CDs 742-KERNEL-SAP-Kernel-742 742-UKERNEL-SAP-Unicode-Kernel-742 RDBMS-MAX-DB-LINUX_X86_64 SAP-NetWeaver-740-SR2-Installation-Export-CD-1-3 SAP-NetWeaver-740-SR2-Installation-Export-CD-2-3 SAP-NetWeaver-740-SR2-Installation-Export-CD-3-3/data/SAP_CDsis the default directory as specified in the/etc/sysconfig/sap-installation-wizardconfiguration file.Depending on the product you are installing, one or more dialogs will prompt you to supply values for several configuration parameters for the SAP application you are installing.
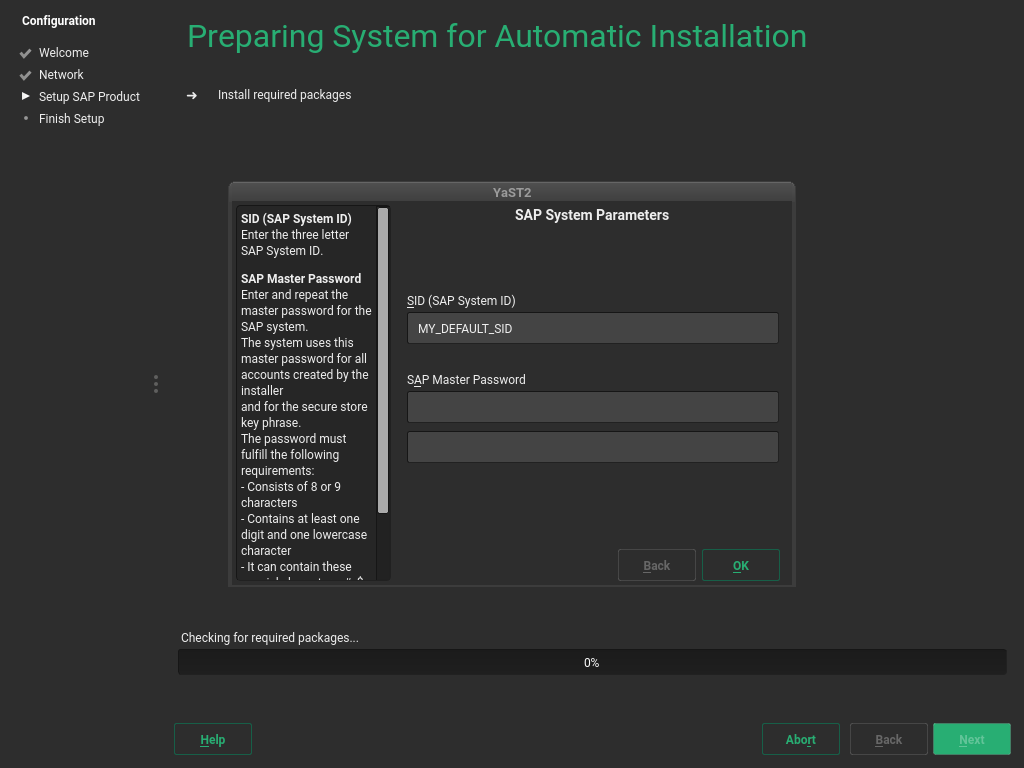
Supply the values as described in the documentation provided to you by SAP. Help for the configuration parameters is also available on the left side of the dialog. For more information, see Section 2.6, “Required data for installing”.
Fill out the form (or forms), then proceed with .
Figure 4.5: Product parameters #When you are done, the SAP Installation Wizard will download additional software packages.
You will be asked whether to continue the installation or prepare another SAP product for installation. If you choose to prepare another SAP product, start from the beginning of this procedure.
(Optional) When installing SAP HANA on a system that is not certified for SAP HANA and does not meet the minimum hardware requirements for SAP HANA TDI (Tailored Datacenter Integration), you will be asked whether to continue. If you receive this message unexpectedly, check Section 2.1, “Hardware requirements” and the sizing guidelines from SAP at https://service.sap.com/sizing (you need your SAP ID to access the information).
Otherwise, continue with .
The following steps differ depending on the type of SAP application you are installing:
When installing an SAP HANA database, SAP HANA will now be installed without further question.
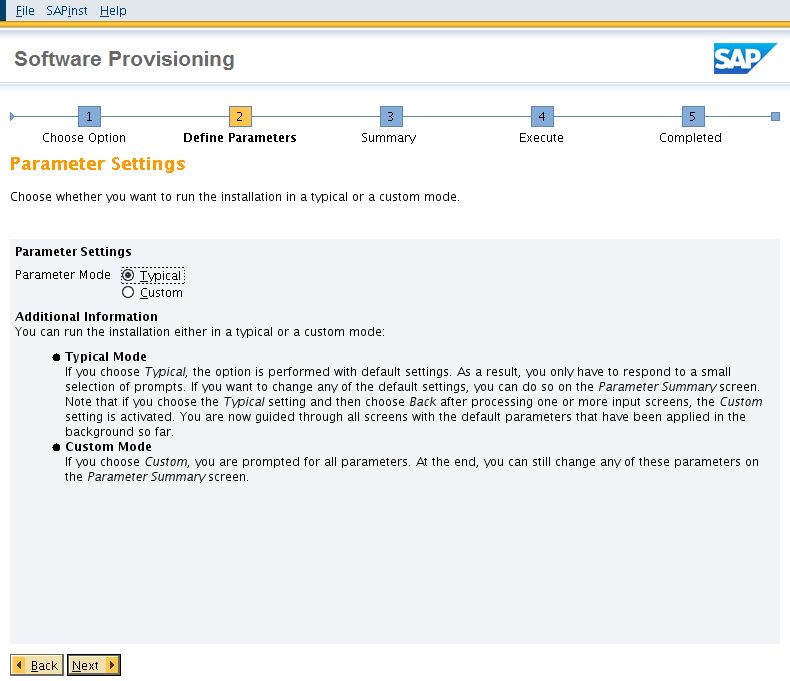
When installing an SAP NetWeaver application, the actual installation will be performed using the SAP Installer (SAPinst). After a few seconds, SAP Installer will open automatically.
Follow the SAP Installer as described in the documentation provided by SAP. Most configuration parameters are correctly filled already.
Figure 4.6: SAP Installer: defining parameters #Tip: Installation log filesIf the installation of the SAP application fails, refer to the installation log files. They are located in
/var/adm/autoinstall. Failed installations are recorded in files with names ending in.err.For more information about log files, see Chapter 14, Important log files.
The final screen is .
To create an AutoYaST file for this installation, activate . The AutoYaST file will be placed in
/root/autoinst.xml.Click .
4.4 Continuing an installation using an installation profile #
If you chose during the previous run of the SAP Installation Wizard, this section will show you how to continue the installation of the selected SAP applications.
When collecting an installation profile, the SAP Installation Wizard copies
product images to /data/SAP_CDs.
It also prepares an installation environment for every product under the
path /data/SAP_INST:
/data/SAP_INST/0/Instmaster
/data/SAP_INST/1/Instmaster
/data/SAP_INST/2/Instmaster
[...]
These files are re-used in the following. To continue the installation, follow these steps:
In
/etc/sysconfig/sap-installation-wizard, set the following:SAP_AUTO_INSTALL="yes"
In the case of an SAP HANA/SAP BusinessOne installation, the SAP Installation Wizard will later use the parameters documented in the AutoYaST files in
/data/SAP_INST/number.If you need to change any parameters, make sure to adapt the AutoYaST files at this point.
Open the YaST control center and start .
You will be asked whether to continue the pending installation. Select .
All further interactions happen within the SAP Installer. Follow the steps of SAP Installer as described in the documentation provided to you by SAP.
In the case of an SAP NetWeaver installation, all parameters of the SAP Installer will be offered again for fine-tuning.
In the case of an SAP HANA/SAP BusinessOne installation, the installer will not be offer to make any changes to parameters.
4.5 Partitioning for an SAP application without the SAP Installation Wizard #
If you do not want to use the SAP Installation Wizard, you can also create the partitioning
for SAP applications directly from the command line. First, find the
correct partitioning file in the directory
/usr/share/YaST2/include/sap-installation-wizard/ or
create your own partitioning file. For more information, see
Section 2.7.2, “Partitioning for the SAP system (stage 2)”.
When you have determined the correct partitioning XML file, run:
#yast2 sap_create_storage_ng ABSOLUTE_PATH_TO_PARTITIONING_FILE
4.6 Automated installation of SAP applications with AutoYaST #
The SAP Installation Wizard can be used from AutoYaST to automate the installation of SAP Applications.
4.6.1 SAP HANA installation #
The following AutoYaST snippet shows how an SAP HANA or SAP TREX installation can be automated:
<sap-inst>
  <products config:type="list">
    <product>
      <media config:type="list">
        <medium>
          <url>nfs://server/path1</url>
          <type>sap</type>
        </medium>
        <medium>
          <url>nfs://server/path3</url>
          <type>supplement</type>
        </medium>
      </media>
      <sapMasterPW>PASSWORD</sapMasterPW>
      <sid>SID</sid>
      <sapInstNr>INSTANCE_NUMBER</sapInstNr>
      <sapMDC>no</sapMDC>
    </product>
  </products>
</sap-inst>
The
sapMDCelement is only applicable to SAP HANA.The
sapVirtHostnameelement must be specified for distributed or highly available installations.
For a full SAP HANA example, including partitioning, see
/usr/share/doc/packages/sap-installation-wizard/hana-autoyast.xml.
4.6.2 SAP NetWeaver installation #
For SAP NetWeaver, the following example shows how the installation can be
automated. Specifically, this example is tailored to installing ASCS
Instance of an SAP NetWeaver 7.5 ABAP Server distributed system with MaxDB
(product ID NW_ABAP_ASCS:NW750.ADA.ABAP). When
installing other products based on SAP NetWeaver, not all of the following
variables may be necessary or these variables might need to be replaced
by others:
The master password for the SAP NetWeaver instance: MASTER_PASSWORD
The SAP Identifier (SID): SID
The SAP kernel: KERNEL
The SAP instance number: INSTANCE_NUMBER
The ASCS virtual host name: ASCS_VIRTUAL_HOSTNAME
The SCS virtual host name: SCS_VIRTUAL_HOSTNAME
<sap-inst>
  <products config:type="list">
    <product>
      <media config:type="list">
        <medium>
          <url>nfs://SERVER/PATH1</url>
          <type>sap</type>
        </medium>
        <medium>
          <url>nfs://SERVER/PATH2</url>
          <type>sap</type>
        </medium>
        <medium>
          <url>nfs://SERVER/PATH3</url>
          <type>supplement</type>
        </medium>
      </media>
      <productID>NW_ABAP_ASCS:NW750.ADA.ABAP</productID>
      <iniFile>
        <![CDATA[
# Password for the Diagnostics Agent specific <dasid>adm user. Provided value
# may be encoded.
DiagnosticsAgent.dasidAdmPassword =

# Windows domain in which the Diagnostics Agent users must be created.
# The property is Microsoft Windows only. This is an optional property.
DiagnosticsAgent.domain =

# Password for the Diagnostics Agent specific SAPService<DASID> user.
# Provided value may be encoded.
# The property is Microsoft Windows only.
DiagnosticsAgent.sapServiceDASIDPassword =

NW_GetMasterPassword.masterPwd = MASTER_PASSWORD

# Human readable form of the Default Login language - valid names are stored
# in a table of the subcomponent NW_languagesInLoadChecks. Used when freshly
# installing an ABAP stack for the machine that performs an ABAP load (in the
# case of a distributed system, that is the database, otherwise it is used by
# the normal installer). The available languages must be declared in the
# LANGUAGES_IN_LOAD parameter of the product.xml . In this file, the one
# character representation of the languages is used. Check the same table in
# the subcomponent mentioned above.
NW_GetSidNoProfiles.SAP_GUI_DEFAULT_LANGUAGE =

# The drive to use (Windows only)
NW_GetSidNoProfiles.sapdrive =

# The /sapmnt path (Unix only)
NW_GetSidNoProfiles.sapmnt = /sapmnt

# The SAP System ID of the system to install
NW_GetSidNoProfiles.sid = SID

# Will this system be unicode system?
NW_GetSidNoProfiles.unicode = true

NW_SAPCrypto.SAPCryptoFile = /data/SAP_CDs/745-UKERNEL-SAP-Unicode-Kernel-745/DBINDEP/SAPEXE.SAR

NW_SCS_Instance.ascsInstanceNumber =

NW_SCS_Instance.ascsVirtualHostname = ASCS_VIRTUAL_HOSTNAME

NW_SCS_Instance.instanceNumber = INSTANCE_NUMBER

NW_SCS_Instance.scsInstanceNumber =

NW_SCS_Instance.scsMSPort =

NW_SCS_Instance.scsVirtualHostname = SCS_VIRTUAL_HOSTNAME

NW_System.installSAPHostAgent = true

NW_Unpack.igsExeSar =

NW_Unpack.igsHelperSar =

NW_Unpack.sapExeDbSar =

NW_Unpack.sapExeSar =

NW_Unpack.sapJvmSar =

NW_Unpack.xs2Sar =

NW_adaptProfile.templateFiles =

# The FQDN of the system.
NW_getFQDN.FQDN =

# Do we want to set the FQDN for the system?
NW_getFQDN.setFQDN = false

# The path to the JCE policy archive to install into the Java home directory
# if it is not already installed.
NW_getJavaHome.jcePolicyArchive =

hostAgent.domain =

# Password for the SAP Host Agent specific sapadm user. Provided value may be
# encoded.
hostAgent.sapAdmPassword = MASTER_PASSWORD

nwUsers.sapDomain =

nwUsers.sapServiceSIDPassword =

nwUsers.sidadmPassword =
            ]]>
      </iniFile>
    </product>
  </products>
</sap-inst>