3 Customizing Your Settings #
You can change the way the GNOME desktop looks and behaves to suit your own personal tastes and needs. Some possible changes of settings are:
Keyboard and mouse configuration, as described in Section 3.3.3, “Modifying Keyboard Shortcuts” and Section 3.3.4, “Configuring the Mouse and Touchpad”
Desktop background, as described in Section 3.2.1, “Changing the Desktop Background”
Sounds, as described in Section 3.3.7, “Configuring Sound Settings”
These settings and others can be changed in the dialog.
3.1 The GNOME Settings Dialog #
Whereas YaST is a desktop-independent system-wide tool to configure most aspects of your product installation, the settings dialog is a GNOME configuration tool. It focuses on look and feel, personal settings and preferences of your GNOME desktop.
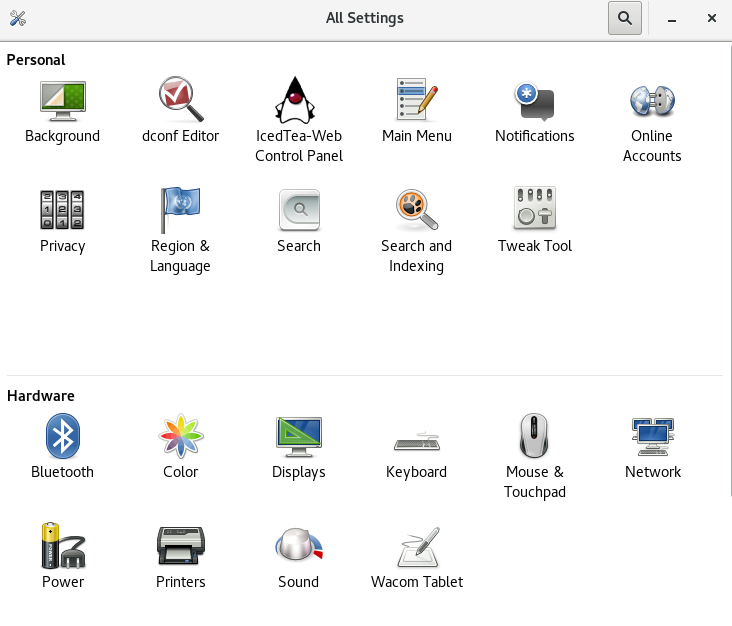
To access the GNOME settings dialog, click › › . The dialog is divided into the following three categories:
From here, you can change the background of your desktop or of the lock screen, and configure language settings. For more information, see Section 3.2, “Personal”.
Allows you to configure hardware components such as monitors, printers, mouses/touchpads, network adapters and sound devices. You can also change key combination settings and set up power-saving features. For more information, see Section 3.3, “Hardware”.
Lets you configure system settings such as date and time, whether to start software when inserting flash disks or whether you want to share your screen with others. You can also set up user accounts. If you want, you can also start YaST from this screen, though it is also available separately from within the menu. For more information, see Section 3.4, “System”.
To change some system-wide settings, the control center will prompt you for
the root password and start YaST. This is mostly
the case for administrator settings (including most of the hardware, the
graphical user interface, Internet access, security settings, user
administration, software installation and system updates and information).
Follow the instructions in YaST to configure these settings. For
information about using YaST, refer to the integrated YaST help texts or
to the
Deployment Guide.
This chapter focuses on individual settings you can change directly in the GNOME settings dialog, without having to use YaST.
3.2 Personal #
The following sections introduce examples of how to configure some personal aspects of your GNOME desktop, like your languages used or desktop backgrounds.
3.2.1 Changing the Desktop Background #
The desktop background is the image or color that is applied to your desktop. You can also customize the image shown when the screen is locked.
To change the desktop background or the lock screen:
Click › › › .
Click or .
Click , , or .
Wallpapers are preconfigured images distributed with your system. Pictures are your own images from your
Picturesdirectory (~/Pictures). Colors are predefined colors chosen by GNOME developers.Choose an option from the list.
When you are satisfied with your choice, click .
3.2.2 Configuring Language Settings #
SUSE Linux Enterprise Server can be configured to use any of several languages. The language setting determines the language of dialogs and menus and can also determine the keyboard and clock layout.
To configure your language settings click › › › .
Here you can choose:
Interface language.
Date and number formats, currency and related options.
Input sources (keyboard layout). For non-alphabetic languages there can be additional settings.
ibus-setup Do Not Take Effect
On GNOME, settings made using ibus-setup do not take
effect. ibus-setup can only be
used to configure IceWM. Instead, always use the
application:
To change input methods, use the panel .
To change the key combination that switches between input methods, use the panel . In it, choose the category and the entry .
3.3 Hardware #
In the following sections you will find examples of how to configure some hardware aspects of your GNOME desktop, including keyboard or mouse preferences, handling of removable drives (and other media) or screen resolution.
3.3.1 Configuring Bluetooth Settings #
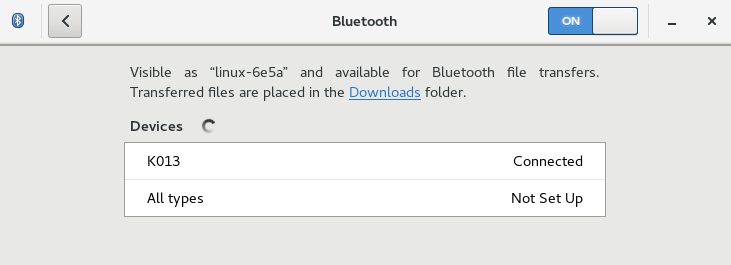
The Bluetooth module lets you set the visibility of your machine over Bluetooth and connect to available Bluetooth devices. To configure Bluetooth connectivity, follow these steps:
Click › › › to open the Bluetooth settings module.
To use Bluetooth, turn the switch on.
To make your computer visible over Bluetooth, turn the switch on. The computer will start searching for other visible Bluetooth devices in the vicinity and display any found devices in the list. At first, the list may be empty.
Note: Temporary VisibilityThe switch is meant to be used only temporarily. You only need to turn it on for the initial setup of a connection to a Bluetooth device. After the connection has been established, turn off the switch.
On the device you want to connect, turn on Bluetooth connectivity and visibility, too.
If the desired device has been found and is shown in the list, click it to establish a connection to it.
You will be asked whether the PINs of the two devices match.
If the PINs match, confirm this on both your computer and the device.
Both are now paired. On your computer, the device in the list is shown as .
Depending on the device type, you can now either see it as a storage device in GNOME Files, set a volume for it in the Sound settings or other things.
To connect to a paired Bluetooth device, select the device in the list. In the dialog that appears, turn the switch on. You can send files to the connected device by using the button. If you are connected to a device such as a mobile phone, you can use it as a network device by activating the appropriate option.
To remove a connected device from the list on your computer, click and confirm your choice. To completely remove the pairing, you also need to do so on your device.
3.3.2 Configuring Power Settings #
Click › › › to open the Power settings module.
In the upper part of the dialog, you can see the current state of the battery.
In the section of the dialog, set the to conserve power. You can also set whether to dim the screen after a period of inactivity and set the time interval. You can also set whether to turn off wireless networking after the period of inactivity.
In the section of the dialog, set the . When you click it, a separate dialog opens.
In it, you can turn on automatic suspending and associated time intervals. If you are using a computer with a battery, you can set these separately for computer running on battery power or plugged in.
You can also set the action performed when the power button is pressed. Choose to use a mode where the computer turns off completely but saves your running session to the hard disk. Alternatively, choose or .
3.3.3 Modifying Keyboard Shortcuts #
To modify keyboard shortcuts click › › › .
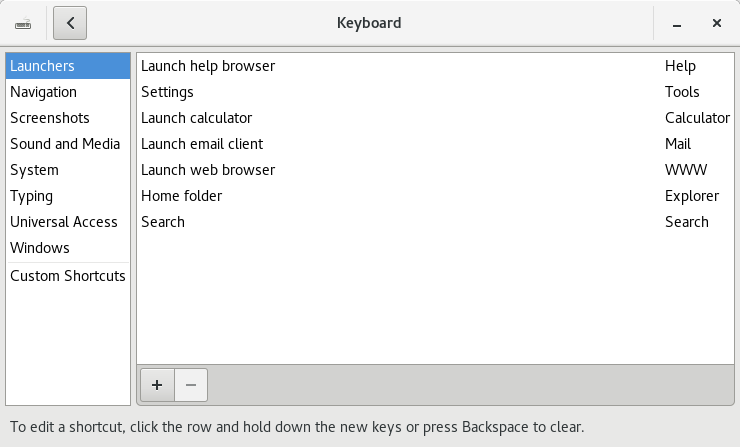
The dialog shows the keyboard shortcuts that are configured for your system. Click the categories on the right to view the current shortcuts.
To edit a key combination, first click the row. To set a new key combination, press the keys. To disable a shortcut, press <— instead.
To configure keyboard accessibility options, refer to Section 4.4, “Mobility Impairments”. To configure your keyboard layout, refer to Section 3.2.2, “Configuring Language Settings”.
3.3.4 Configuring the Mouse and Touchpad #
To modify mouse and touchpad options, click › › › .
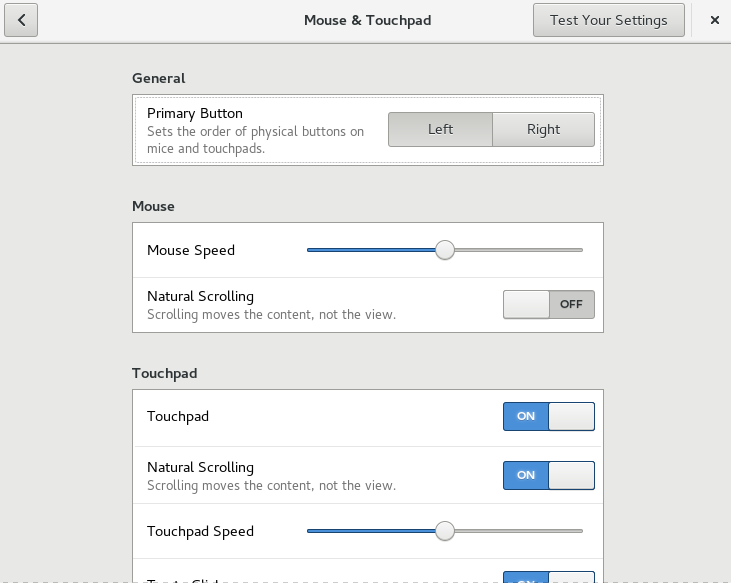
In the section of the dialog, you can set the orientation (left or right).
In the section of the dialog, use to adjust the sensitivity of the mouse pointer.
In the section of the dialog, you can turn the touchpad on and off. Use to adjust the sensitivity of the touchpad pointer. You can also disable the touchpad while typing and enable clicks by tapping the touchpad.
To test your settings, click and try the pointing device.
For configuration of mouse accessibility options, refer to the Section 4.4, “Mobility Impairments”.
3.3.5 Installing and Configuring Printers #
The module lets you connect to any available local or remote CUPS server and configure printers.
To start the Printers module, click › › › . For detailed information, refer to Chapter 6, Managing Printers.
3.3.6 Configuring Screens #
To specify resolution and orientation for your screen or to configure multiple screens, click › › › .
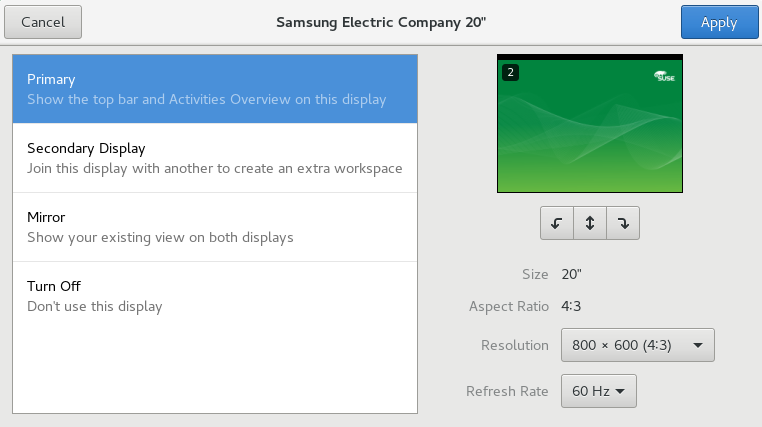
To find the right monitor, look for the numbers displayed in the upper left corner of all monitors after you have opened the dialog. To set options for a monitor, click the list item of the monitor. A new dialog appears.
If multiple monitors are attached to the computer, the left part of the dialog will allow you to choose how to use the monitor. You can choose between:
The screen that shows the panel and important messages.
A monitor that expands the desktop of the primary monitor.
A monitor that mirrors the image on the primary monitor. In terms of resolution, the lowest common denominator will be used.
A screen that is not used.
To rotate the displayed image, use the buttons with the arrows pointing left and right. To mirror the displayed image, use the button with the double arrow icon.
You can set a different resolution by changing the value next to . Not all resolutions provide a sharp and unstretched image. To find the best resolution for your monitor, refer to its manual.
When you are done, click .
The monitors will now readjust. This can take multiple seconds during which the screen can be black or distorted.
Afterward, a confirmation dialog will appear.
If the configuration looks correct, click .
If the configuration is not what you hoped for, click or wait for 20 seconds. The changes will then be reverted.
If you are using multiple screens, set up how they are arranged, so you can use the mouse pointer properly across monitors.
Click .
To find the right monitor, look for the numbers displayed in the upper left corner of all monitors. Click and drag the monitor image around to move it.
When you are done, click .
If the configuration looks correct, click .
If the configuration is not what you hoped for, click or wait for 20 seconds. The changes will then be reverted.
3.3.7 Configuring Sound Settings #
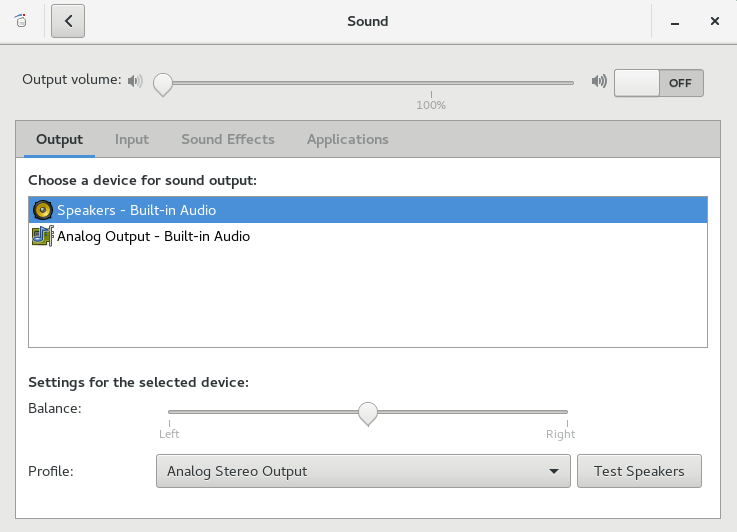
The tool lets you manage sound devices and set the sound effects. In the top part of the dialog, you can select the general output volume or turn the sound off completely.
To open the sound settings, click › › › .
3.3.7.1 Configuring Sound Devices #
Use the tab to select the device for sound output. Below the list, choose the sound device setting you prefer, for example balance.
Use the tab to set the input device volume or to mute the input temporarily. If you have more than one sound device, you can also select a default device for audio input in the list.
3.3.7.2 Configuring Sound Effects #
Use the tab to configure whether and how you want sound to be played when message boxes appear.
Specify the volume at which the sound effects will be played under . You can also turn the effects on and off.
Select the to use.
3.3.8 Networking #
To set up networking options, click › › › .
In the appearing dialog, you can configure wired or wireless connections and proxies and VPNs.
To learn more about setting up network connections, see Chapter 38, Using NetworkManager.
3.4 System #
In the following sections, you will find examples of how to configure some system aspects of your GNOME desktop. These include preferred applications, changing your user password, and session sharing preferences.
To learn more about configuring assistive technologies, see Chapter 4, Assistive Technologies.
3.4.1 Changing Your Password #
For security reasons, it is a good idea to change your login password from time to time. To change your password:
Click › › › .
Click the button labeled with dots next to .
In the first text box, type your current password.
In the next text box, type a new password.
You can also click the cog wheel icon at the end of the text box to generate a random password.
Confirm your new password by typing it again in the last text box.
Click .
3.4.2 Setting Preferred Applications #
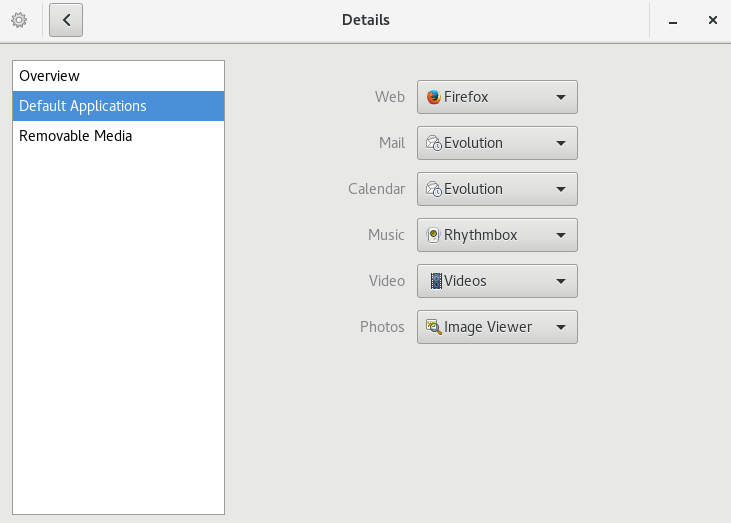
To change the default application for various common tasks such as browsing the Internet, sending mails or playing multimedia files, click › › › .
Figure 3.6: Preferred Applications #Click .
Select one of the available applications from the drop-down box. You can choose an application to handle Web, mail, calendar, music, videos or photographs.
3.4.4 Configuring Administrative Settings with YaST #
For your convenience, YaST is available from the GNOME Settings as well as from the Applications menu. For information about using YaST, refer to Deployment Guide.
