9 Registering SUSE Linux Enterprise and managing modules/extensions #
To get technical support and product updates, you need to register and activate SUSE Linux Enterprise Server with the SUSE Customer Center. It is recommended to register during the installation, since this will enable you to install the system with the latest updates and patches available. However, if you are offline or want to skip the registration step, you can register at any time later from the installed system.
Modules and extensions add features to your system and allow you to customize the system according to your needs. These components also need to be registered and can be managed with YaST or command line tools. For more details also refer to the Modules and Extensions Quick Start.
Registering with the SUSE Customer Center requires a SUSE account. In case you do not have a SUSE account yet, go to the SUSE Customer Center home page (https://scc.suse.com/) to create one.
To completely deregister a system including all modules and extensions use
the command line tool SUSEConnect. Deregistering a system
removes its entry on the registration server and removes all
repositories for modules, extensions, and the product itself.
>sudoSUSEConnect -d
9.1 Registering during the installation #
The easiest and recommended way to register is to do it during the installation. It will not only allow you to install the latest patch level of SUSE Linux Enterprise Server, but you will also get access to all modules and extensions without having to provide an additional installation media. This also applies to all modules or extension you install. For details on the registration process refer to Section 8.7, “Registration”.
If the system was successfully registered during installation, YaST will add online repositories provided by SUSE Customer Center. This prevents problems if local installation sources are no longer available and ensures that you always get the latest updates from the online repositories.
9.2 Registering during automated deployment #
If you deploy your instances automatically using AutoYaST, you can register the system during the installation by providing the respective information in the AutoYaST control file. Refer to Section 4.3, “System registration and extension selection” for details.
9.3 Registering from the installed system #
If you have skipped the registration during the installation or want to
re-register your system, you can do so at any time using the
YaST module or the command line tool
SUSEConnect.
9.3.1 Registering with YaST #
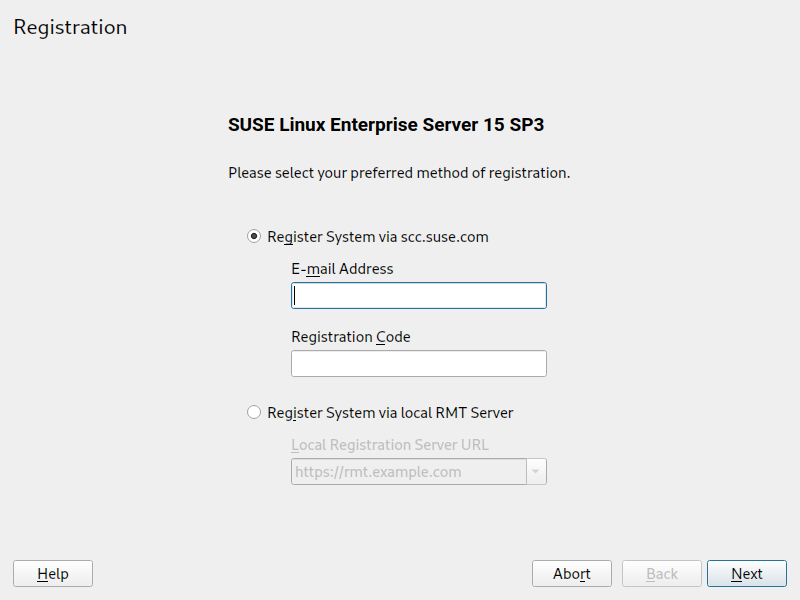
To register the system start › › . First register SUSE Linux Enterprise Server, then choose the modules and extensions you want to make available.
If you have installed the system by skipping the registration and installing from the SLE-15-SP4-Full-ARCH-GM-media1.iso media, make sure to register all the modules and extension you have chosen during the installation. You will only receive security updates and patches for modules and extensions that have been registered.
Start › › .
Provide the associated with the SUSE account you or your organization uses to manage subscriptions. Also enter the you received with your copy of SUSE Linux Enterprise Server.
By default the system is registered with the SUSE Customer Center. Proceed to the next step to make this happen.
If your organization provides local registration servers you can either choose one form the list of auto-detected servers or provide the URL at .
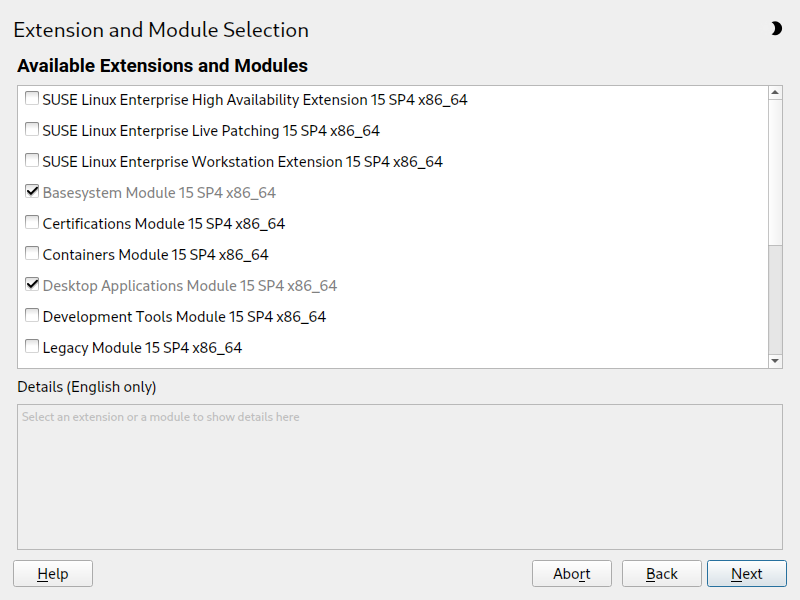
Choose to start the registration process. SUSE Linux Enterprise Server is registered with the chosen server and the associated repositories are added to your system. The dialog opens.
Select all modules and extensions you want to make available in the system. You should at least choose the preselected modules ( and ). Also make sure to choose any additional module or extension that you have added during the installation. Note that all extensions require additional registration codes which are liable for cost. Proceed with .
Depending on your selection, you may need to accept one or more license agreements now. All components are registered with the chosen server and the associated repositories are added to your system.
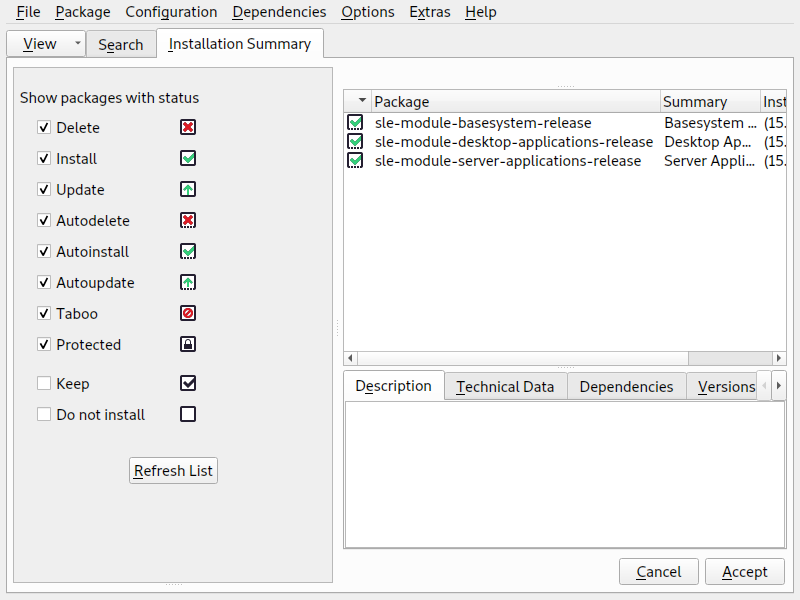
The YaST package installer opens to install release-packages for each module and, depending on your choice of modules and extensions, additional packages. It is strongly recommended not to deselect any of the preselected packages; you may, however, add additional packages.
Choose and to conclude the registration process.
9.3.2 Registering with SUSEConnect #
Registering the system plus modules and extensions is also possible from
the command line using SUSEConnect. For information that
go beyond the scope of this section, refer to the inline documentation with
man 8 SUSEConnect
To register SUSE Linux Enterprise Server with SUSE Customer Center run
SUSEConnectas follows:>sudo SUSEConnect -r REGISTRATION_CODE -e EMAIL_ADDRESSTo register with a local registration server, additionally provide the URL to the server:
>sudo SUSEConnect -r REGISTRATION_CODE -e EMAIL_ADDRESS \ --url "https://suse_register.example.com/"Replace REGISTRATION_CODE with the registration code you received with your copy of SUSE Linux Enterprise Server. Replace EMAIL_ADDRESS with the E-mail address associated with the SUSE account you or your organization uses to manage subscriptions.
This process will register the and and add the associated repositories to your system.
SUSE Linux Enterprise Server including the two default repositories is now registered. In case you want to register additional modules or extensions, proceed as outlined in Section 9.4, “Managing modules and extensions in a running system”.
9.4 Managing modules and extensions in a running system #
Even after a system is installed and registered, adding and removing modules
and extensions is still possible. You can either use YaST or
SUSEConnect for this task. For more details also refer to
the Modules and Extensions Quick Start.
9.4.1 Adding modules and extensions with YaST #
Start › › .
To add modules or extensions, select all components you want to install. Note that all extensions require additional registration codes which are liable for cost.
All additional components are registered with the registration server and the associated repositories are added to your system.
The YaST package installer opens to install release-packages for each module and, depending on your choice of modules and extensions, additional packages. It is strongly recommended not to deselect any of the preselected packages; you may, however, add additional packages.
Choose and to conclude the process.
Similar to software packages, which may depend on other packages to function, a module may have dependencies on other modules. If this is the case, the modules on which it depends are automatically selected for installation.
9.4.2 Deleting modules and extensions with YaST #
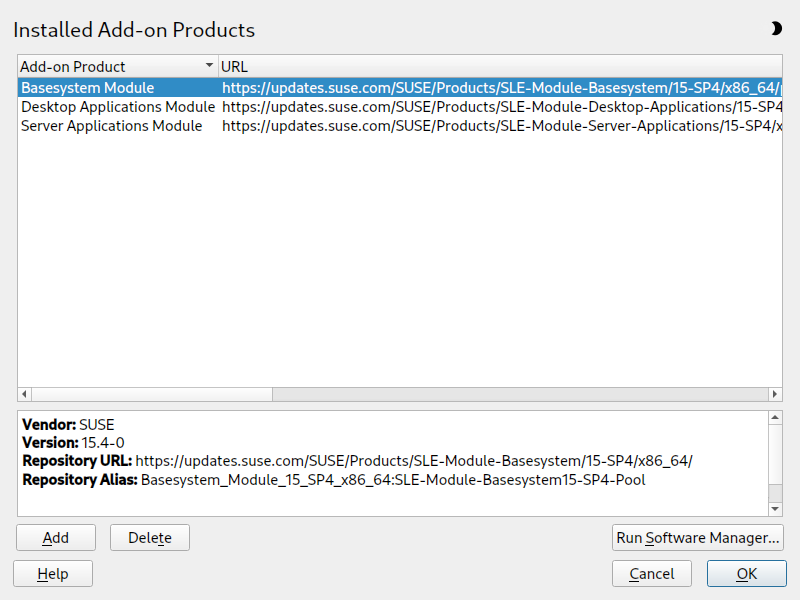
Start › › .
Choose the module or extension that should be removed and click . Confirm the warning saying that all packages from the selected component will be removed.
The YaST Software Manager opens and lists all installed packages from the deleted module or extension. Click to remove all of them. It is strongly recommended to do so, because you will no longer get updates for packages from deleted modules or extensions. In case you keep packages, make sure to at least remove the
*-releasepackage for each module or extension that gets deleted.Proceed with and then .
Note that you should never delete the . It is also not recommended to delete the .
If you choose to keep packages from deleted modules or extensions, you will no longer receive updates for these packages. Because this includes security fixes, keeping such packages may introduce a security risk to your system.
9.4.3 Adding or deleting modules and extensions with SUSEConnect #
Run
SUSEConnect -list-extensionsto get an overview of available extensions:>sudo SUSEConnect -list-extensions AVAILABLE EXTENSIONS AND MODULES Basesystem Module 15 SP4 x86_64 (Installed) Deactivate with: SUSEConnect -d -p sle-module-basesystem/15.4/x86_64 Containers Module 15 SP4 x86_64 Activate with: SUSEConnect -p sle-module-containers/15.4/x86_64 Desktop Applications Module 15 SP4 x86_64 Activate with: SUSEConnect -p sle-module-desktop-applications/15.4/x86_64 Development Tools Module 15 SP4 x86_64 Activate with: SUSEConnect -p sle-module-development-tools/15.4/x86_64 SUSE Linux Enterprise Workstation Extension 15 SP4 x86_64 Activate with: SUSEConnect -p sle-we/15.4/x86_64 -r ADDITIONAL REGCODE SUSE Cloud Application Platform Tools Module 15 SP4 x86_64 Activate with: SUSEConnect -p sle-module-cap-tools/15.4/x86_64 SUSE Linux Enterprise Live Patching 15 SP4 x86_64 Activate with: SUSEConnect -p sle-module-live-patching/15.4/x86_64 -r ADDITIONAL REGCODE SUSE Package Hub 15 SP4 x86_64 Activate with: SUSEConnect -p PackageHub/15.4/x86_64 Server Applications Module 15 SP4 x86_64 (Installed) Deactivate with: SUSEConnect -d -p sle-module-server-applications/15.4/x86_64 Legacy Module 15 SP4 x86_64 Activate with: SUSEConnect -p sle-module-legacy/15.4/x86_64 Public Cloud Module 15 SP4 x86_64 Activate with: SUSEConnect -p sle-module-public-cloud/15.4/x86_64 SUSE Enterprise Storage 6 x86_64 Activate with: SUSEConnect -p ses/6/x86_64 -r ADDITIONAL REGCODE SUSE Linux Enterprise High Availability Extension 15 SP4 x86_64 Activate with: SUSEConnect -p sle-ha/15.4/x86_64 -r ADDITIONAL REGCODE Web and Scripting Module 15 SP4 x86_64 Activate with: SUSEConnect -p sle-module-web-scripting/15.4/x86_64 MORE INFORMATION You can find more information about available modules here: https://www.suse.com/products/server/features/modules.htmlRun the commands in the listing for activating/deactivating a module or extension to add or delete a component. Note that adding an extensions requires additional registration codes which are liable for cost.
Note that you should never delete the . It is also not recommended to delete the .
SUSEConnect only adds or removes modules and extensions.
It registers or derigisters the components and enables or disables their
repositories, but it does not install or remove any packages. If you want
this to be done automatically, use YaST to manage modules and extensions.
When adding a module or extension, SUSEConnect does
not install default packages or patterns. To do this manually, use Zypper
or › .
When deleting a module or extension, SUSEConnect does
not perform a cleanup. Packages from the module or extension remain
installed on the system, but are longer updated from a repository. To list
these “orphaned” packages, run zypper packages
--orphaned. To remove one or more packages, run
zypper remove PACKAGE [ANOTHER_PACKAGE].
Alternatively use › and then
› ›
to list and delete orphaned packages.
If you choose to keep packages from deleted modules or extensions, you will no longer receive updates for these packages. Because this includes security fixes, keeping such packages may introduce a security risk to your system.
9.5 SUSEConnect keep-alive timer #
From version 0.3.33, the SUSEConnect package ships with two systemd units:
suseconnect-keepalive.service: a service which runs the commandSUSEConnect --keep-aliveon demand.suseconnect-keepalive.timer: a timer which runs the servicesuseconnect-keepalive.serviceonce a day.
These units are responsible for keeping the system information up-to-date with the SUSE Customer Center or registration server, and to provide accurate data about subscription usage.
The command SUSEConnect --keep-alive updates the last
time a system has been seen and its hardware information with the
registration service.
When the SUSEConnect package is installed or updated, and its version is equal to or greater than the one described above, the keep-alive timer will be enabled automatically.
If you prefer to not have the SUSEConnect keep-alive timer running on your
system, you can disable it with systemctl:
>sudosystemctl disable --now suseconnect-keepalive.timer
Once the timer is disabled, subsequent updates to the SUSEConnect package will not reenable it.


