Setting up Amazon ELB Network Load Balancer
This how-to guide describes how to set up a Network Load Balancer (NLB) in Amazon’s EC2 service that will direct traffic to multiple instances on EC2.
These examples show the load balancer being configured to direct traffic to three Rancher server nodes. If Rancher is installed on an RKE Kubernetes cluster, three nodes are required. If Rancher is installed on a K3s Kubernetes cluster, only two nodes are required.
This tutorial is about one possible way to set up your load balancer, not the only way. Other types of load balancers, such as a Classic Load Balancer or Application Load Balancer, could also direct traffic to the Rancher server nodes.
Rancher only supports using the Amazon NLB when terminating traffic in tcp mode for port 443 rather than tls mode. This is due to the fact that the NLB does not inject the correct headers into requests when terminated at the NLB. This means that if you want to use certificates managed by the Amazon Certificate Manager (ACM), you should use an ALB.
Requirements
These instructions assume you have already created Linux instances in EC2. The load balancer will direct traffic to these nodes.
1. Create Target Groups
Begin by creating two target groups for the TCP protocol, one with TCP port 443 and one regarding TCP port 80 (providing redirect to TCP port 443). You’ll add your Linux nodes to these groups.
Your first NLB configuration step is to create two target groups. Technically, only port 443 is needed to access Rancher, but it’s convenient to add a listener for port 80, because traffic to port 80 will be automatically redirected to port 443.
Regardless of whether an NGINX Ingress or Traefik Ingress controller is used, the Ingress should redirect traffic from port 80 to port 443.
-
Log into the Amazon AWS Console to get started. Make sure to select the Region where your EC2 instances (Linux nodes) are created.
-
Select Services and choose EC2, find the section Load Balancing and open Target Groups.
-
Click Create target group to create the first target group, regarding TCP port 443.
|
Health checks are handled differently based on the Ingress. For details, refer to this section. |
Target Group (TCP port 443)
Configure the first target group according to the table below.
| Option | Setting |
|---|---|
Target Group Name |
|
Target type |
|
Protocol |
|
Port |
|
VPC |
Choose your VPC |
Health check settings:
| Option | Setting |
|---|---|
Protocol |
TCP |
Port |
|
Healthy threshold |
|
Unhealthy threshold |
|
Timeout |
|
Interval |
|
Click Create target group to create the second target group, regarding TCP port 80.
Target Group (TCP port 80)
Configure the second target group according to the table below.
| Option | Setting |
|---|---|
Target Group Name |
|
Target type |
|
Protocol |
|
Port |
|
VPC |
Choose your VPC |
Health check settings:
| Option | Setting |
|---|---|
Protocol |
TCP |
Port |
|
Healthy threshold |
|
Unhealthy threshold |
|
Timeout |
|
Interval |
|
2. Register Targets
Next, add your Linux nodes to both target groups.
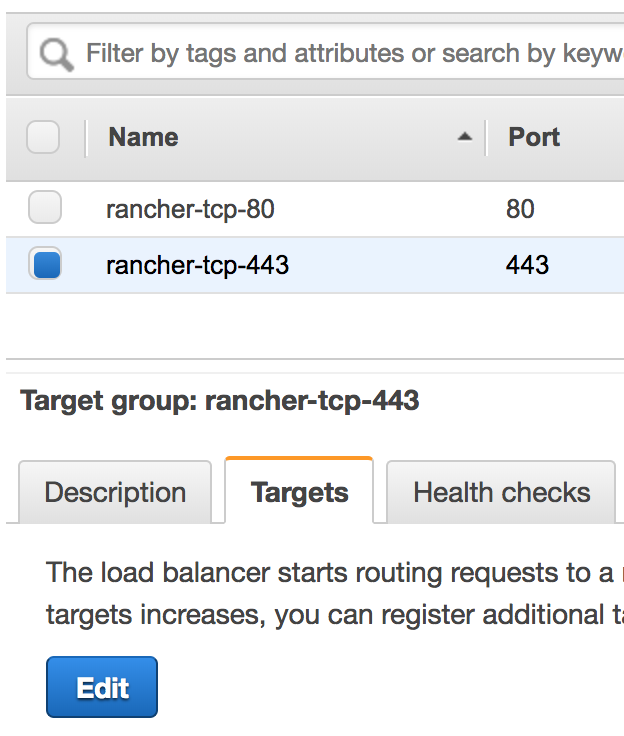
Select the target group named rancher-tcp-443, click the tab Targets and choose Edit.

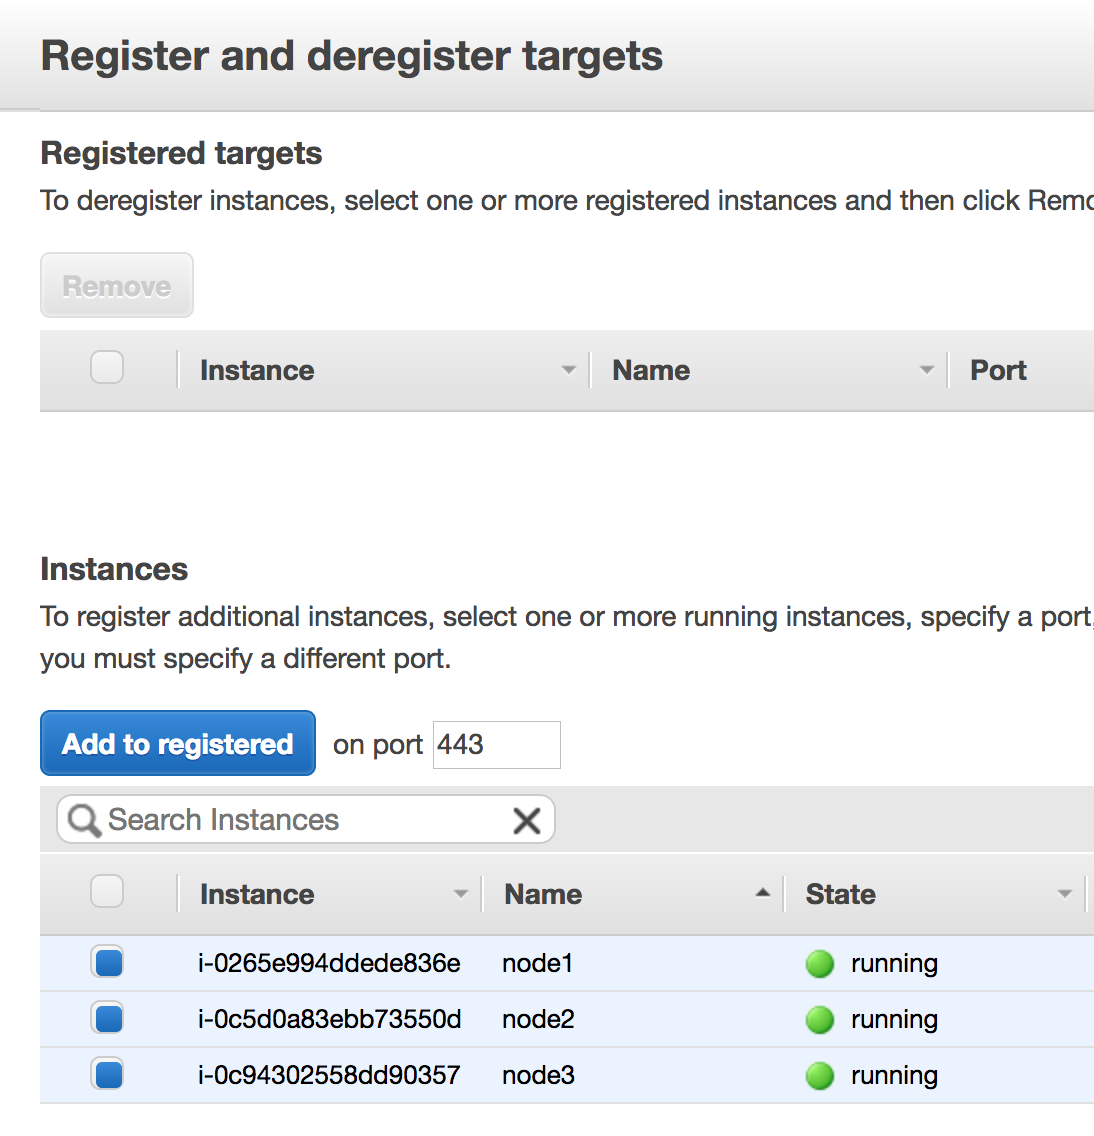
Select the instances (Linux nodes) you want to add, and click Add to registered.


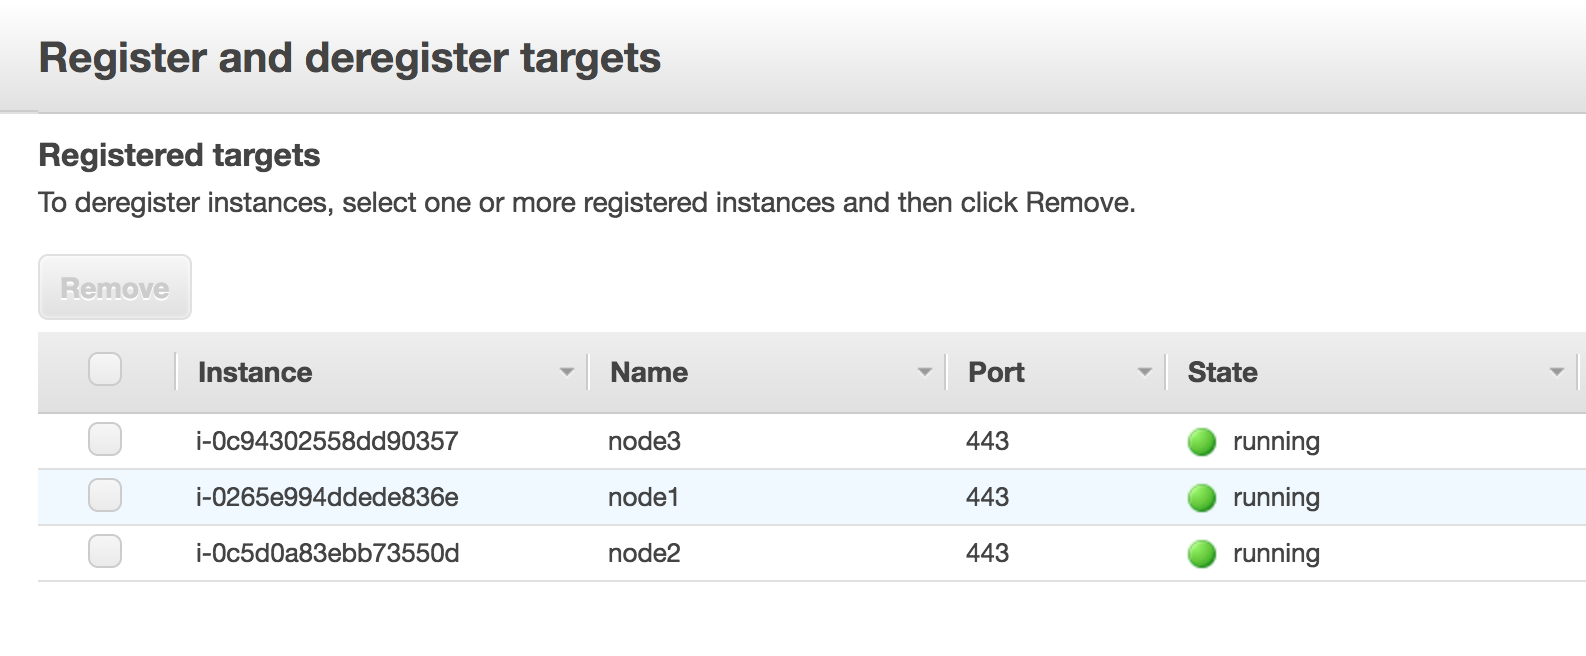
When the instances are added, click Save on the bottom right of the screen.
Repeat those steps, replacing rancher-tcp-443 with rancher-tcp-80. The same instances need to be added as targets to this target group.
3. Create Your NLB
Use Amazon’s Wizard to create a Network Load Balancer. As part of this process, you’ll add the target groups you created in 1. Create Target Groups.
-
From your web browser, navigate to the Amazon EC2 Console.
-
From the navigation pane, choose LOAD BALANCING > Load Balancers.
-
Click Create Load Balancer.
-
Choose Network Load Balancer and click Create. Then complete each form.
Step 1: Configure Load Balancer
Set the following fields in the form:
-
Name:
rancher -
Scheme:
internalorinternet-facing. The scheme that you choose for your NLB is dependent on the configuration of your instances and VPC. If your instances do not have public IPs associated with them, or you will only be accessing Rancher internally, you should set your NLB Scheme tointernalrather thaninternet-facing. -
Listeners: The Load Balancer Protocol should be
TCPand the corresponding Load Balancer Port should be set to443. -
Availability Zones: Select Your VPC and Availability Zones.
Step 2: Configure Routing
-
From the Target Group drop-down, choose Existing target group.
-
From the Name drop-down, choose
rancher-tcp-443. -
Open Advanced health check settings, and configure Interval to
10 seconds.
4. Add listener to NLB for TCP port 80
-
Select your newly created NLB and select the Listeners tab.
-
Click Add listener.
-
Use
TCP:80as Protocol : Port -
Click Add action and choose Forward to...
-
From the Forward to drop-down, choose
rancher-tcp-80. -
Click Save in the top right of the screen.
Health Check Paths for NGINX Ingress and Traefik Ingresses
K3s and RKE Kubernetes clusters handle health checks differently because they use different Ingresses by default.
For RKE Kubernetes clusters, NGINX Ingress is used by default, whereas for K3s Kubernetes clusters, Traefik is the default Ingress.
-
Traefik: The health check path is
/ping. By default/pingis always matched (regardless of Host), and a response from Traefik itself is always served. -
NGINX Ingress: The default backend of the NGINX Ingress controller has a
/healthzendpoint. By default/healthzis always matched (regardless of Host), and a response fromingress-nginxitself is always served.
To simulate an accurate health check, it is a best practice to use the Host header (Rancher hostname) combined with /ping or /healthz (for K3s or for RKE clusters, respectively) wherever possible, to get a response from the Rancher Pods, not the Ingress.