8 Configuring software RAID for the root partition #
In SUSE Linux Enterprise Server, the Device Mapper RAID tool has been integrated into the
YaST Partitioner. You can use the partitioner at install time to create a
software RAID for the system device that contains your root
(/) partition. The /boot partition
cannot be stored on a RAID partition unless it is RAID 1.
/boot/efi on RAID 1 might not boot
When creating the /boot/efi partition on
RAID, keep in mind that in some cases the firmware might not
recognize the boot partition on RAID. The firmware then
refuses to boot.
8.1 Prerequisites for using a software RAID device for the root partition #
Ensure that your configuration meets the following requirements:
You need two hard disks to create the RAID 1 mirror device. The hard disks should be similarly sized. The RAID assumes the size of the smaller drive. The block storage devices can be any combination of local (in or directly attached to the machine), Fibre Channel storage subsystems, or iSCSI storage subsystems.
A separate partition for
/bootis not required if you install the boot loader in the MBR. If installing the boot loader in the MBR is not an option,/bootneeds to reside on a separate partition.For UEFI machines, you need to set up a dedicated
/boot/efipartition. It needs to be VFAT-formatted, and may reside on the RAID 1 device to prevent booting problems in case the physical disk with/boot/efifails.If you are using hardware RAID devices, do not attempt to run software RAIDs on top of it.
If you are using iSCSI target devices, you need to enable the iSCSI initiator support before you create the RAID device.
If your storage subsystem provides multiple I/O paths between the server and its directly attached local devices, Fibre Channel devices, or iSCSI devices that you want to use in the software RAID, you need to enable the multipath support before you create the RAID device.
8.2 Setting up the system with a software RAID device for the root (/) partition #
Start the installation with YaST and proceed as described in Capítulo 9, Pasos de instalación until you reach the step.
Click to open the custom partitioning tool. You can use the suggested proposal, or you can use the existing proposal.
(Optional) If there are iSCSI target devices that you want to use, you need to enable the iSCSI Initiator software by choosing › › from the upper-left section of the screen. Refer to Chapter 15, Mass storage over IP networks: iSCSI for further details.
(Optional) If there are FCoE target devices that you want to use, you need to configure the interface by clicking › › from the upper left section of the screen.
(Optional) If you need to discard the partitioning changes, click › .
Set up the format for each of the devices you want to use for the software RAID. You should use RAID for
/,/boot/efi, or swap partitions.In the left panel, select and select the device you want to use, then click .
Under , specify the size to use, then click .
Under , choose .
Select and and set the to .
Click and repeat these instructions for the second partition.
Create the RAID device for the
/partition.In the left panel, select and then .
Set the desired for the
/partition and the tosystem.Select the two RAID devices you prepared in the previous step from the section and them.
Proceed with .
Select the chunk size from the drop-down box. Sticking with the default is a safe choice.
In the left panel, click the . In the tab, select your new RAID and click .
Under , select and proceed with .
Select the and set the mount point to
/. Leave the dialog withNext.
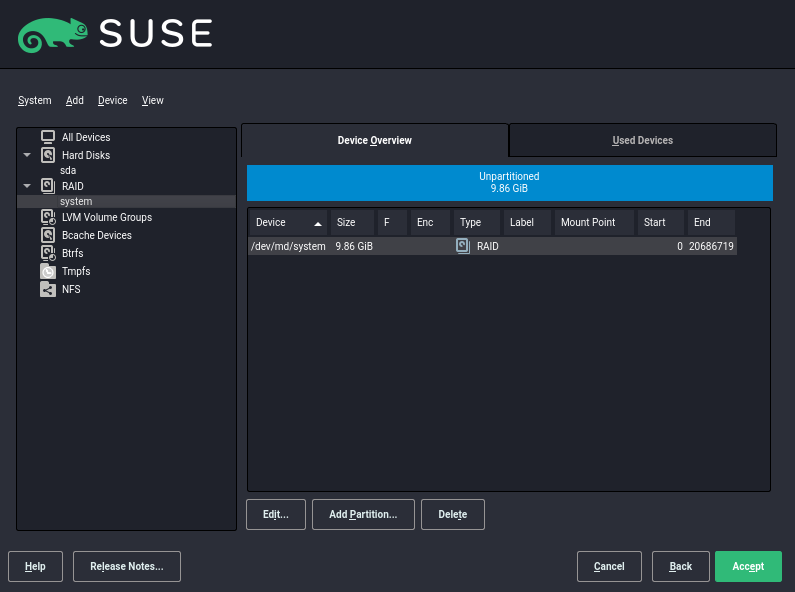
The software RAID device is managed by Device Mapper, and creates a device under the
/dev/md/systempath.Optionally, you can create a swap partition in RAID. Use similar steps to those described above, but under , select . Select the file system and mount point as shown below. Click .
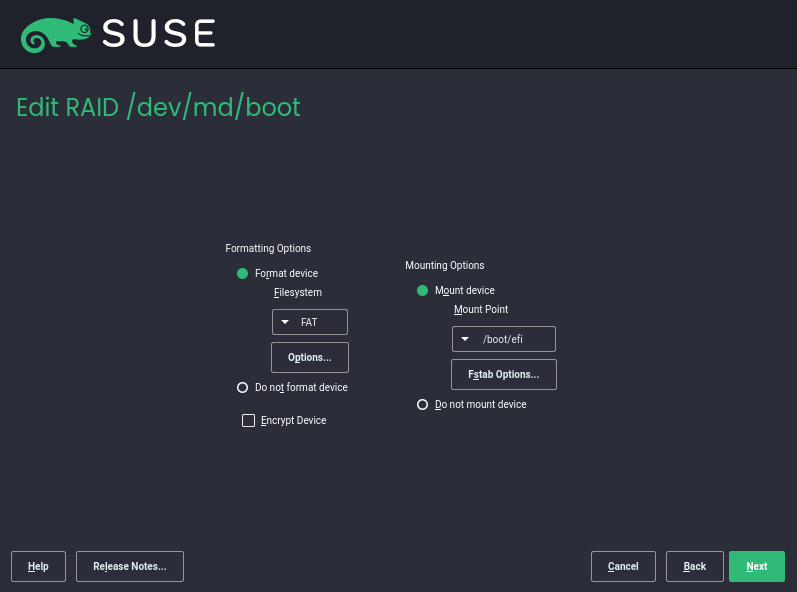
Optionally, for UEFI machines, use similar steps to create the
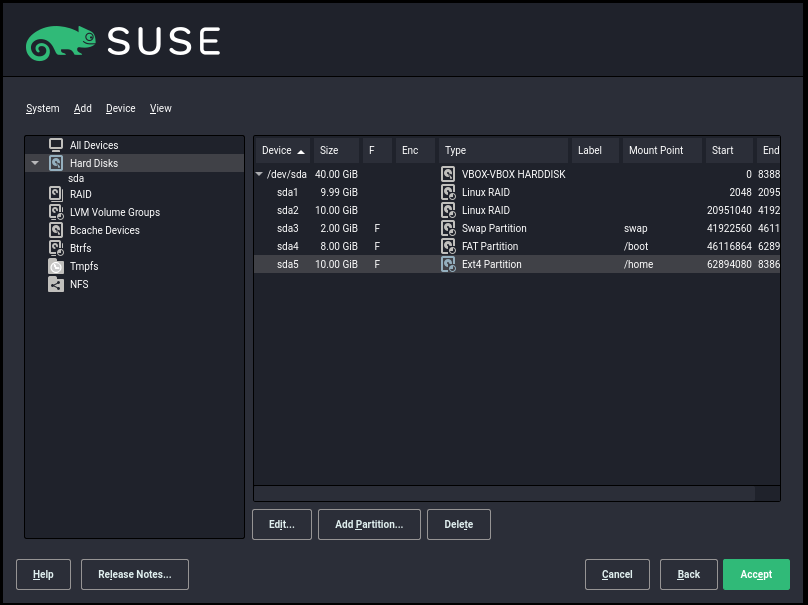
/boot/efimounted partition. Remember that only RAID 1 is supported for/boot/efi, and the partition needs to be formatted with the FAT32 file system.The partitioning then looks as follows:
Click to leave the partitioner.
The new proposal appears on the page.
Continue with the installation. For UEFI machines with a separate
/boot/efipartition, click on the screen and set as the . Check that the option is activated.Whenever you reboot your server, Device Mapper is started at boot time so that the software RAID is automatically recognized, and the operating system on the root (
/) partition can be started.


