3 Using NIS #
When multiple Unix systems in a network access common resources, it becomes imperative that all user and group identities are the same for all machines in that network. The network should be transparent to users: their environments should not vary, regardless of which machine they are using. This can be done by NIS and NFS services. NFS distributes file systems over a network and is discussed in Chapter 19, Sharing file systems with NFS.
NIS (Network Information Service) can be described as a database-like
service that provides access to the contents of
/etc/passwd, /etc/shadow, and
/etc/group across networks. NIS can also be used
for other purposes (making the contents of files like
/etc/hosts or /etc/services
available, for example), but this is beyond the scope of this
introduction. People often refer to NIS as YP,
because it works like the network's “yellow pages.”
3.1 Configuring NIS servers #
To distribute NIS information across networks, either install one single server (a master) that serves all clients, or NIS slave servers requesting this information from the master and relaying it to their respective clients.
To configure just one NIS server for your network, proceed with Section 3.1.1, “Configuring a NIS master server”.
If your NIS master server needs to export its data to slave servers, set up the master server as described in Section 3.1.1, “Configuring a NIS master server” and set up slave servers in the subnets as described in Section 3.1.2, “Configuring a NIS slave server”.
3.1.1 Configuring a NIS master server #
To manage the NIS Server functionality with YaST, install the yast2-nis-server package by running the zypper in yast2-nis-server command as root. To configure a NIS master server for your network, proceed as follows:
Start › › .
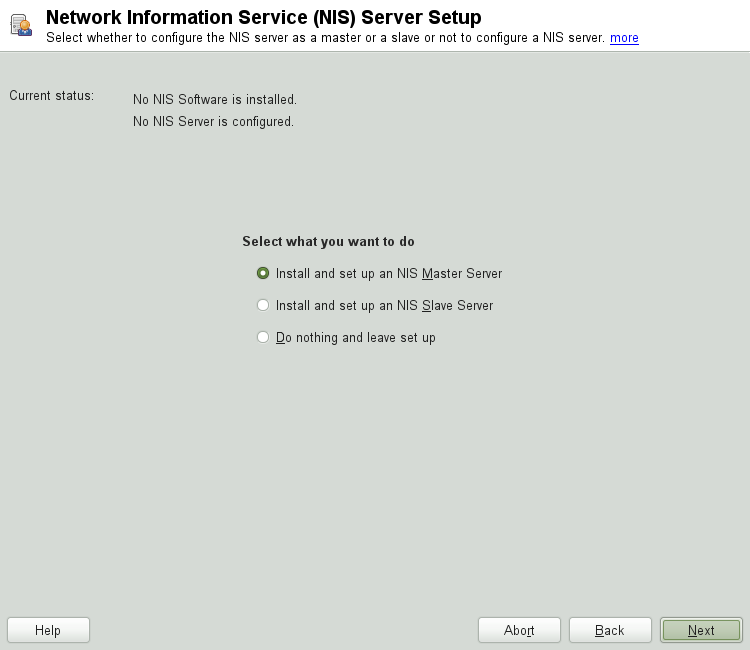
If you need just one NIS server in your network or if this server is to act as the master for further NIS slave servers, select . YaST installs the required packages.
Tip: Already installed NIS server softwareIf NIS server software is already installed on your machine, initiate the creation of a NIS master server by clicking .
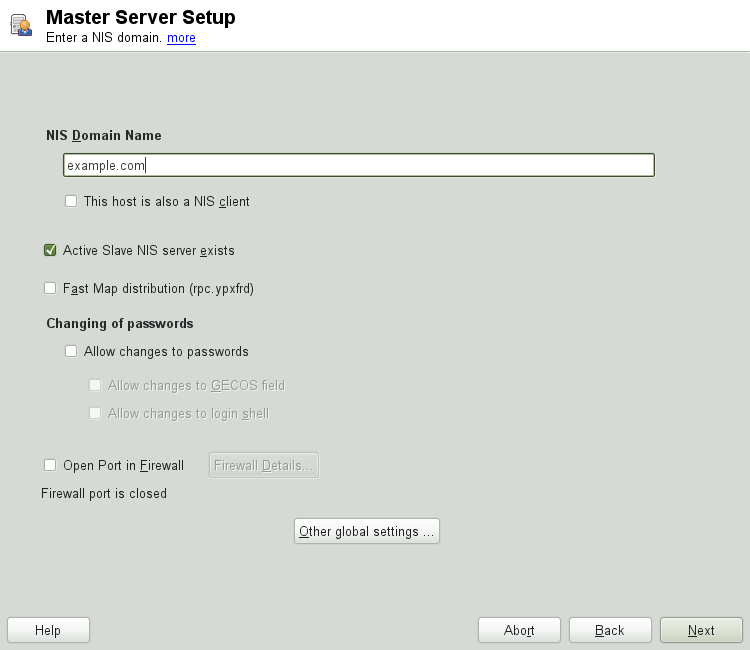
Figure 3.1: NIS server setup #Determine basic NIS setup options:
Enter the NIS domain name.
Define whether the host should also be a NIS client (enabling users to log in and access data from the NIS server) by selecting .
If your NIS server needs to act as a master server to NIS slave servers in other subnets, select .
The option is only useful with . It speeds up the transfer of maps to the slaves.
Select to allow users in your network (both local users and those managed through the NIS server) to change their passwords on the NIS server (with the command
yppasswd). This makes the options and available. “GECOS” means that the users can also change their names and address settings with the commandypchfn. “Shell” allows users to change their default shell with the commandypchsh(for example, to switch from Bash to sh). The new shell must be one of the predefined entries in/etc/shells.Select to have YaST adapt the firewall settings for the NIS server.
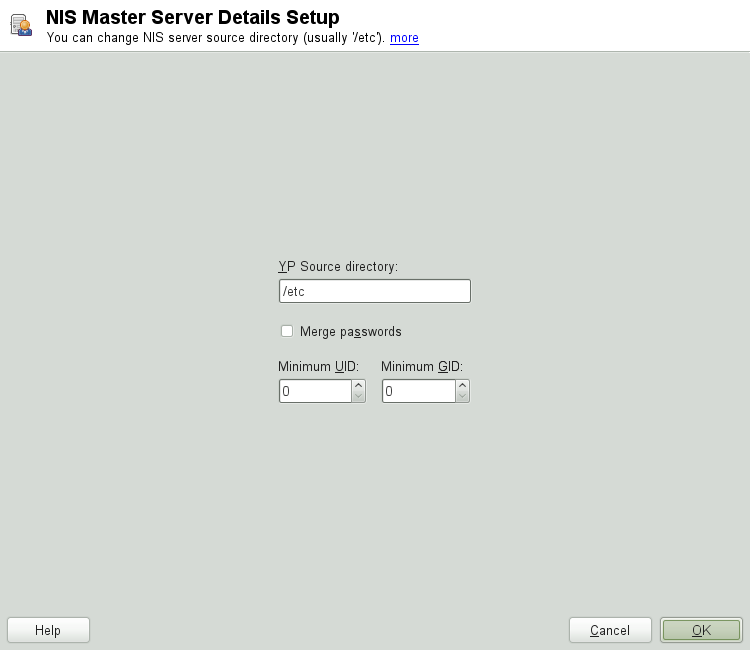
Figure 3.2: Master server setup #Leave this dialog with or click to make additional settings.
include changing the source directory of the NIS server (
/etcby default). In addition, passwords can be merged here. The setting should be to create the user database from the system authentication files/etc/passwd,/etc/shadowand/etc/group. Also, determine the smallest user and group ID that should be offered by NIS. Click to confirm your settings and return to the previous screen.Figure 3.3: Changing the directory and synchronizing files for a NIS server #
If you previously enabled , enter the host names used as slaves and click . If no slave servers exist, this configuration step is skipped.
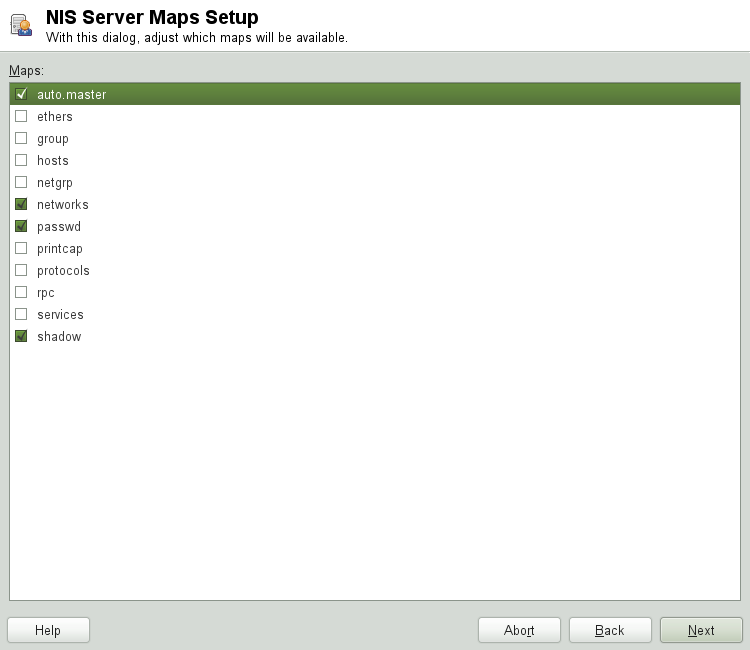
Continue to the dialog for the database configuration. Specify the NIS Server Maps, the partial databases to transfer from the NIS server to the client. The default settings are adequate. Leave this dialog with .
Check which maps should be available and click to continue.
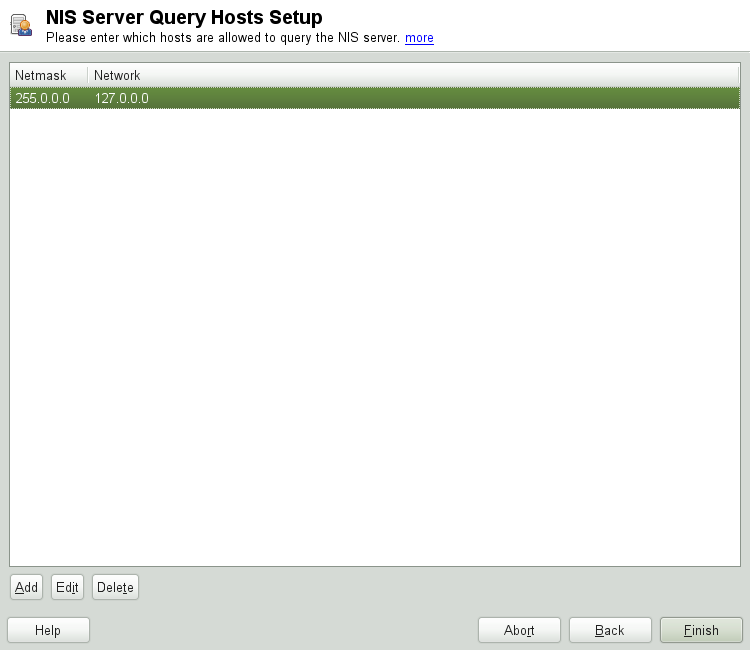
Figure 3.4: NIS server maps setup #Determine which hosts are allowed to query the NIS server. You can add, edit, or delete hosts by clicking the appropriate button. Specify from which networks requests can be sent to the NIS server. Normally, this is your internal network. In this case, there should be the following two entries:
255.0.0.0     127.0.0.0
0.0.0.0       0.0.0.0
The first entry enables connections from your own host, which is the NIS server. The second one allows all hosts to send requests to the server.
Figure 3.5: Setting request permissions for a NIS server #Click to save your changes and exit the setup.
3.1.2 Configuring a NIS slave server #
To configure additional NIS slave servers in your network, proceed as follows:
Start › › .
Select and click .
TipIf NIS server software is already installed on your machine, initiate the creation of a NIS slave server by clicking .
Complete the basic setup of your NIS slave server:
Enter the NIS domain.
Enter host name or IP address of the master server.
Set to enable user logins on this server.
Adapt the firewall settings with .
Click .
Enter the hosts that are allowed to query the NIS server. You can add, edit, or delete hosts by clicking the appropriate button. Specify all networks from which requests can be sent to the NIS server. If it applies to all networks, use the following configuration:
255.0.0.0     127.0.0.0
0.0.0.0       0.0.0.0
The first entry enables connections from your own host, which is the NIS server. The second one allows all hosts with access to the same network to send requests to the server.
Click to save changes and exit the setup.
3.2 Configuring NIS clients #
To use NIS on a workstation, do the following:
Start › › .
Activate the button.
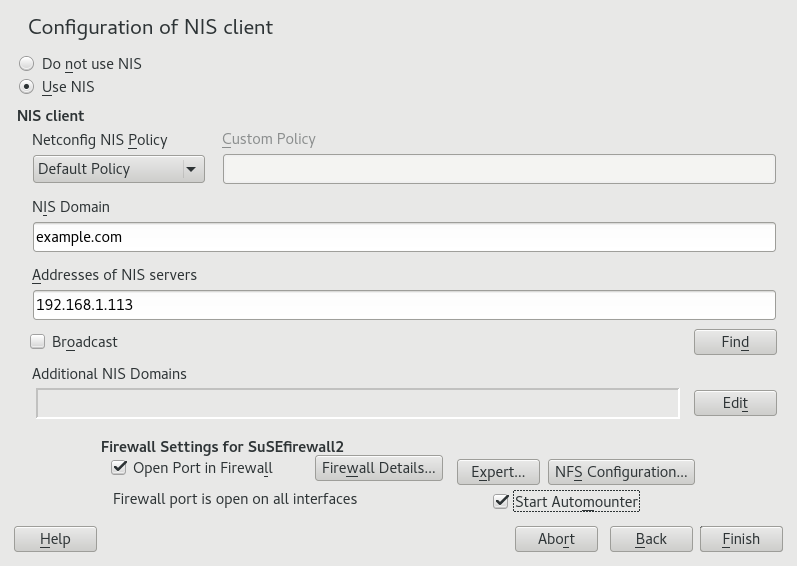
Enter the NIS domain. This is a domain name given by your administrator or a static external IP address received by DHCP. For information about DHCP, see Chapter 40, DHCP.
Figure 3.6: Setting domain and address of a NIS server #Enter your NIS servers and separate their addresses by spaces. If you do not know your NIS server, click to let YaST search for any NIS servers in your domain. Depending on the size of your local network, this may be a time-consuming process. asks for a NIS server in the local network after the specified servers fail to respond.
Depending on your local installation, you may also want to activate the automounter. This option also installs additional software if required.
If you do not want other hosts to be able to query which server your client is using, go to the settings and disable . By checking , the client is enabled to receive replies from a server communicating through an unprivileged port. For further information, see
manypbind.Click to save them and return to the YaST control center. Your client is now configured with NIS.
