StorageClass
SUSE Virtualization uses StorageClasses to describe how SUSE Storage must provision volumes. SUSE Storage StorageClasses can map to replica policies, node schedule policies, or disk schedule policies created by the cluster administrators. This concept is referred to as profiles in other storage systems.
|
The default StorageClass To avoid this issue, you can perform either of the following actions:
|
For information about support for volume provisioning using external container storage interface (CSI) drivers, see Third-Party Storage Support.
Creating a StorageClass
-
UI
-
API
-
Terraform
|
Once the StorageClass is created, you can only edit the description. All other settings are fixed. |
-
Go to Advanced → StorageClasses.

-
In the general information section, configure the following:
-
Name: Name of the StorageClass.
-
Description (optional): Description of the StorageClass.
-
Provisioner: Provisioner that determines the volume plugin to be used for provisioning volumes.
-
-
On the Parameters tab, configure the following:
-
Number of Replicas: Number of replicas created for each SUSE Storage volume. The default value is
3. -
Stale Replica Timeout: Number of minutes SUSE Storage waits before cleaning up a replica with the status
ERROR. The default value is30. -
Node Selector (optional): Node tags to be matched during volume scheduling. You can add node tags on the host configuration screen (Host → Edit Config).
-
Disk Selector (optional): Disk tags to be matched during volume scheduling. You can add disk tags on the host configuration screen (Host → Edit Config).
-
Migratable: Setting that enables Live Migration for volumes created using the StorageClass. The default value is
Yes.
-
-
On the Customize tab, configure the following:
-
Reclaim Policy: Reclaim policy that applies to volumes created using the StorageClass. The default value is
Delete.-
Delete: Deletes volumes and the underlying devices when the volume claim is deleted.
-
Retain: Retains the volume for manual cleanup.
-
-
Allow Volume Expansion: Setting that allows volume expansion, which involves resizing of the block device and expansion of the filesystem. When the setting is enabled, you can increase the volume size by editing the corresponding PVC object.
You can only use the volume expansion feature to increase the volume size.
-
Volume Binding Mode: Setting that controls when volume binding and dynamic provisioning occur. The default value is
Immediate.-
Immediate: Binds and provisions a volume once the PVC is created.
-
WaitForFirstConsumer: Binds and provisions a volume once a virtual machine using the PVC is created.
-
-
-
Click Create.
apiVersion: storage.k8s.io/v1
kind: StorageClass
metadata:
  annotations:
    storageclass.beta.kubernetes.io/is-default-class: 'true'
    storageclass.kubernetes.io/is-default-class: 'true'
  name: single-replica
parameters:
  migratable: 'false'
  numberOfReplicas: '1'
  staleReplicaTimeout: '30'
provisioner: driver.longhorn.io
reclaimPolicy: Delete
volumeBindingMode: Immediate
allowVolumeExpansion: true
resource "harvester_storageclass" "single-replica" {
name = "single-replica"
is_default = "true"
allow_volume_expansion = "true"
volume_binding_mode = "immediate"
reclaim_policy = "delete"
parameters = {
"migratable" = "false"
"numberOfReplicas" = "1"
"staleReplicaTimeout" = "30"
}
}Data Locality Settings
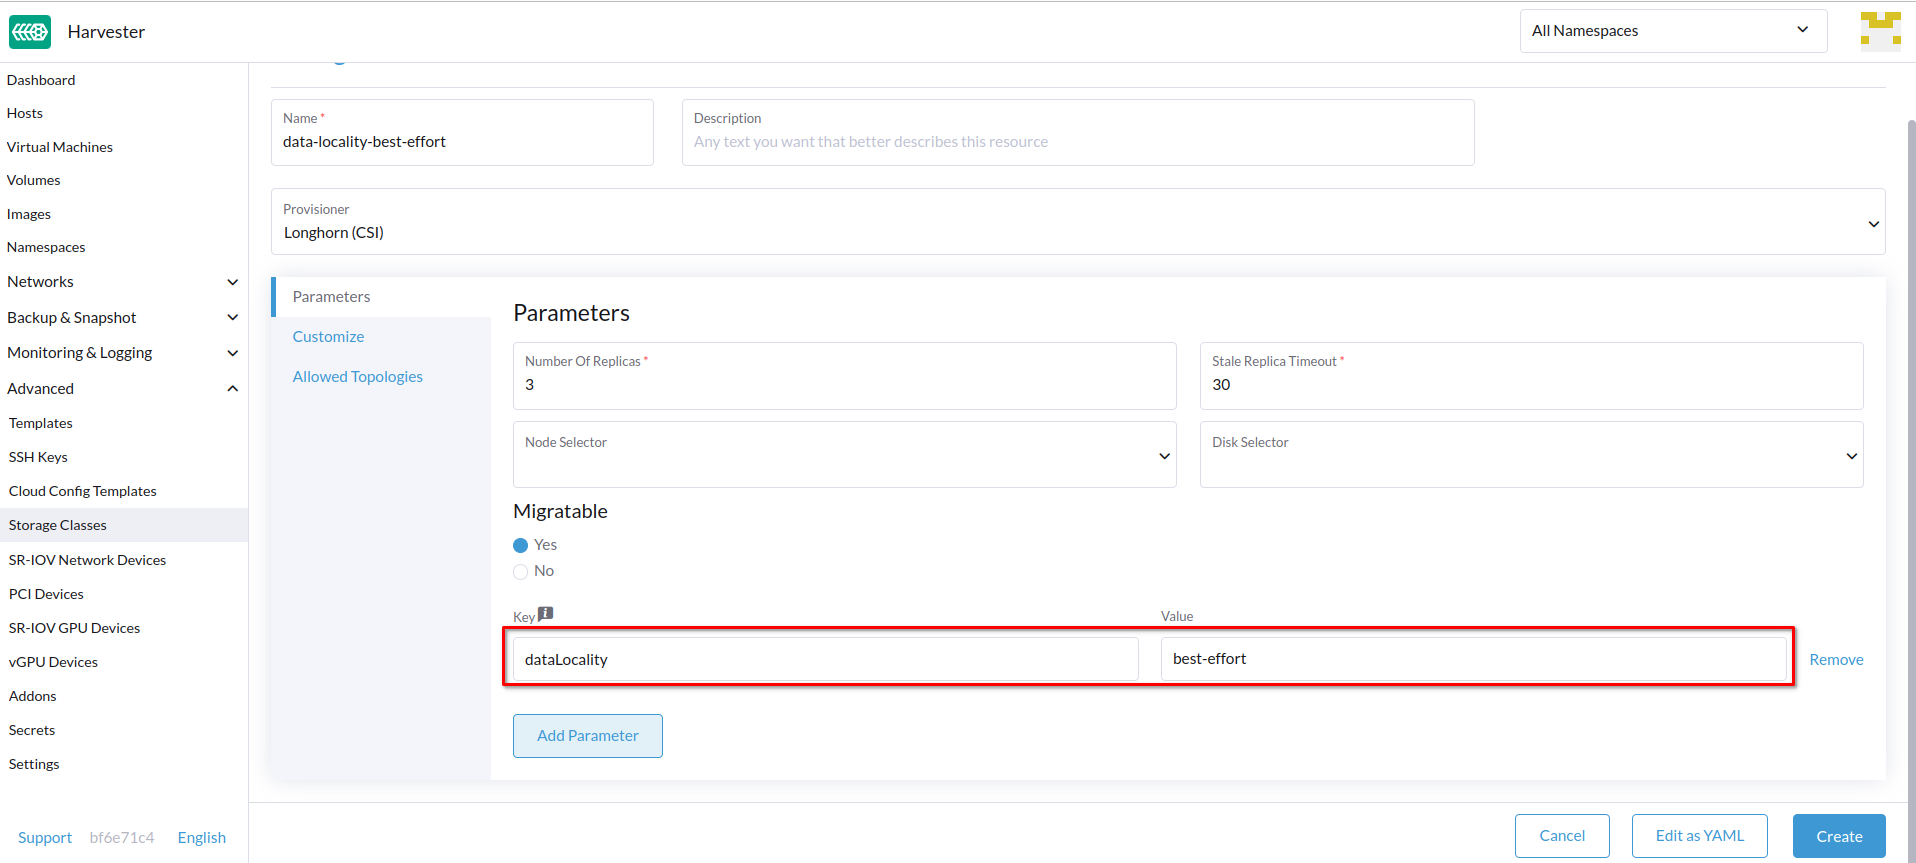
You can use the dataLocality parameter when at least one replica of a SUSE Storage volume must be scheduled on the same node as the pod that uses the volume (whenever possible).
SUSE Virtualization officially supports data locality. This applies even to volumes created from images. To configure data locality, create a new StorageClass on the SUSE Virtualization UI (Storage Classess → Create → Parameters) and then add the following parameter:
-
Key:
dataLocality -
Value:
disabledorbest-effort
Data Locality Options
SUSE Virtualization currently supports the following options:
-
disabled: When applied, SUSE Storage may or may not schedule a replica on the same node as the pod that uses the volume. This is the default option. -
best-effort: When applied, SUSE Storage always attempts to schedule a replica on the same node as the pod that uses the volume. SUSE Storage does not stop the volume even when a local replica is unavailable because of an environmental limitation (for example, insufficient disk space or incompatible disk tags).
|
SUSE Storage provides a third option called |
For more information, see Data Locality in the SUSE Storage documentation.
Appendix - Use Case
HDD Scenario
With the introduction of StorageClass, users can now use HDDs for tiered or archived cold storage.
|
HDD is not recommended for guest RKE2 clusters or VMs with good performance disk requirements. |
Recommended Practice
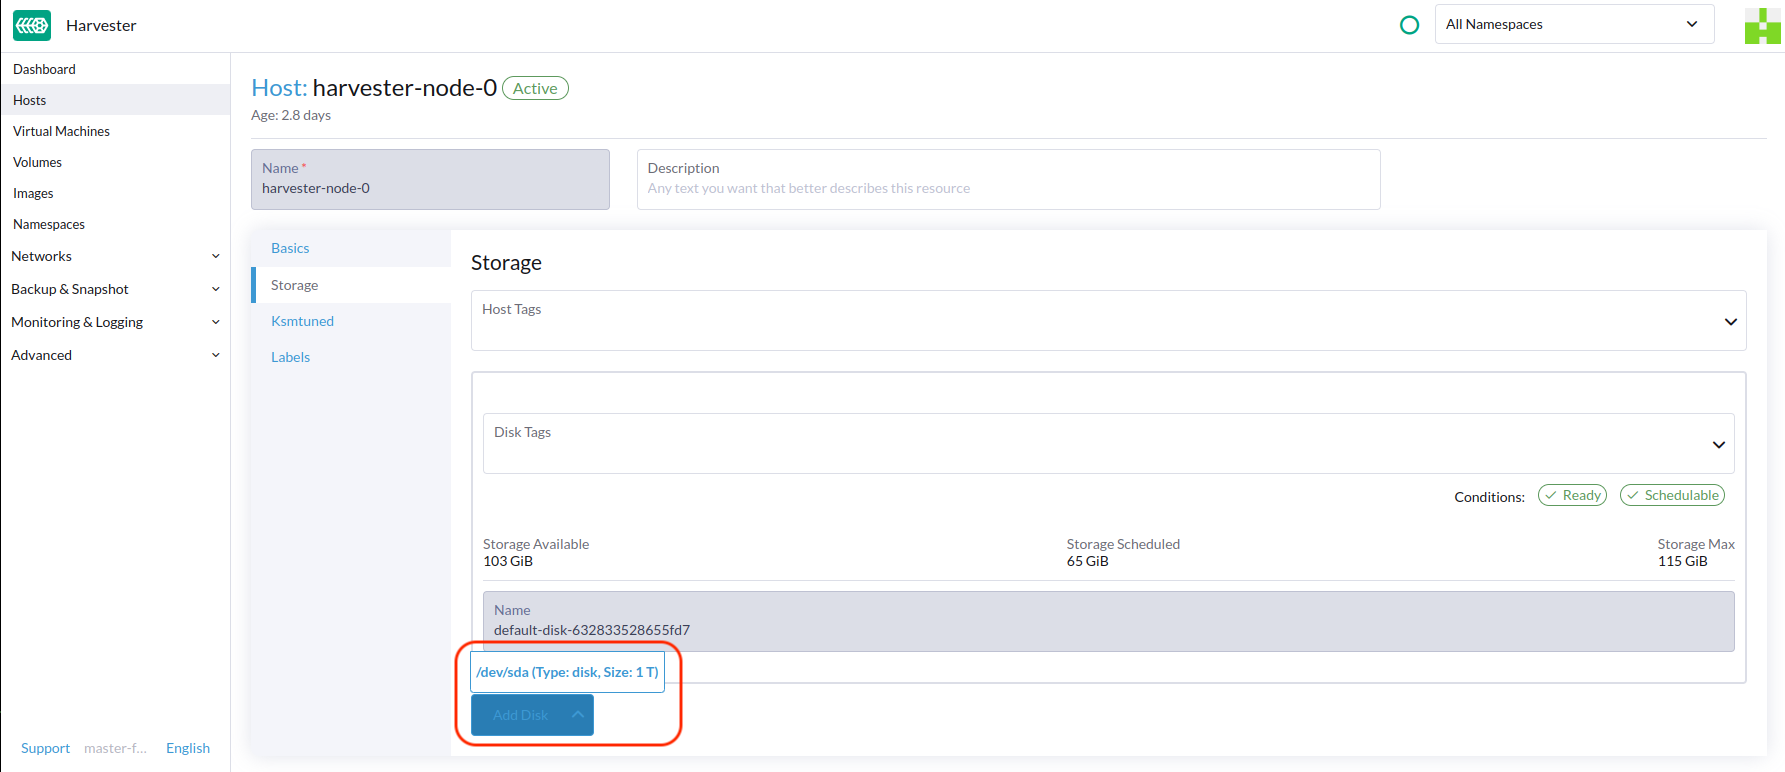
First, add your HDD on the Host page and specify the disk tags as needed, such as HDD or ColdStorage. For more information on how to add extra disks and disk tags, see Multi-disk Management for details.

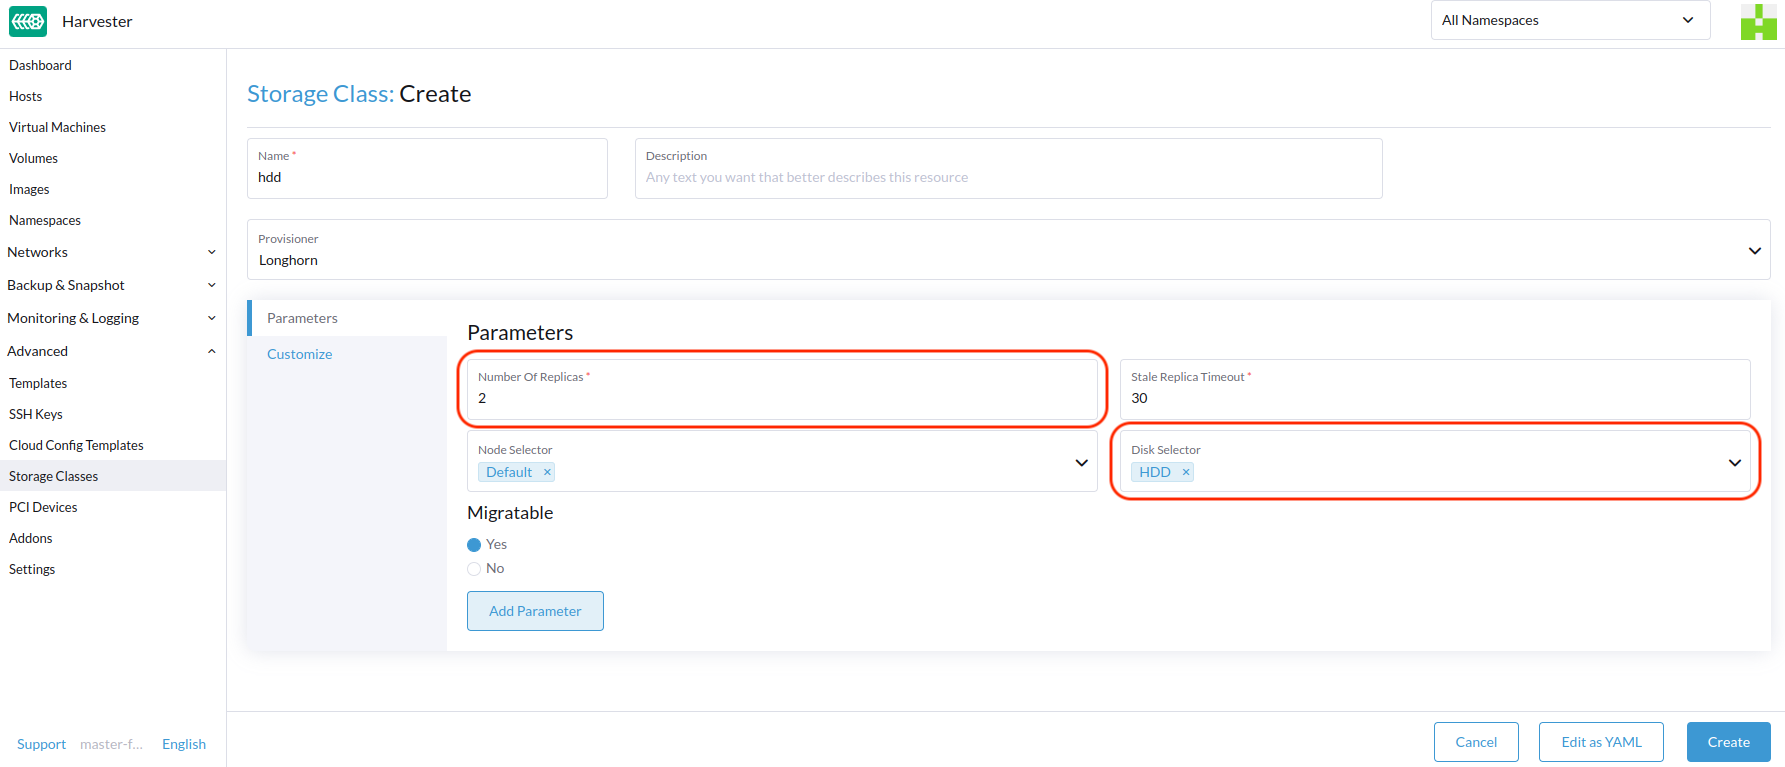
Then, create a new StorageClass for the HDD (use the above disk tags). For hard drives with large capacity but slow performance, the number of replicas can be reduced to improve performance.
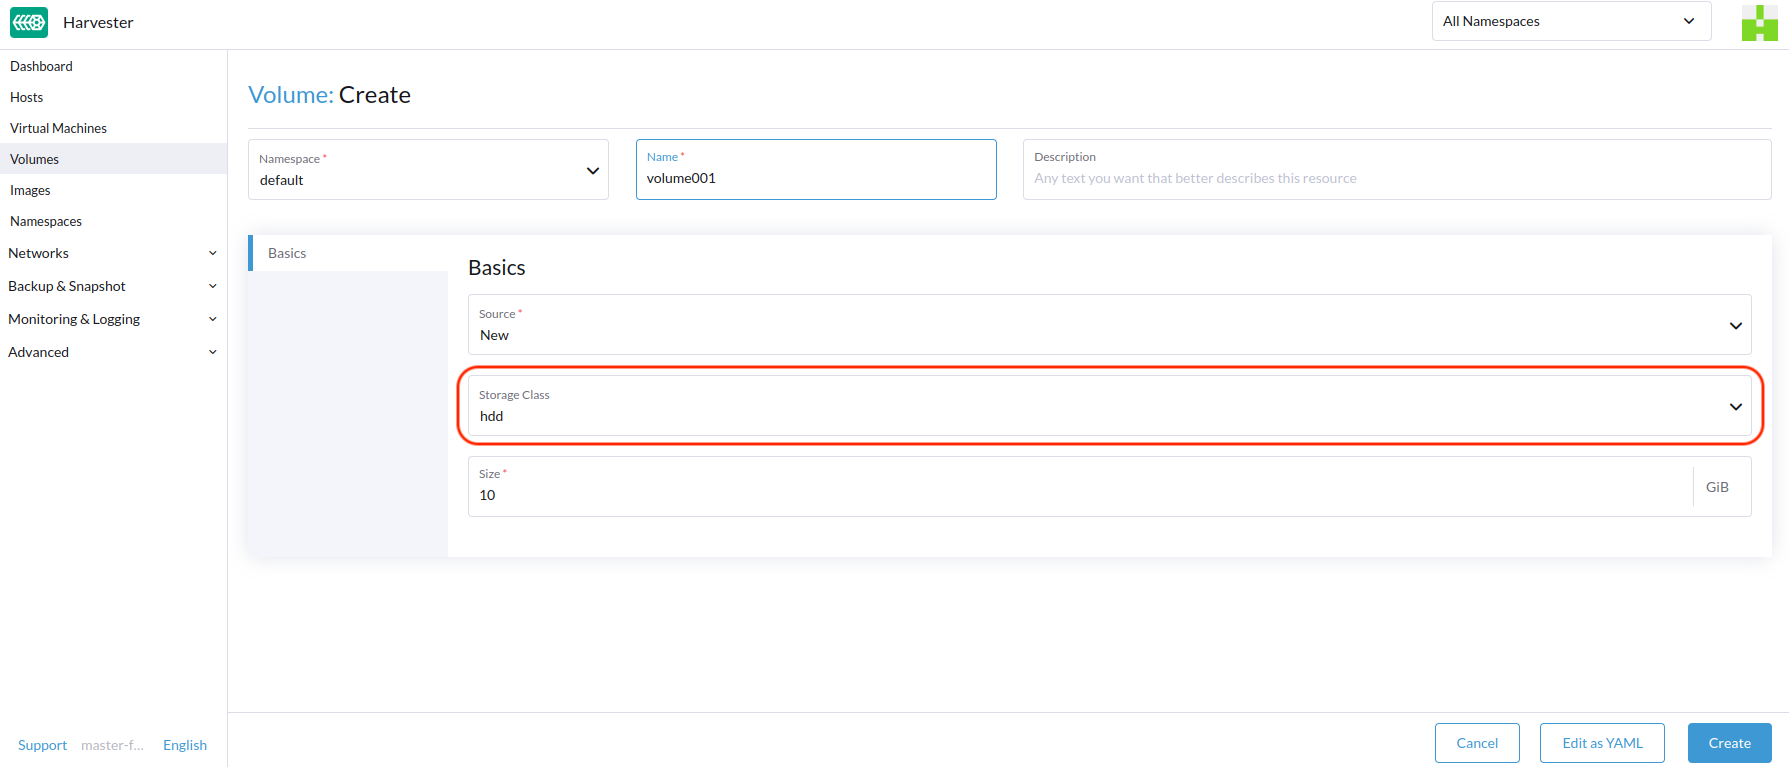
You can now create a volume using the above StorageClass with HDDs mostly for cold storage or archiving purpose.