IP Pool
IP Pool is a built-in IP address management (IPAM) solution exclusively available to SUSE Virtualization load balancers (LBs).
Features
-
Multiple IP ranges: Each IP pool can contain multiple IP ranges or CIDRs.
-
Allocation history: The IP pool keeps track of the allocation history of every IP address and prioritizes assigning previously allocated addresses by load balancer name.
status: allocatedHistory: 192.168.178.8: default/rke2-default-lb-pool-2fab9ac0 -
Scope: IP pools can be confined to a particular network, project, namespace, or guest cluster.
Creating an IP pool
-
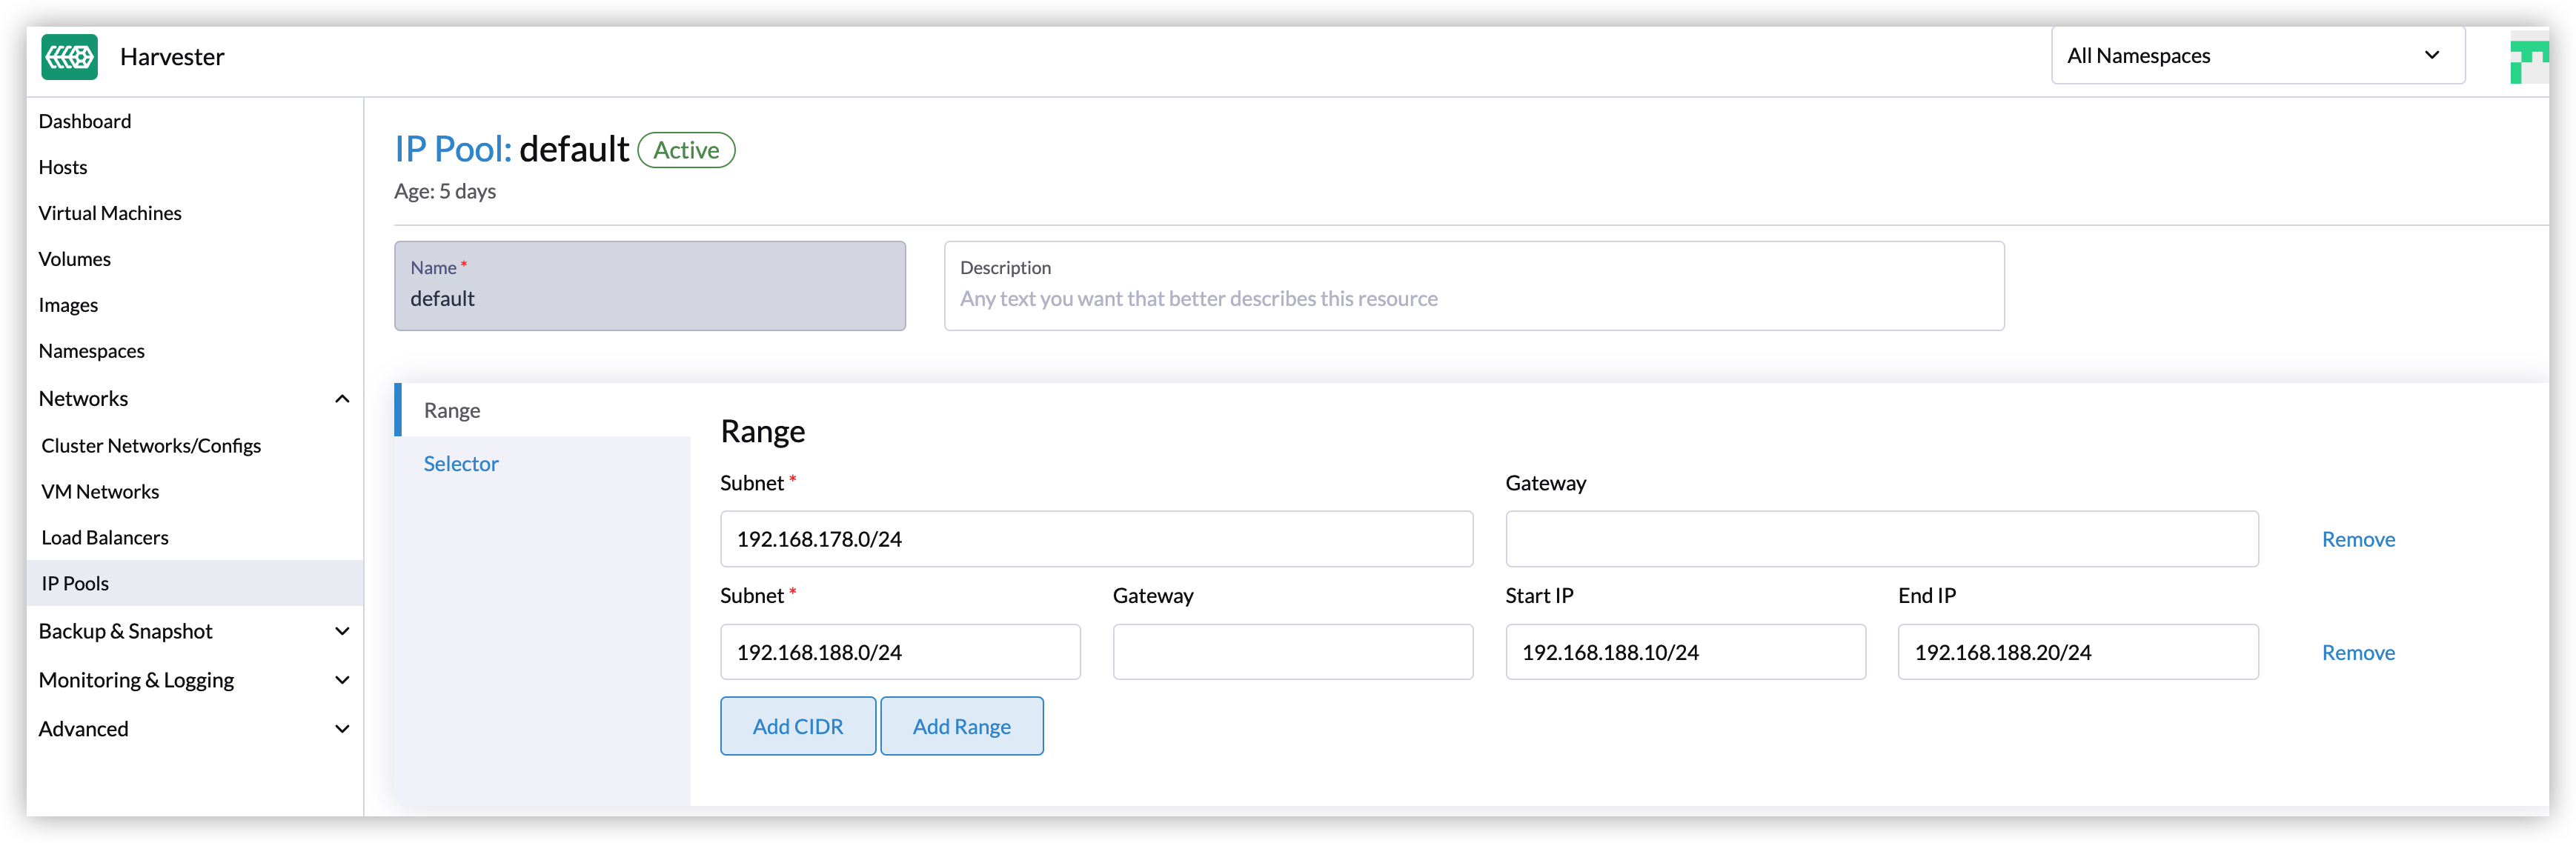
On the SUSE Virtualization UI, go to Networks → IP Pools.
-
Select Create.
-
Specify a name for the IP pool.
-
On the Range tab, specify one or more IP ranges.
-
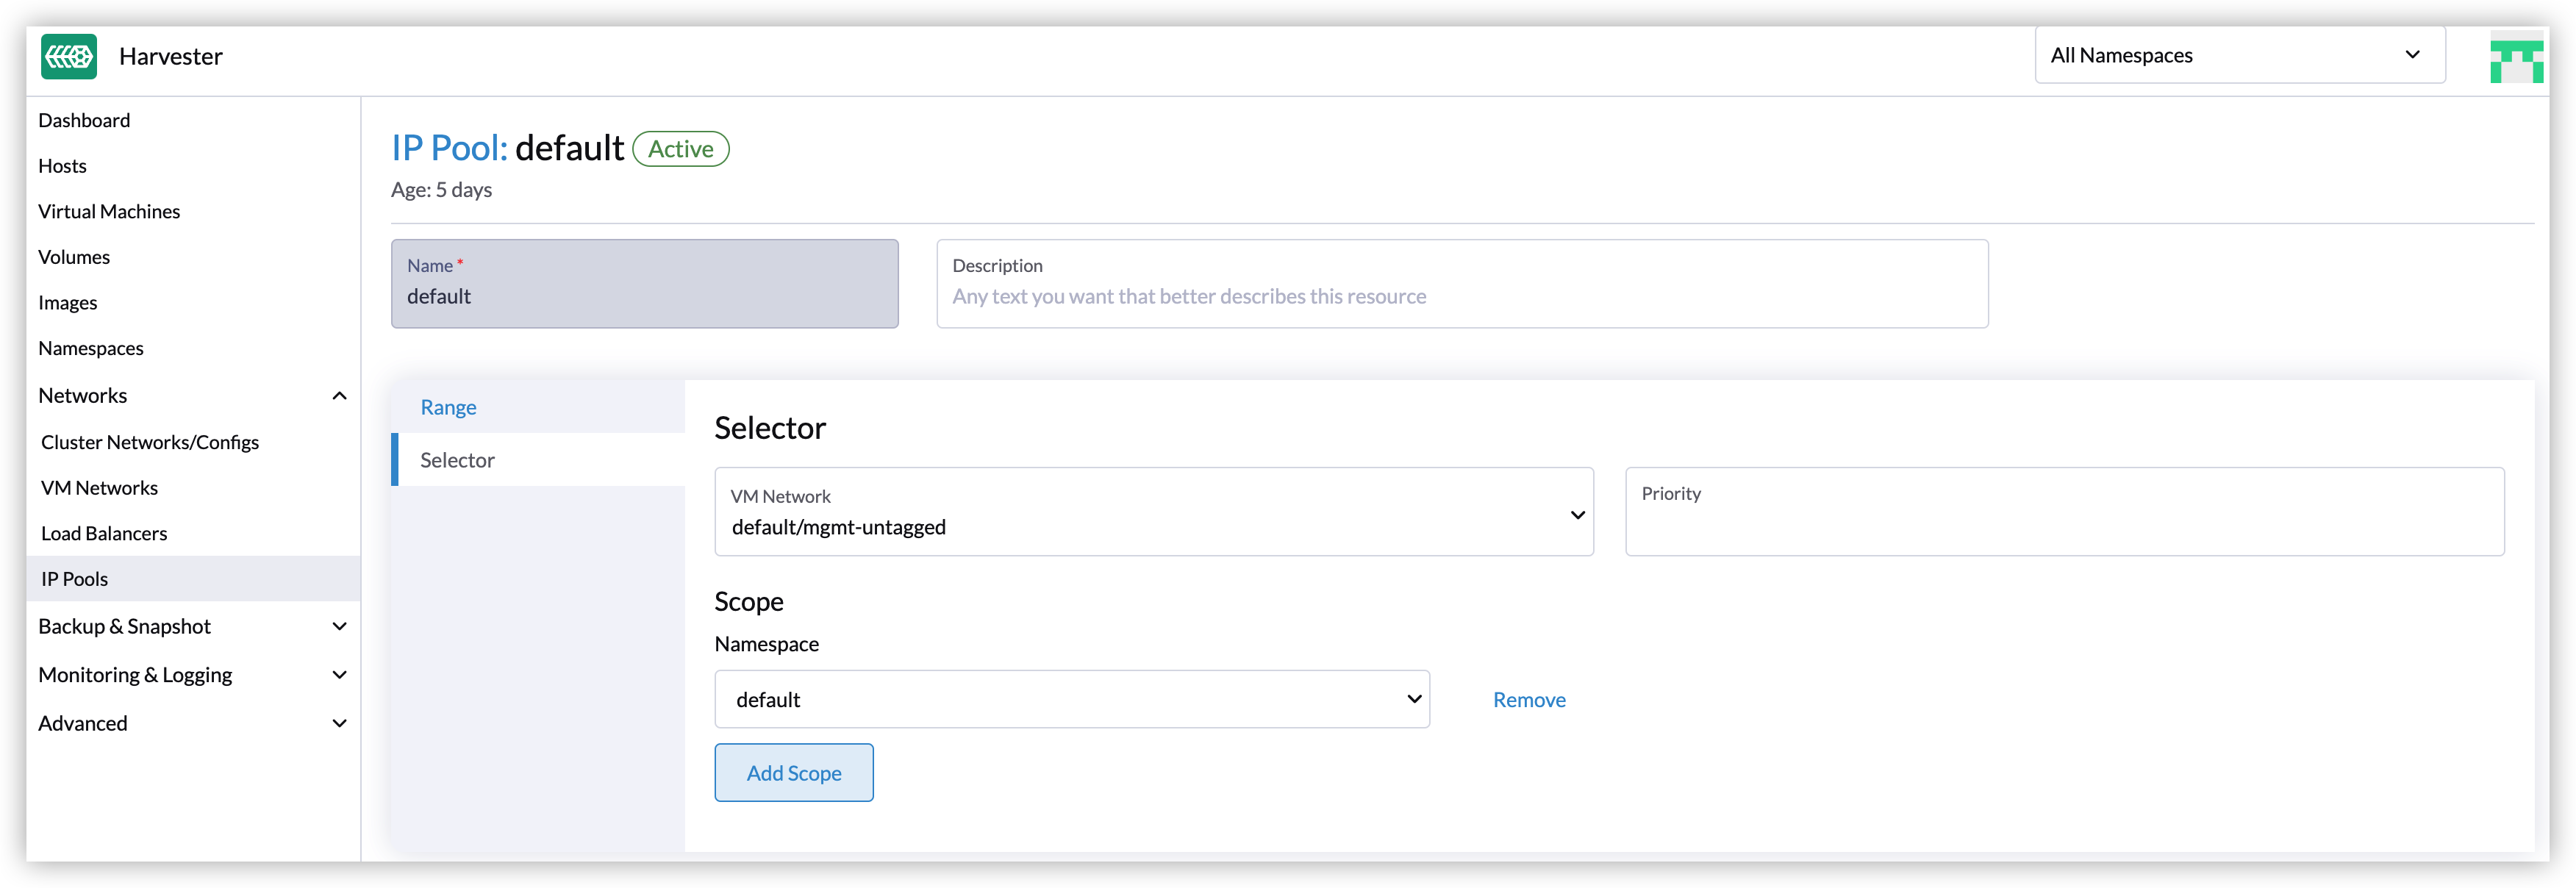
On the Selector tab, specify the VM network, priority level, and namespace of the IP pool.
Creating an IP pool using the Rancher UI
If you imported the SUSE Virtualization cluster into Rancher, you can create an IP pool using the Rancher UI (Virtualization Management → IP Pool: Create*). However, the Scope section on the Selector tab requires you to specify the project and guest Kubernetes cluster, in addition to the namespace. For more information, see Multi-Tenancy Example and Projects and Kubernetes Namespaces with Rancher.
An IP pool is designated as a global resource when the Scope section contains only one entry with the Project, Namespace, and Guest Kubernetes Cluster fields set to All.
Selection policy
Each IP pool will have a specific range, and you can specify the corresponding requirements in the LB annotations. IP pools that meet the specified requirements will automatically assign IP addresses to LBs.
-
LBs utilize the following annotations to express requirements (all annotations are optional):
-
loadbalancer.harvesterhci.io/network: Specifies the VM network that the guest cluster nodes use. If this annotation is omitted, the mutator automatically selects the first Multus network defined in the guest cluster’s virtual machine instances. -
loadbalancer.harvesterhci.io/projectandloadbalancer.harvesterhci.io/namespace: Identify the project and namespace of the VMs that comprise the guest cluster. -
loadbalancer.harvesterhci.io/cluster: Denotes the name of the guest cluster.
-
-
The IP pool has a selector, including network and scope, to match the requirements of the LB.
-
Network is a hard condition. The target IP pool must match the value of the LB annotation
loadbalancer.harvesterhci.io/network. -
Every IP pool, except the global IP pool, has a unique scope different from others if its priority is
0. The project, namespace, or cluster name of LBs should be in the scope of the IP pool if they want to get an IP from this pool.
-
-
spec.selector.priorityspecifies the priority of the IP Pool. The larger the number, the higher the priority. If the priority is not0, the value should differ. The priority helps you to migrate the old IP pool to the new one. -
An IP pool whose scope matches all projects, namespaces, and guest clusters is referred to as a global IP pool. Only one global IP pool is permitted. If no IP pool matches the load balancer’s requirements, the IPAM controller automatically allocates an IP address from the global IP pool (if it exists).
|
Network matching is not enforced. This means that a global IP pool could inadvertently allocate IPs to the incorrect network. For information about risk mitigation and resource allocation, see Best practices. |
Examples
-
Example 1: You wish to set up an IP pool within the range
192.168.100.0/24for thedefaultnamespace. In this scenario, all load balancers within thedefaultnamespace will receive an IP address from this designated IP pool:apiVersion: networking.harvesterhci.io/v1beta1 kind: IPPool metadata: name: default-ip-pool spec: ranges: - subnet: 192.168.100.0/24 selector: scope: namespace: default -
Example 2: You have a guest cluster
rke2deployed within the networkdefault/vlan1, and itsproject/namespacename isproduct/default. If you want to configure an exclusive IP pool range192.168.10.10-192.168.10.20for it. Refer to the followingYAMLconfig:apiVersion: networking.harvesterhci.io/v1beta1 kind: IPPool metadata: name: rke2-ip-pool spec: ranges: - subnet: 192.168.10.0/24 rangeStart: 192.168.10.10 rangeEnd: 192.168.10.20 selector: network: default/vlan1 scope: - project: product namespace: default guestCluster: rke2 -
Example 3: If you have specified the IP pool
default-ip-poolfor thedefaultnamespace, you want to migrate the IP pooldefault-ip-poolto a different IP pooldefault-ip-pool-2with range192.168.200.0/24. It’s not allowed to specify over one IP pool for the same scope, but you can give the IP pooldefault-ip-pool-2a higher priority thandefault-ip-pool. Refer to the followingYAMLconfig:apiVersion: networking.harvesterhci.io/v1beta1 kind: IPPool metadata: name: default-ip-pool-2 spec: ranges: - subnet: 192.168.200.0/24 selector: priority: 1 # The priority is higher than default-ip-pool scope: namespace: default -
Example 4: You want to configure a global IP pool with a CIDR range of
192.168.20.0/24:apiVersion: networking.harvesterhci.io/v1beta1 kind: IPPool metadata: name: global-ip-pool labels: loadbalancer.harvesterhci.io/global-ip-pool: 'true' # Added automatically by {harvester-product-name} spec: ranges: - subnet: 192.168.20.0/24 selector: scope: - project: "*" namespace: "*" guestCluster: "*"
Allocation policy
-
The IP pool prioritizes the allocation of previously assigned IP addresses based on their allocation history.
-
IP addresses are assigned in ascending order.
Best practices
IP pool for VM type load balancer
-
Create an IP pool using the SUSE Virtualization UI, which leaves the scope selector’s Project and Guest Kubernetes Cluster fields blank.
-
If you must use the Rancher UI, set the Project and Guest Kubernetes Cluster fields to either All or None.
IP pool for guest cluster type load balancer
-
Create an IP pool using the Rancher UI, which allows you to specify the target project, namespace, and guest Kubernetes cluster for better resource management and isolation.
-
Exercise caution when creating a global IP pool. One guest cluster could consume too many IP addresses and starve other clusters on the network. Additionally, a global IP pool cannot be deleted while any of its allocated IP addresses remain in use. Lastly, this version lacks mandatory network matching, which could lead to IP allocation across incorrect networks.
-
For optimal network isolation, use project-scoped or namespace-scoped IP pools. Because each guest cluster is deployed within a specific project and namespace, you should create dedicated IP pools with explicitly defined IP ranges. This approach offers several advantages:
-
Granular control: A single virtual machine network can support multiple non-global pools, allowing you to partition IP address availability safely across different projects or namespaces.
-
Resource protection: The exhaustion of one pool does not affect other pools that share the same underlying network.
-
Scalability: It is easier to expand an IP pool’s range than to shrink it. Shrinking an active range is difficult if allocated IP addresses are scattered (for example, in a pool range of
.1through.10, shrinking the pool is difficult if.1,.5, and.9are already in use). As a best practice, start with a smaller range and expand it as your cluster workloads grow.
-