5 Managing Repositories with YaST SMT Server Management #
The YaST SMT Server Management module is designed to perform daily management tasks. It can be used to enable and disable the mirroring of repositories, the staging flag for repositories, and perform the mirroring and staging.
5.1 Starting SMT Management Module #
SMT Management is a YaST module. There are two ways to start the module:
Start YaST and select , then
Run the
yast2 smtcommand in the terminal asroot
This opens the SMT Management application window and switches to the section.
5.2 Viewing and Managing Repositories #
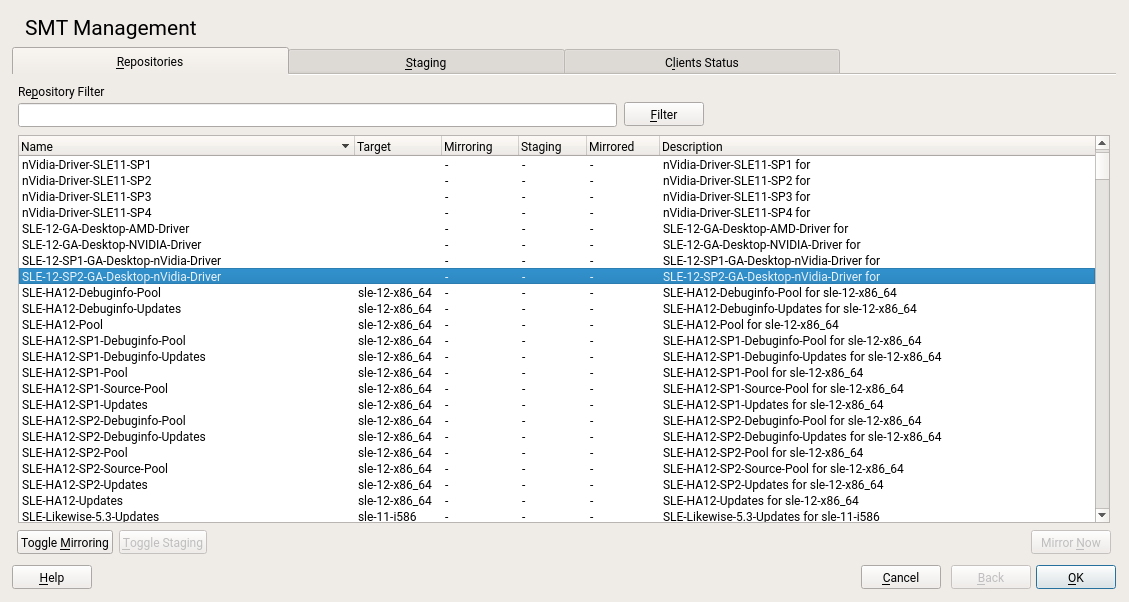
In the section, you can see the list of all available package repositories for SMT. For each repository, the list shows the repository's name, target product and architecture, mirroring and staging flag, date of last mirroring, and a short description. Sort the list by clicking the desired column header, and scroll the list items using the scrollbar on the right side.
5.2.1 Filtering Repositories #
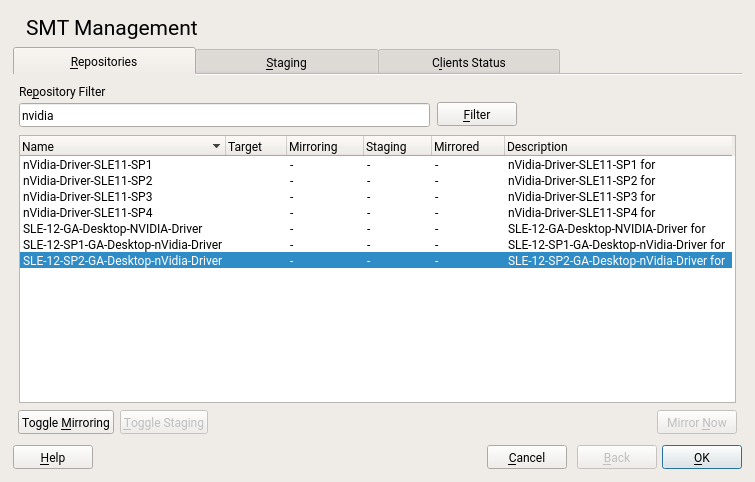
You can also filter out groups of repositories using the text box. Enter the desired filter term and click to see only the matching entries. To cancel the current filter and display all repositories, clear the field and click .
5.2.2 Mirroring Repositories #
Before you can offer package repositories, you need to create a local mirror of their packages. To do this, follow the procedure below.
From the list, select the line containing the name of the repository you want to mirror.
Click the selected line to highlight it.
Click the button in the lower-left part of the window. This enables the option in the column of the selected repository. If the repository was already selected for mirroring, clicking the button disables the mirroring.
Hit the button to mirror the repository.
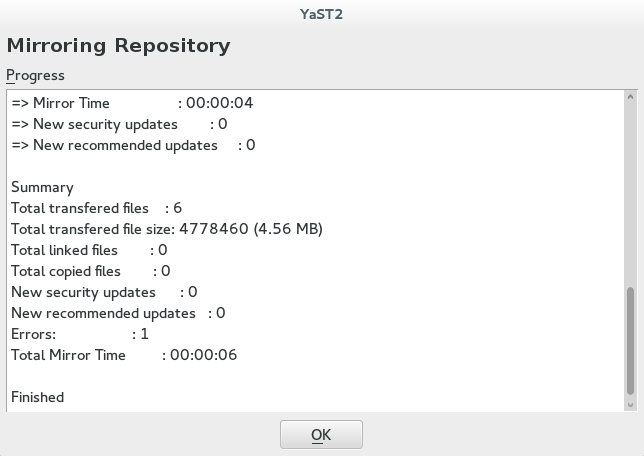
A pop-up window appears with the information about mirroring status and result.
Click to refresh the list of repositories.
5.3 Staging Repositories #
After the mirroring is finished, you can stage the mirrored repositories. In SMT, staging is a process where you create either testing or production repositories based on the mirrored ones. The testing repository helps you examine the repository and its packages before you make them available in a production environment. To make repositories available for staging, follow the steps below.
From the repository list, select the line containing the name of the repository you want to manage.
Click the selected line to highlight it.
Click the button next to the button. This enables the option in the column of the selected repository. If the repository was already selected for staging before, clicking the button disables staging.
Repeat steps 1 to 3 for all directories you want to stage.
You can only stage the repositories that were previously selected for mirroring. Otherwise, the button will disabled.
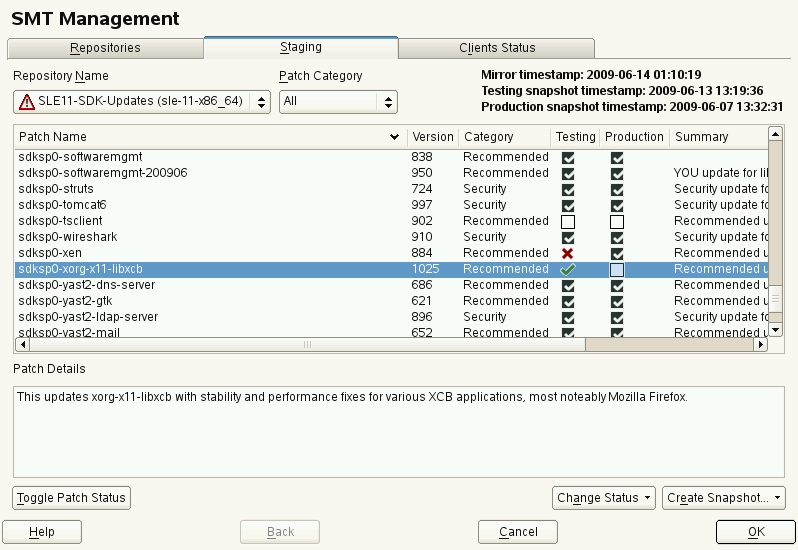
After you have mirrored the repositories and made them available for staging, click the tab. In the upper-left part of the window, you will find the drop-down box containing all repositories available for staging. The repository names there have the name of the attached staging group. Select the group you want to stage, and you should see a list of packages in this repository. For each patch, there is information about the patch name, its version and category, testing and production flags, and a short summary.
Next to the drop-down box, there is a filter. It can be used for listing only the patches that belong to one of the predefined categories.
If the selected repository allows for patch filtering, you can toggle the status flag for individual patches. This is done by clicking the button.
Before creating a repository of packages that are available in the production environment, you need to create and test the testing repository. Select the item from the drop-down list. A small pop-up window appears informing you about the staging process. After the testing repository snapshot has been created, you should see the appropriate options enabled in the column.
After you have enabled staging for an update repository, you need to create its production snapshot to make it available to the clients. Otherwise, the clients cannot find the update repository.
Select the item from the drop-down box. A small pop-up window appears informing you about linking the testing repository to the production one. After the production snapshot has been created, you should see the appropriate options enabled in the column. Also, a green check mark appears in the drop-down box.
5.4 Jobs and Client Status Monitoring #
For each client that is registered against the SMT server, SMT creates a
job queue. To use the job queue, you need to install the
smt-client package on the client. During the
installation of the smt-client package, a cron job
is created that runs the client executable
/usr/sbin/smt-agent every three hours. The
agent then asks the server if it has any jobs in the queue belonging to this
client and executes these jobs. When there are no more jobs in the queue,
the agent terminates completely. It is important to understand that jobs are
not pushed directly to the clients when they get created. They are not
executed until the client asks for them at the intervals specified in the cron job.
Therefore, from the time a job is created on the server until it is executed on the
client, a delay of several hours may occur.
Every job can have a parent job. This means that the child job only runs after the parent job has successfully finished. It is also possible to configure advanced timing and recurrence and persistence of jobs. You can find more details about SMT jobs in Section 8.1.2.3, “smt-job”.
When creating jobs, you need to specify the GUID of the target clients using
the -g GUID parameter. Although
the -g parameter can be specified multiple times in a
single command, you cannot use wild cards to assign a job to all
clients.
Currently, the following types of jobs are available:
- Execute
Run commands on the client
- Eject
Open, close, or toggle the CD tray of the client
- Patchstatus
Report the status of installed patches
- Reboot
Reboot the client
- Softwarepush
Install packages
- Update
Install available updates
By default only softwarepush, patchstatus, and update jobs are
allowed. To allow more types of jobs, append the job type to the
ALLOWED_AGENTS list in
/etc/sysconfig/smt-client.
All clients that register against the SMT server automatically get a
persistent patchstatus job added to their job queue. This
is also the case for
clients without the smt-clients package (SUSE Linux Enterprise 10 and
older, or non-SUSE based distributions). These clients appear with the
Unknown patchstatus in the client lists. The patchstatus jobs for
such clients are not required, and clients can safely be deleted to clean
up the output of smt-job. Keep in mind that if you
update a machine to SUSE Linux Enterprise 11 or later, you need to create the
patchstatus job manually.
Whenever the client runs a patchstatus job, it compares the currently
installed updates with what is available in the repositories on the SMT
server. The job then reports back the number of missing patches that need to
be installed in each of the four categories:
Security
Package Manager
Recommended
Optional
--agreelicense Option
To install a package and its dependencies, the job type softwarepush is
used. When creating this type of job, it is a good idea to use the
--agreelicense option. If a
package displays a license agreement and expects it to be accepted, the job
will skip the package if --agreelicense is not
specified. The smt-client command forwards the installation
process to zypper, which does not consider a failed
acceptance of a license agreement to be an error. This results in the job
being completed successfully, even if the package is not installed. Using the
--agreelicense option prevents this from happening.
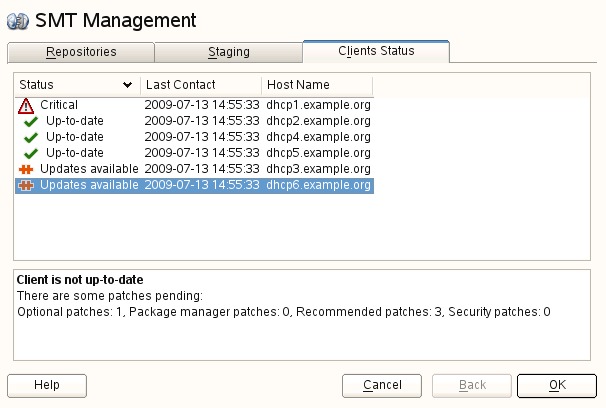
5.4.1 Checking the Client Status with YaST #
The section of the window provides the status information about all the clients that use the repositories on your SMT server. This information consists of two main parts: the list of the clients and the detailed information.
You can see the client's host name, the date and time of the last network contact with the SMT server, and its update status. The update status can be one of the following:
- Up-to-date
The client packages are updated to their last version available in the production repository
- Updates available
This status means that there are updates available for the client that are either
optionalorrecommended- Critical
Either
securitypatches orpackage managerpatches are available for the client
Detailed information about the selected client is available in the lower part of the window. This usually includes extended status information and detailed information about the number and types of available updates.
The date and time in the column is the
last time contact of the server—even if it only ran the regular
registration update script. This date is not the date of the last
'patchstatus' report. The smt-client command-line tool
prints the correct date and calls it Patch Status Date.
The smt-client -v command prints both dates: the
patchstatus date
and the last contact of the client system.
Some patches may not be visible if they are required by other patches that are only shown as available after the package manager patch or patches have been installed.
