6 Configuring cluster resources #
As a cluster administrator, you need to create cluster resources for every resource or application you run on servers in your cluster. Cluster resources can include Web sites, e-mail servers, databases, file systems, virtual machines, and any other server-based applications or services you want to make available to users at all times.
6.1 Types of resources #
The following types of resources can be created:
- Primitives
A primitive resource, the most basic type of resource.
- Groups
Groups contain a set of resources that need to be located together, started sequentially and stopped in the reverse order.
- Clones
Clones are resources that can be active on multiple hosts. Any resource can be cloned, provided the respective resource agent supports it.
Promotable clones (also known as multi-state resources) are a special type of clone resources that can be promoted.
6.2 Supported resource agent classes #
For each cluster resource you add, you need to define the standard that the resource agent conforms to. Resource agents abstract the services they provide and present an accurate status to the cluster, which allows the cluster to be non-committal about the resources it manages. The cluster relies on the resource agent to react appropriately when given a start, stop or monitor command.
Typically, resource agents come in the form of shell scripts. SUSE Linux Enterprise High Availability supports the following classes of resource agents:
- Open Cluster Framework (OCF) resource agents
OCF RA agents are best suited for use with High Availability, especially when you need promotable clone resources or special monitoring abilities. The agents are generally located in
/usr/lib/ocf/resource.d/provider/. Their functionality is similar to that of LSB scripts. However, the configuration is always done with environmental variables which allow them to accept and process parameters easily. OCF specifications have strict definitions of which exit codes must be returned by actions, see Section 10.3, “OCF return codes and failure recovery”. The cluster follows these specifications exactly.All OCF Resource Agents are required to have at least the actions
start,stop,status,monitor, andmeta-data. Themeta-dataaction retrieves information about how to configure the agent. For example, to know more about theIPaddragent by the providerheartbeat, use the following command:OCF_ROOT=/usr/lib/ocf /usr/lib/ocf/resource.d/heartbeat/IPaddr meta-data
The output is information in XML format, including several sections (general description, available parameters, available actions for the agent).
Alternatively, use the
crmshto view information on OCF resource agents. For details, see Section 5.5.3, “Displaying information about OCF resource agents”.- Linux Standards Base (LSB) scripts
LSB resource agents are generally provided by the operating system/distribution and are found in
/etc/init.d. To be used with the cluster, they must conform to the LSB init script specification. For example, they must have several actions implemented, which are, at minimum,start,stop,restart,reload,force-reload, andstatus. For more information, see http://refspecs.linuxbase.org/LSB_4.1.0/LSB-Core-generic/LSB-Core-generic/iniscrptact.html.The configuration of those services is not standardized. If you intend to use an LSB script with High Availability, make sure that you understand how the relevant script is configured. Often you can find information about this in the documentation of the relevant package in
/usr/share/doc/packages/PACKAGENAME.- Systemd
Starting with SUSE Linux Enterprise 12, systemd is a replacement for the popular System V init daemon. Pacemaker can manage systemd services if they are present. Instead of init scripts, systemd has unit files. Generally the services (or unit files) are provided by the operating system. In case you want to convert existing init scripts, find more information at http://0pointer.de/blog/projects/systemd-for-admins-3.html.
- Service
There are currently many “common” types of system services that exist in parallel:
LSB(belonging to System V init),systemd, and (in some distributions)upstart. Therefore, Pacemaker supports a special alias which intelligently figures out which one applies to a given cluster node. This is particularly useful when the cluster contains a mix of systemd, upstart, and LSB services. Pacemaker will try to find the named service in the following order: as an LSB (SYS-V) init script, a systemd unit file, or an Upstart job.- Nagios
Monitoring plug-ins (formerly called Nagios plug-ins) allow to monitor services on remote hosts. Pacemaker can do remote monitoring with the monitoring plug-ins if they are present. For detailed information, see Section 9.1, “Monitoring services on remote hosts with monitoring plug-ins”.
- STONITH (fencing) resource agents
This class is used exclusively for fencing related resources. For more information, see Chapter 12, Fencing and STONITH.
The agents supplied with SUSE Linux Enterprise High Availability are written to OCF specifications.
6.3 Timeout values #
Timeouts values for resources can be influenced by the following parameters:
op_defaults(global timeout for operations),a specific timeout value defined in a resource template,
a specific timeout value defined for a resource.
If a specific value is defined for a resource, it takes precedence over the global default. A specific value for a resource also takes precedence over a value that is defined in a resource template.
Getting timeout values right is very important. Setting them too low will result in a lot of (unnecessary) fencing operations for the following reasons:
If a resource runs into a timeout, it fails and the cluster will try to stop it.
If stopping the resource also fails (for example, because the timeout for stopping is set too low), the cluster will fence the node. It considers the node where this happens to be out of control.
You can adjust the global default for operations and set any specific
timeout values with both crmsh and Hawk2. The best practice for
determining and setting timeout values is as follows:
Check how long it takes your resources to start and stop (under load).
If needed, add the
op_defaultsparameter and set the (default) timeout value accordingly:For example, set
op_defaultsto60seconds:crm(live)configure#op_defaults timeout=60For resources that need longer periods of time, define individual timeout values.
When configuring operations for a resource, add separate
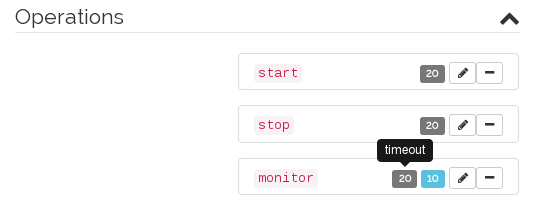
startandstopoperations. When configuring operations with Hawk2, it will provide useful timeout proposals for those operations.
6.4 Creating primitive resources #
Before you can use a resource in the cluster, it must be set up. For example, to use an Apache server as a cluster resource, set up the Apache server first and complete the Apache configuration before starting the respective resource in your cluster.
If a resource has specific environment requirements, make sure they are present and identical on all cluster nodes. This kind of configuration is not managed by SUSE Linux Enterprise High Availability. You must do this yourself.
You can create primitive resources using either Hawk2 or crmsh.
When managing a resource with SUSE Linux Enterprise High Availability, the same resource must not be started or stopped otherwise (outside of the cluster, for example manually or on boot or reboot). The High Availability software is responsible for all service start or stop actions.
If you need to execute testing or maintenance tasks after the services are already running under cluster control, make sure to put the resources, nodes, or the whole cluster into maintenance mode before you touch any of them manually. For details, see Section 28.2, “Different options for maintenance tasks”.
Cluster resources and cluster nodes should be named differently. Otherwise Hawk2 will fail.
6.4.1 Creating primitive resources with Hawk2 #
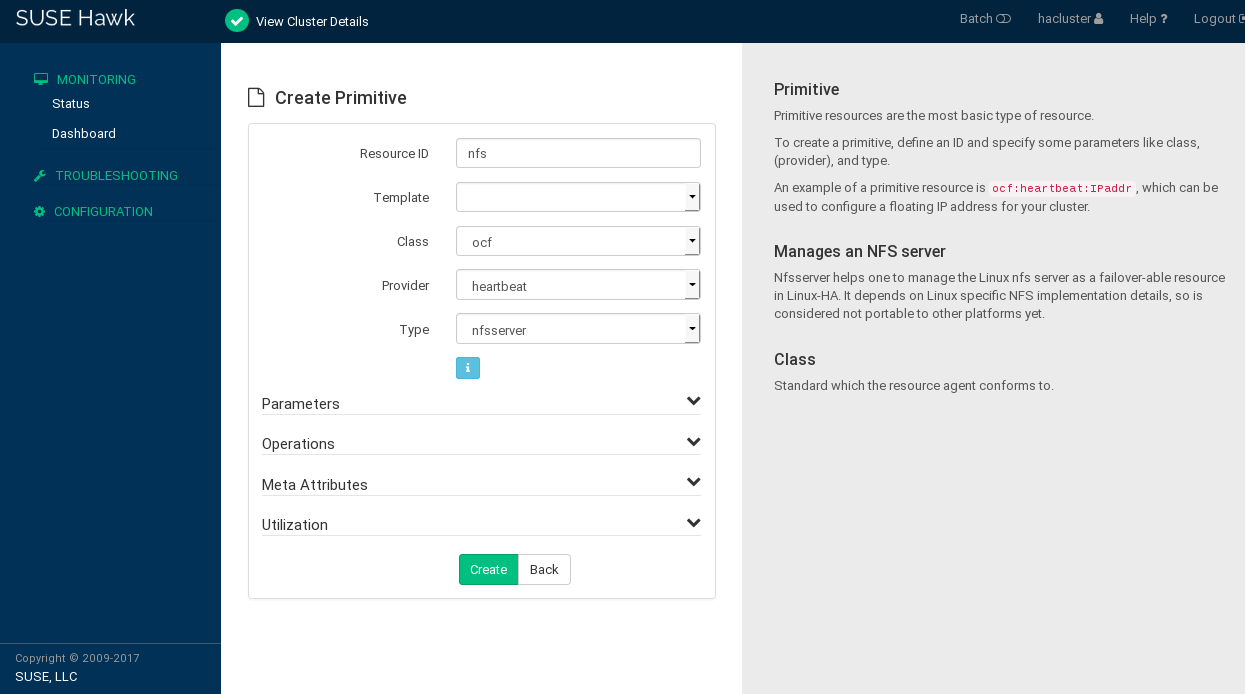
To create the most basic type of resource, proceed as follows:
Log in to Hawk2:
https://HAWKSERVER:7630/
From the left navigation bar, select › › .
Enter a unique .
If a resource template exists on which you want to base the resource configuration, select the respective .
Select the resource agent you want to use:
lsb,ocf,service,stonith, orsystemd. For more information, see Section 6.2, “Supported resource agent classes”.If you selected
ocfas class, specify the of your OCF resource agent. The OCF specification allows multiple vendors to supply the same resource agent.From the list, select the resource agent you want to use (for example, or ). A short description for this resource agent is displayed.
NoteThe selection you get in the list depends on the (and for OCF resources also on the ) you have chosen.
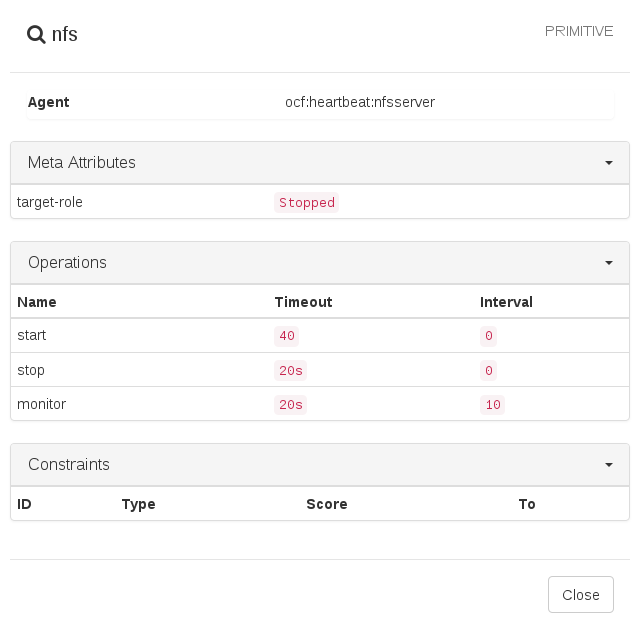
Figure 6.1: Hawk2—primitive resource #After you have specified the resource basics, Hawk2 shows the following categories. Either keep these categories as suggested by Hawk2, or edit them as required.
- Parameters (instance attributes)
Determines which instance of a service the resource controls. When creating a resource, Hawk2 automatically shows any required parameters. Edit them to get a valid resource configuration.
For more information, refer to Section 6.13, “Instance attributes (parameters)”.
- Operations
Needed for resource monitoring. When creating a resource, Hawk2 displays the most important resource operations (
monitor,start, andstop).For more information, refer to Section 6.14, “Resource operations”.
- Meta attributes
Tells the CRM how to treat a specific resource. When creating a resource, Hawk2 automatically lists the important meta attributes for that resource (for example, the
target-roleattribute that defines the initial state of a resource. By default, it is set toStopped, so the resource will not start immediately).For more information, refer to Section 6.12, “Resource options (meta attributes)”.
- Utilization
Tells the CRM what capacity a certain resource requires from a node.
For more information, refer to Section 7.10.1, “Placing resources based on their load impact with Hawk2”.
Click to finish the configuration. A message at the top of the screen shows if the action has been successful.
6.4.2 Creating primitive resources with crmsh #
crmsh #Log in as
rootand start thecrmtool:#crm configureConfigure a primitive IP address:
crm(live)configure#primitive myIP IPaddr \ params ip=127.0.0.99 op monitor interval=60sThe previous command configures a “primitive” with the name
myIP. You need to choose a class (hereocf), provider (heartbeat), and type (IPaddr). Furthermore, this primitive expects other parameters like the IP address. Change the address to your setup.Display and review the changes you have made:
crm(live)configure#showCommit your changes to take effect:
crm(live)configure#commit
6.5 Creating resource groups #
Some cluster resources depend on other components or resources. They require that each component or resource starts in a specific order and runs together on the same server with resources it depends on. To simplify this configuration, you can use cluster resource groups.
You can create resource groups using either Hawk2 or crmsh.
An example of a resource group would be a Web server that requires an IP address and a file system. In this case, each component is a separate resource that is combined into a cluster resource group. The resource group would run on one or more servers. In case of a software or hardware malfunction, the group would fail over to another server in the cluster, similar to an individual cluster resource.
Groups have the following properties:
- Starting and stopping
Resources are started in the order they appear in and stopped in the reverse order.
- Dependency
If a resource in the group cannot run anywhere, then none of the resources located after that resource in the group is allowed to run.
- Contents
Groups may only contain a collection of primitive cluster resources. Groups must contain at least one resource, otherwise the configuration is not valid. To refer to the child of a group resource, use the child's ID instead of the group's ID.
- Constraints
Although it is possible to reference the group's children in constraints, it is usually preferable to use the group's name instead.
- Stickiness
Stickiness is additive in groups. Every active member of the group will contribute its stickiness value to the group's total. So if the default
resource-stickinessis100and a group has seven members (five of which are active), the group as a whole will prefer its current location with a score of500.- Resource monitoring
To enable resource monitoring for a group, you must configure monitoring separately for each resource in the group that you want monitored.
6.5.1 Creating resource groups with Hawk2 #
Groups must contain at least one resource, otherwise the configuration is not valid. While creating a group, Hawk2 allows you to create more primitives and add them to the group.
Log in to Hawk2:
https://HAWKSERVER:7630/
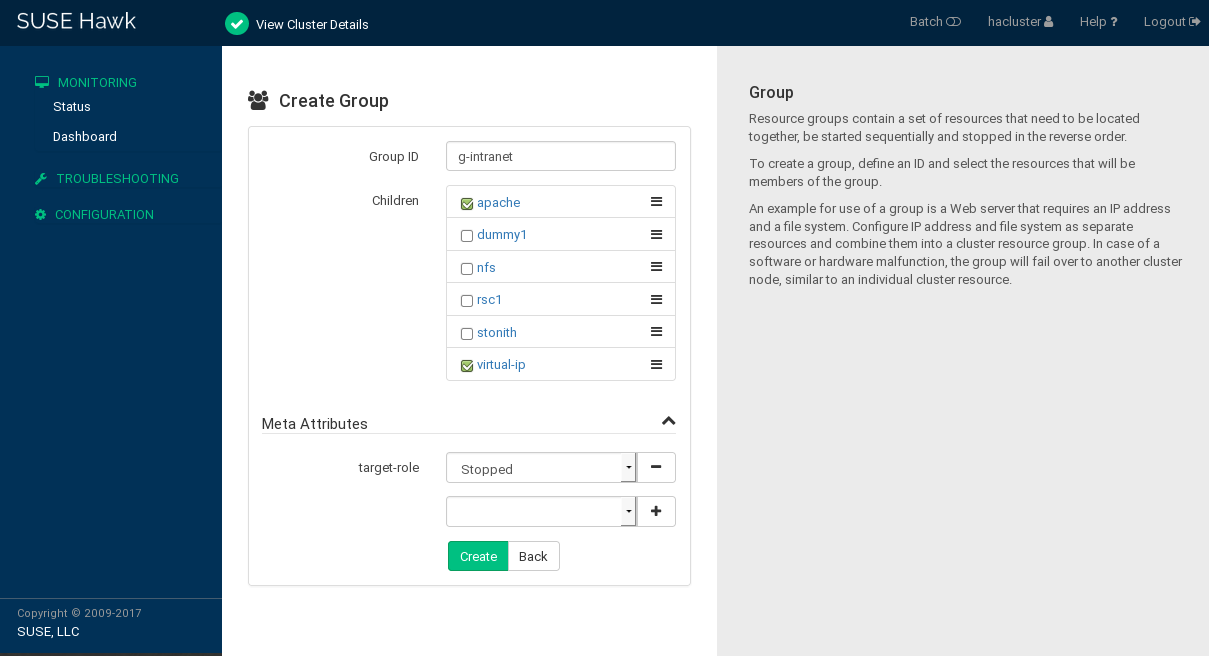
From the left navigation bar, select › › .
Enter a unique .
To define the group members, select one or multiple entries in the list of . Re-sort group members by dragging and dropping them into the order you want by using the “handle” icon on the right.
If needed, modify or add .
Click to finish the configuration. A message at the top of the screen shows if the action has been successful.
6.5.2 Creating a resource group with crmsh #
The following example creates two primitives (an IP address and an e-mail resource).
crmsh #Run the
crmcommand as system administrator. The prompt changes tocrm(live).Configure the primitives:
crm(live)#configurecrm(live)configure#primitive Public-IP ocf:heartbeat:IPaddr2 \ params ip=1.2.3.4 \ op monitor interval=10scrm(live)configure#primitive Email systemd:postfix \ op monitor interval=10sGroup the primitives with their relevant identifiers in the correct order:
crm(live)configure#group g-mailsvc Public-IP Email
6.6 Creating clone resources #
You may want certain resources to run simultaneously on multiple nodes in your cluster. To do this you must configure a resource as a clone. Examples of resources that might be configured as clones include cluster file systems like OCFS2. You can clone any resource provided. This is supported by the resource's Resource Agent. Clone resources may even be configured differently depending on which nodes they are hosted.
There are three types of resource clones:
- Anonymous clones
These are the simplest type of clones. They behave identically anywhere they are running. Because of this, there can only be one instance of an anonymous clone active per machine.
- Globally unique clones
These resources are distinct entities. An instance of the clone running on one node is not equivalent to another instance on another node; nor would any two instances on the same node be equivalent.
- Promotable clones (multi-state resources)
Active instances of these resources are divided into two states: promoted and unpromoted. These are also sometimes called primary and secondary. Promotable clones can be either anonymous or globally unique. For more information, see Section 6.7, “Creating promotable clones (multi-state resources)”.
Clones must contain exactly one group or one regular resource.
When configuring resource monitoring or constraints, clones have different requirements than simple resources. For details, see Pacemaker Explained, available from https://clusterlabs.org/projects/pacemaker/doc/.
You can create clone resources using either Hawk2 or crmsh.
6.6.1 Creating clone resources with Hawk2 #
Clones can either contain a primitive or a group as child resources. In Hawk2, child resources cannot be created or modified while creating a clone. Before adding a clone, create child resources and configure them as desired.
Log in to Hawk2:
https://HAWKSERVER:7630/
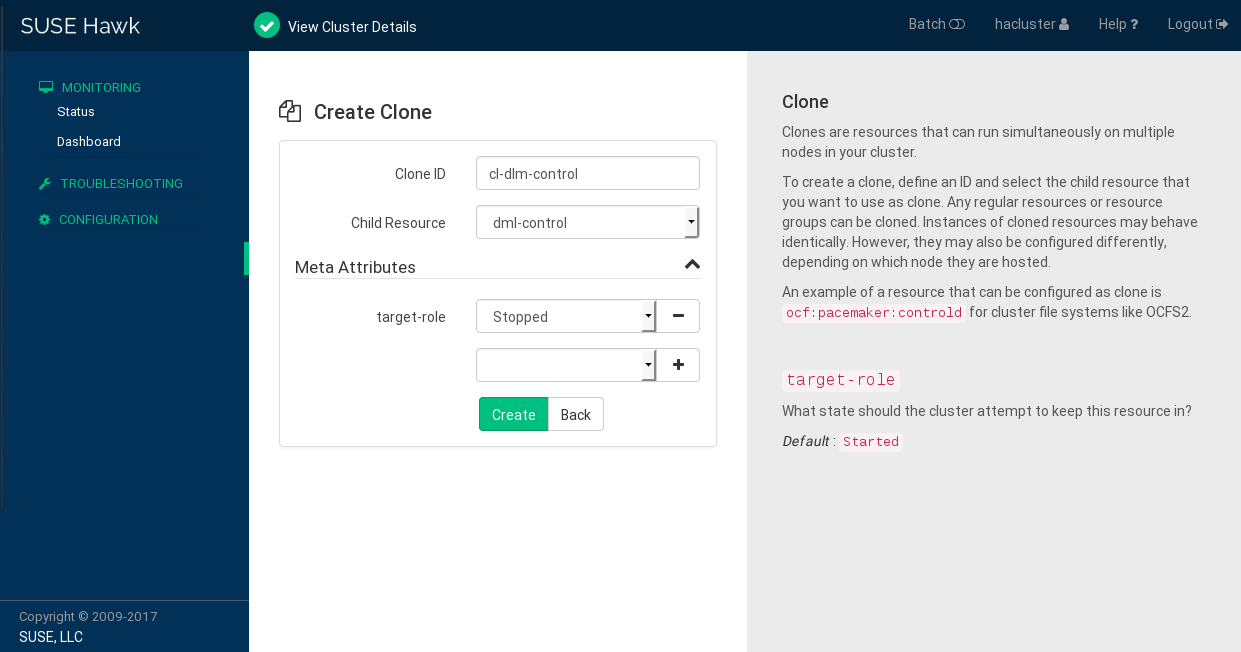
From the left navigation bar, select › › .
Enter a unique .
From the list, select the primitive or group to use as a sub-resource for the clone.
If needed, modify or add .
Click to finish the configuration. A message at the top of the screen shows if the action has been successful.
6.6.2 Creating clone resources with crmsh #
To create an anonymous clone resource, first create a primitive
resource and then refer to it with the clone command.
crmsh #Log in as
rootand start thecrminteractive shell:#crm configureConfigure the primitive, for example:
crm(live)configure#primitive Apache apache \ op monitor timeout=20s interval=10sClone the primitive:
crm(live)configure#clone cl-apache Apache
6.7 Creating promotable clones (multi-state resources) #
Promotable clones (formerly known as multi-state resources) are a specialization of clones. They allow the instances to be in one of two operating modes: promoted or unpromoted (also known as primary or secondary). Promotable clones must contain exactly one group or one regular resource.
Pacemaker determines which instance of the clone to promote using one of the following methods (or a combination of both):
If a resource agent supports promotable clones, it might automatically set promotion scores based on its own preference for which instance to promote.
You can manually set promotion rules or preferences by creating location or colocation constraints.
For more information, see https://clusterlabs.org/projects/pacemaker/doc/3.0/Pacemaker_Explained/html/collective.html#determining-which-instance-is-promoted.
When configuring resource monitoring or constraints, promotable clones have different requirements than simple resources. For more information, see https://clusterlabs.org/projects/pacemaker/doc/3.0/Pacemaker_Explained/html/collective.html#clone-constraints.
You can create promotable clones using either Hawk2 or crmsh.
6.7.1 Creating promotable clones with Hawk2 #
Promotable clones can either contain a primitive or a group as child resources. In Hawk2, child resources cannot be created or modified while creating a promotable clone. Before adding a promotable clone, create child resources and configure them as desired. See Section 6.4.1, “Creating primitive resources with Hawk2” or Section 6.5.1, “Creating resource groups with Hawk2”.
Log in to Hawk2:
https://HAWKSERVER:7630/
From the left navigation bar, select › › .
Enter a unique .
From the list, select the primitive or group to use as a sub-resource for the multi-state resource.
If needed, modify or add .
Click to finish the configuration. A message at the top of the screen shows if the action has been successful.
6.7.2 Creating promotable clones with crmsh #
To create a promotable clone resource, first create a primitive resource and then the promotable clone resource. The promotable clone resource must support at least promote and demote operations.
crmsh #Log in as
rootand start thecrminteractive shell:#crm configureConfigure the primitive. Change the intervals if needed:
crm(live)configure#primitive my-rsc ocf:myCorp:myAppl \ op monitor interval=60 \ op monitor interval=61 role=PromotedCreate the promotable clone resource:
crm(live)configure#clone clone-rsc my-rsc meta promotable=true
6.8 Creating resource templates #
If you want to create lots of resources with similar configurations, defining a resource template is the easiest way. After being defined, it can be referenced in primitives, or in certain types of constraints as described in Section 7.3, “Resource templates and constraints”.
If a template is referenced in a primitive, the primitive will inherit all operations, instance attributes (parameters), meta attributes, and utilization attributes defined in the template. Additionally, you can define specific operations or attributes for your primitive. If any of these are defined in both the template and the primitive, the values defined in the primitive will take precedence over the ones defined in the template.
You can create resource templates using either Hawk2 or crmsh.
6.8.1 Creating resource templates with Hawk2 #
Resource templates are configured like primitive resources.
Log in to Hawk2:
https://HAWKSERVER:7630/
From the left navigation bar, select › › .
Enter a unique .
Follow the instructions in Procedure 6.2, “Adding a primitive resource with Hawk2”, starting from Step 5.
6.8.2 Creating resource templates with crmsh #
Use the rsc_template command to get familiar with the syntax:
#crm configure rsc_templateusage: rsc_template <name> [<class>:[<provider>:]]<type> [params <param>=<value> [<param>=<value>...]] [meta <attribute>=<value> [<attribute>=<value>...]] [utilization <attribute>=<value> [<attribute>=<value>...]] [operations id_spec [op op_type [<attribute>=<value>...] ...]]
For example, the following command creates a new resource template with
the name BigVM derived from the
ocf:heartbeat:Xen resource and some default values
and operations:
crm(live)configure#rsc_template BigVM ocf:heartbeat:Xen \ params allow_mem_management="true" \ op monitor timeout=60s interval=15s \ op stop timeout=10m \ op start timeout=10m
Once you define the new resource template, you can use it in primitives
or reference it in order, colocation, or rsc_ticket constraints. To
reference the resource template, use the @ sign:
crm(live)configure#primitive MyVM1 @BigVM \ params xmfile="/etc/xen/shared-vm/MyVM1" name="MyVM1"
The new primitive MyVM1 is going to inherit everything from the BigVM resource templates. For example, the equivalent of the above two would be:
crm(live)configure#primitive MyVM1 Xen \ params xmfile="/etc/xen/shared-vm/MyVM1" name="MyVM1" \ params allow_mem_management="true" \ op monitor timeout=60s interval=15s \ op stop timeout=10m \ op start timeout=10m
If you want to overwrite some options or operations, add them to your (primitive) definition. For example, the following new primitive MyVM2 doubles the timeout for monitor operations but leaves others untouched:
crm(live)configure#primitive MyVM2 @BigVM \ params xmfile="/etc/xen/shared-vm/MyVM2" name="MyVM2" \ op monitor timeout=120s interval=30s
A resource template may be referenced in constraints to stand for all primitives which are derived from that template. This helps to produce a more concise and clear cluster configuration. Resource template references are allowed in all constraints except location constraints. Colocation constraints may not contain more than one template reference.
6.9 Creating STONITH resources #
You must have a node fencing mechanism for your cluster.
The global cluster options
stonith-enabledandstartup-fencingmust be set totrue. When you change them, you lose support.
By default, the global cluster option stonith-enabled is
set to true. If no STONITH resources have been defined,
the cluster will refuse to start any resources. Configure one or more
STONITH resources to complete the STONITH setup. While STONITH resources
are configured similarly to other resources, their behavior is different in
some respects. For details refer to Section 12.3, “STONITH resources and configuration”.
You can create STONITH resources using either Hawk2 or crmsh.
6.9.1 Creating STONITH resources with Hawk2 #
To add a STONITH resource for SBD, for libvirt (KVM/Xen), or for vCenter/ESX Server, the easiest way is to use the Hawk2 wizard.
Log in to Hawk2:
https://HAWKSERVER:7630/
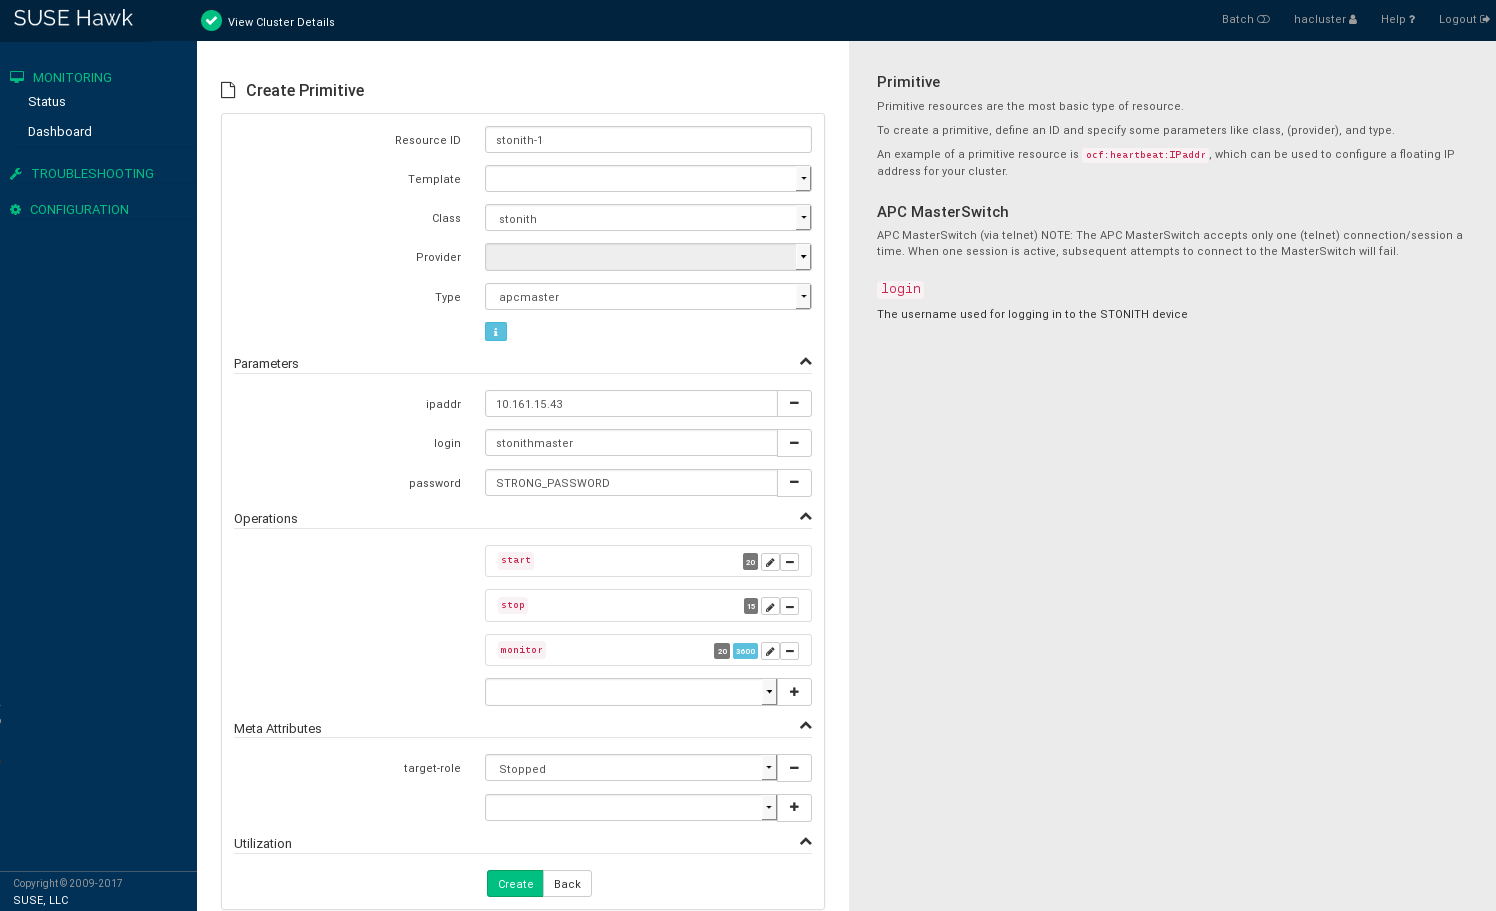
From the left navigation bar, select › › .
Enter a unique .
From the list, select the resource agent class .
From the list, select the STONITH plug-in to control your STONITH device. A short description for this plug-in is displayed.
Hawk2 automatically shows the required for the resource. Enter values for each parameter.
Hawk2 displays the most important resource and proposes default values. If you do not modify any settings here, Hawk2 adds the proposed operations and their default values when you confirm.
If there is no reason to change them, keep the default settings.
Figure 6.5: Hawk2—STONITH resource #Confirm your changes to create the STONITH resource.
A message at the top of the screen shows if the action has been successful.
To complete your fencing configuration, add constraints. For more details, refer to Chapter 12, Fencing and STONITH.
6.9.2 Creating STONITH resources with crmsh #
crmsh #Log in as
rootand start thecrminteractive shell:#crmGet a list of all STONITH types with the following command:
crm(live)#ra list stonithapcmaster apcmastersnmp apcsmart baytech bladehpi cyclades drac3 external/drac5 external/dracmc-telnet external/hetzner external/hmchttp external/ibmrsa external/ibmrsa-telnet external/ipmi external/ippower9258 external/kdumpcheck external/libvirt external/nut external/rackpdu external/riloe external/sbd external/vcenter external/vmware external/xen0 external/xen0-ha fence_legacy ibmhmc ipmilan meatware nw_rpc100s rcd_serial rps10 suicide wti_mpc wti_npsChoose a STONITH type from the above list and view the list of possible options. Use the following command:
crm(live)#ra info stonith:external/ipmiIPMI STONITH external device (stonith:external/ipmi) ipmitool based power management. Apparently, the power off method of ipmitool is intercepted by ACPI which then makes a regular shutdown. If case of a split brain on a two-node it may happen that no node survives. For two-node clusters use only the reset method. Parameters (* denotes required, [] the default): hostname (string): Hostname The name of the host to be managed by this STONITH device. ...Create the STONITH resource with the
stonithclass, the type you have chosen in Step 3, and the respective parameters if needed, for example:crm(live)#configurecrm(live)configure#primitive my-stonith stonith:external/ipmi \ params hostname="alice" \ ipaddr="192.168.1.221" \ userid="admin" passwd="secret" \ op monitor interval=60m timeout=120s
6.10 Configuring resource monitoring #
If you want to ensure that a resource is running, you must configure
resource monitoring for it. You can configure resource monitoring using
either Hawk2 or crmsh.
If the resource monitor detects a failure, the following takes place:
Log file messages are generated, according to the configuration specified in the
loggingsection of/etc/corosync/corosync.conf.The failure is reflected in the cluster management tools (Hawk2,
crm status), and in the CIB status section.The cluster initiates noticeable recovery actions which may include stopping the resource to repair the failed state and restarting the resource locally or on another node. The resource also may not be restarted, depending on the configuration and state of the cluster.
If you do not configure resource monitoring, resource failures after a successful start will not be communicated, and the cluster will always show the resource as healthy.
Usually, resources are only
monitored by the cluster while they are running. However, to detect
concurrency violations, also configure monitoring for resources which are
stopped. For resource monitoring, specify a timeout and/or start delay
value, and an interval. The interval tells the CRM how often it should check
the resource status. You can also set particular parameters such as
timeout for start or
stop operations.
For more information about monitor operation parameters, see Section 6.14, “Resource operations”.
6.10.1 Configuring resource monitoring with Hawk2 #
Log in to Hawk2:
https://HAWKSERVER:7630/
Add a resource as described in Procedure 6.2, “Adding a primitive resource with Hawk2” or select an existing primitive to edit.
Hawk2 automatically shows the most important (
start,stop,monitor) and proposes default values.To see the attributes belonging to each proposed value, hover the mouse pointer over the respective value.
To change the suggested
timeoutvalues for thestartorstopoperation:Click the pen icon next to the operation.
In the dialog that opens, enter a different value for the
timeoutparameter, for example10, and confirm your change.
To change the suggested value for the
monitoroperation:Click the pen icon next to the operation.
In the dialog that opens, enter a different value for the monitoring
interval.To configure resource monitoring in the case that the resource is stopped:
Select the
roleentry from the empty drop-down box below.From the
roledrop-down box, selectStopped.Click to confirm your changes and to close the dialog for the operation.
Confirm your changes in the resource configuration screen. A message at the top of the screen shows if the action has been successful.
To view resource failures, switch to the screen in Hawk2 and select the resource you are interested in. In the column click the arrow down icon and select . The dialog that opens lists recent actions performed for the resource. Failures are displayed in red. To view the resource details, click the magnifier icon in the column.
6.10.2 Configuring resource monitoring with crmsh #
To monitor a resource, there are two possibilities: either define a
monitor operation with the op keyword or use the
monitor command. The following example configures an
Apache resource and monitors it every 60 seconds with the
op keyword:
crm(live)configure#primitive apache apache \ params ... \ op monitor interval=60s timeout=30s
The same can be done with the following commands:
crm(live)configure#primitive apache apache \ params ...crm(live)configure#monitor apache 60s:30s
- Monitoring stopped resources
Usually, resources are only monitored by the cluster as long as they are running. However, to detect concurrency violations, also configure monitoring for resources which are stopped. For example:
crm(live)configure#primitive dummy1 Dummy \ op monitor interval="300s" role="Stopped" timeout="10s" \ op monitor interval="30s" timeout="10s"This configuration triggers a monitoring operation every
300seconds for the resourcedummy1when it is inrole="Stopped". When running, it will be monitored every30seconds.- Probing
The CRM executes an initial monitoring for each resource on every node, the so-called
probe. A probe is also executed after the cleanup of a resource. If multiple monitoring operations are defined for a resource, the CRM will select the one with the smallest interval and will use its timeout value as default timeout for probing. If no monitor operation is configured, the cluster-wide default applies. The default is20seconds (if not specified otherwise by configuring theop_defaultsparameter). If you do not want to rely on the automatic calculation or theop_defaultsvalue, define a specific monitoring operation for the probing of this resource. Do so by adding a monitoring operation with theintervalset to0, for example:crm(live)configure#primitive rsc1 ocf:pacemaker:Dummy \ op monitor interval="0" timeout="60"The probe of
rsc1will time out in60s, independent of the global timeout defined inop_defaults, or any other operation timeouts configured. If you did not setinterval="0"for specifying the probing of the respective resource, the CRM will automatically check for any other monitoring operations defined for that resource and will calculate the timeout value for probing as described above.
6.11 Loading resources from a file #
Parts or all of the configuration can be loaded from a local file or a network URL. Three different methods can be defined:
replaceThis option replaces the current configuration with the new source configuration.
updateThis option tries to import the source configuration. It adds new items or updates existing items to the current configuration.
pushThis option imports the content from the source into the current configuration (same as
update). However, it removes objects that are not available in the new configuration.
To load the new configuration from the file mycluster-config.txt
use the following syntax:
#crm configure load push mycluster-config.txt
6.12 Resource options (meta attributes) #
For each resource you add, you can define options. Options are used by
the cluster to decide how your resource should behave; they tell
the CRM how to treat a specific resource. Resource options can be set
with the crm_resource --meta command or with Hawk2.
The following resource options are available:
priorityIf not all resources can be active, the cluster stops lower priority resources to keep higher priority resources active.
The default value is
0.target-roleIn what state should the cluster attempt to keep this resource? Allowed values:
Stopped,Started,Unpromoted,Promoted.The default value is
Started.is-managedIs the cluster allowed to start and stop the resource? Allowed values:
true,false. If the value is set tofalse, the status of the resource is still monitored and any failures are reported. This is different from setting a resource tomaintenance="true".The default value is
true.maintenanceCan the resources be touched manually? Allowed values:
true,false. If set totrue, all resources become unmanaged: the cluster stops monitoring them and does not know their status. You can stop or restart cluster resources without the cluster attempting to restart them.The default value is
false.resource-stickinessHow much does the resource prefer to stay where it is?
The default value is
1for individual clone instances, and0for all other resources.migration-thresholdHow many failures should occur for this resource on a node before making the node ineligible to host this resource?
The default value is
INFINITY.multiple-activeWhat should the cluster do if it ever finds the resource active on more than one node? Allowed values:
block(mark the resource as unmanaged),stop_only,stop_start.The default value is
stop_start.failure-timeoutHow many seconds to wait before acting as if the failure did not occur (and potentially allowing the resource back to the node on which it failed)?
The default value is
0(disabled).allow-migrateWhether to allow live migration for resources that support
migrate_toandmigrate_fromactions. If the value is set totrue, the resource can be migrated without loss of state. If the value is set tofalse, the resource will be shut down on the first node and restarted on the second node.The default value is
trueforocf:pacemaker:remoteresources, andfalsefor all other resources.remote-nodeThe name of the remote node this resource defines. This both enables the resource as a remote node and defines the unique name used to identify the remote node. If no other parameters are set, this value is also assumed as the host name to connect to at the
remote-portport.This option is disabled by default.
Warning: Use unique IDsThis value must not overlap with any existing resource or node IDs.
remote-portCustom port for the guest connection to pacemaker_remote.
The default value is
3121.remote-addrThe IP address or host name to connect to if the remote node's name is not the host name of the guest.
The default value is the value set by
remote-node.remote-connect-timeoutHow long before a pending guest connection times out?
The default value is
60s.
6.13 Instance attributes (parameters) #
The scripts of all resource classes can be given parameters which
determine how they behave and which instance of a service they control.
If your resource agent supports parameters, you can add them with the
crm_resource command or with Hawk2. In the
crm command line utility and in Hawk2, instance
attributes are called params or
Parameter, respectively. The list of instance
attributes supported by an OCF script can be found by executing the
following command as root:
#crm ra info [class:[provider:]]resource_agent
or (without the optional parts):
#crm ra info resource_agent
The output lists all the supported attributes, their purpose and default values.
Note that groups, clones and promotable clone resources do not have instance attributes. However, any instance attributes set will be inherited by the group's, clone's or promotable clone's children.
6.14 Resource operations #
By default, the cluster will not ensure that your resources are still healthy. To instruct the cluster to do this, you need to add a monitor operation to the resource's definition. Monitor operations can be added for all classes or resource agents.
Monitor operations can have the following properties:
idYour name for the action. Must be unique. (The ID is not shown).
nameThe action to perform. Common values:
monitor,start,stop.intervalHow frequently to perform the operation, in seconds.
timeoutHow long to wait before declaring the action has failed.
requiresWhat conditions need to be satisfied before this action occurs. Allowed values:
nothing,quorum,fencing. The default depends on whether fencing is enabled and if the resource's class isstonith. For STONITH resources, the default isnothing.on-failThe action to take if this action ever fails. Allowed values:
ignore: Pretend the resource did not fail.block: Do not perform any further operations on the resource.stop: Stop the resource and do not start it elsewhere.restart: Stop the resource and start it again (possibly on a different node).fence: Bring down the node on which the resource failed (STONITH).standby: Move all resources away from the node on which the resource failed.
enabledIf
false, the operation is treated as if it does not exist. Allowed values:true,false.roleRun the operation only if the resource has this role.
record-pendingCan be set either globally or for individual resources. Makes the CIB reflect the state of “in-flight” operations on resources.
descriptionDescription of the operation.
