3 Using NIS #
When multiple Unix systems in a network access common resources, it becomes imperative that all user and group identities are the same for all machines in that network. The network should be transparent to users: their environments should not vary, regardless of which machine they are using. This can be done by NIS and NFS services.
NIS (Network Information Service) can be described as a database-like
service that provides access to the contents of
/etc/passwd, /etc/shadow, and
/etc/group across networks. NIS can also be used
for other purposes (making the contents of files like
/etc/hosts or /etc/services
available, for example), but this is beyond the scope of this
introduction. People often refer to NIS as YP,
because it works like the network's “yellow pages.”
3.1 Configuring NIS servers #
For configuring NIS servers, see the SUSE Linux Enterprise Server Administration Guide.
3.2 Configuring NIS clients #
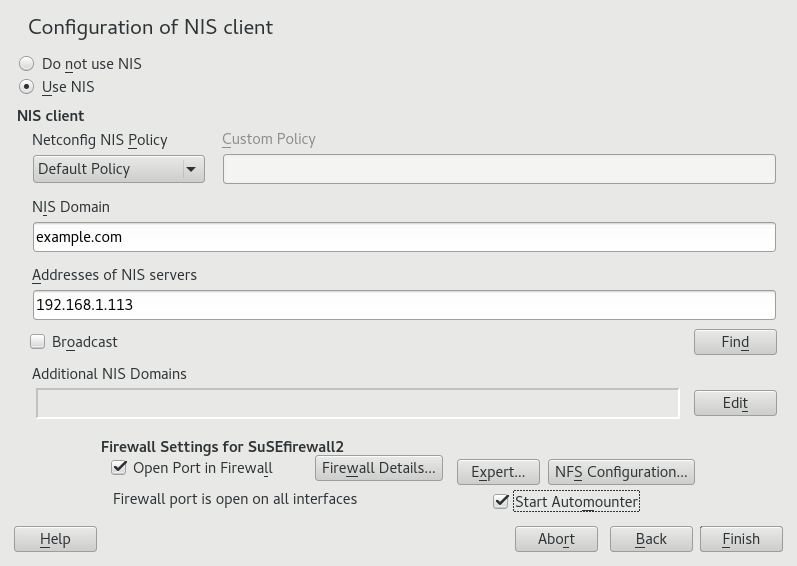
To use NIS on a workstation, do the following:
Start › › .
Activate the button.
Enter the NIS domain. This is a domain name given by your administrator or a static external IP address received by DHCP.
Figure 3.1: Setting domain and address of a NIS server #Enter your NIS servers and separate their addresses by spaces. If you do not know your NIS server, click to let YaST search for any NIS servers in your domain. Depending on the size of your local network, this may be a time-consuming process. asks for a NIS server in the local network after the specified servers fail to respond.
Depending on your local installation, you may also want to activate the automounter. This option also installs additional software if required.
If you do not want other hosts to be able to query which server your client is using, go to the settings and disable . By checking , the client is enabled to receive replies from a server communicating through an unprivileged port. For further information, see
manypbind.Click to save them and return to the YaST control center. Your client is now configured with NIS.
