SAML (Azure AD)
Integrate with Azure AD SAML authentication
-
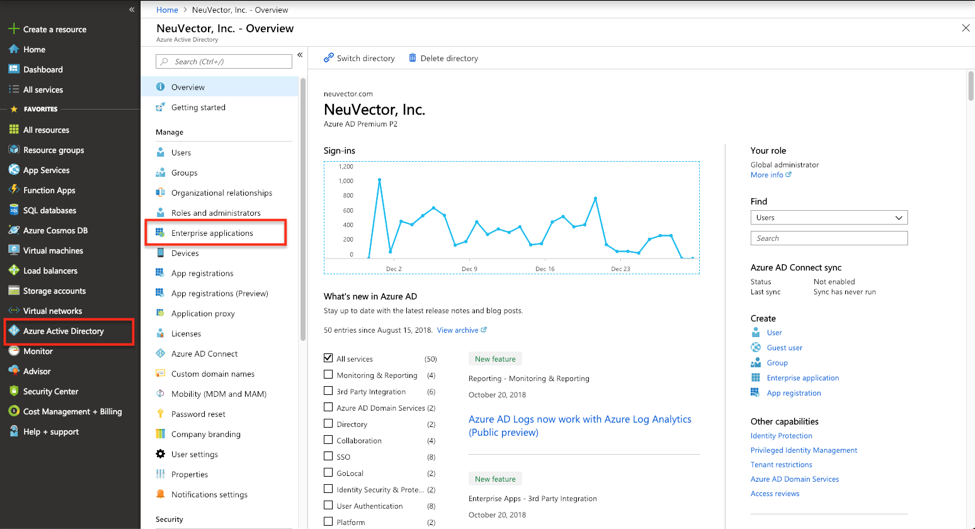
In the Azure management console, select the Enterprise applications menu item in Azure Active Directory.
-
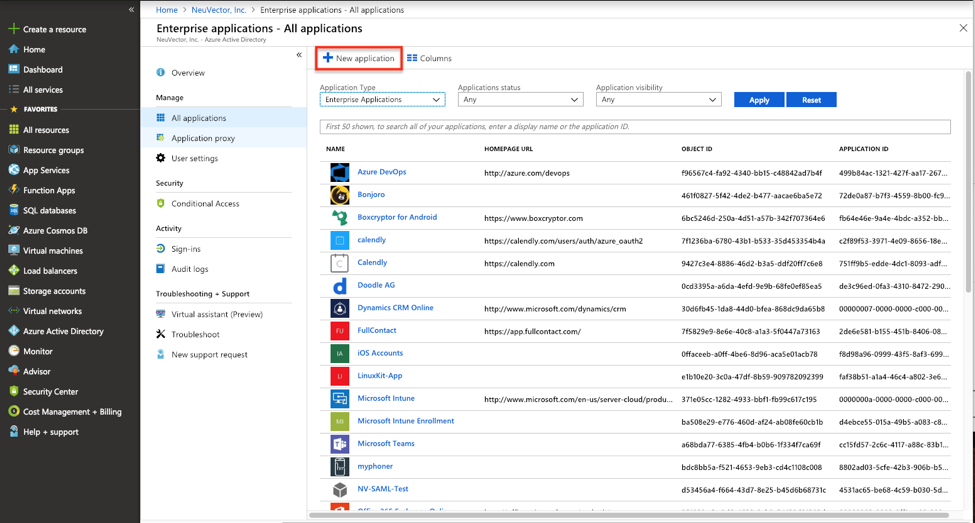
Select New Application.
-
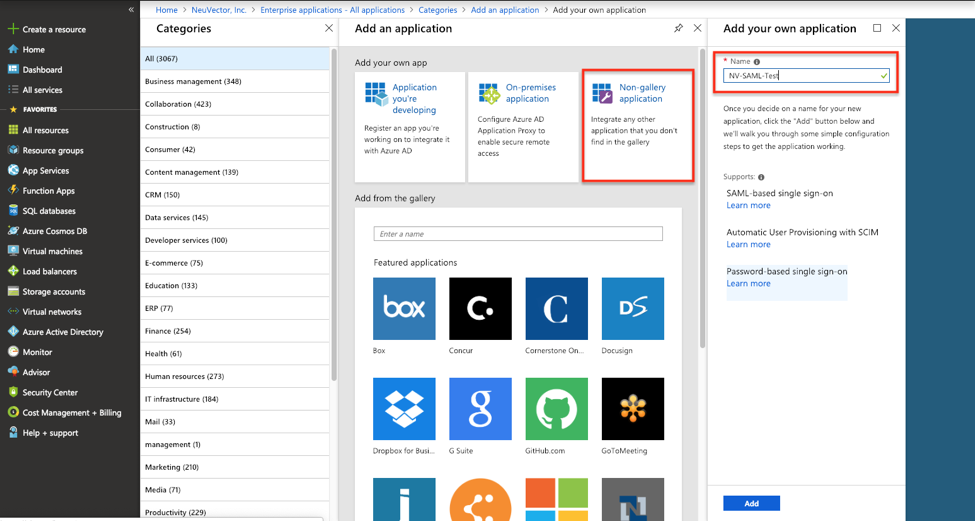
Create a Non-gallery application and give it a unique name.
-
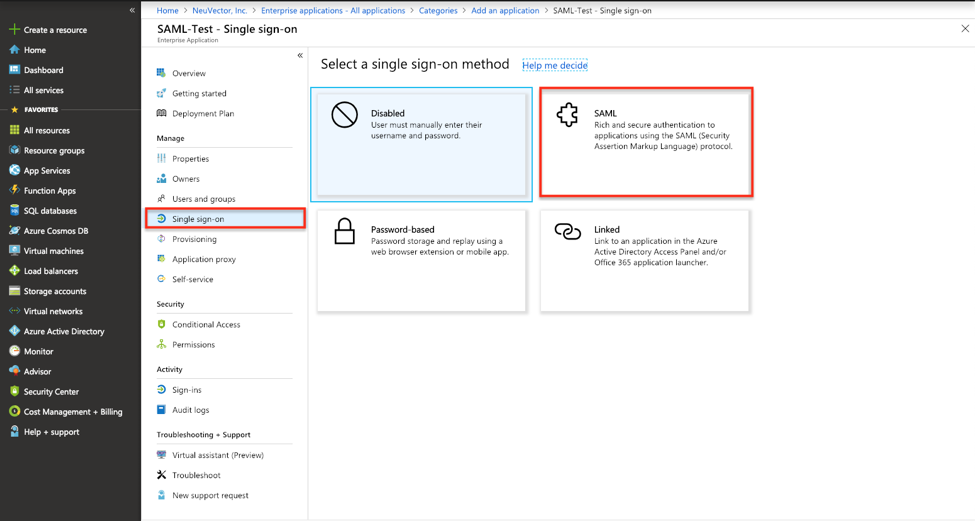
In the application’s configuration page, select Single sign-on in the left-side panel and choose the SAML-based sign-on
-
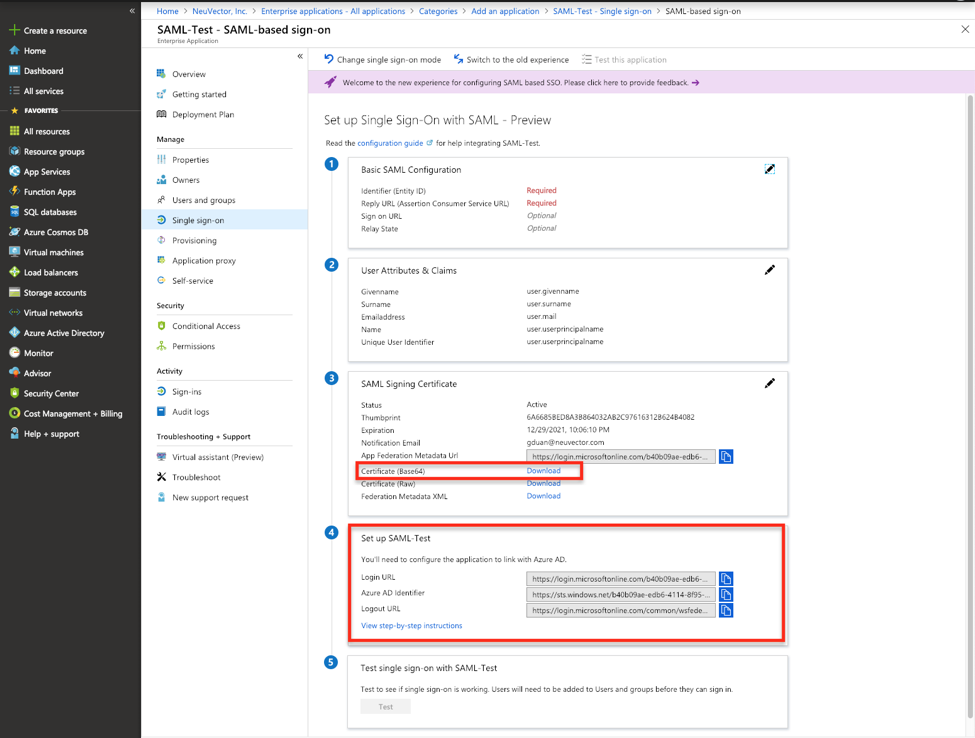
Download the certificate in the base64 format and note the application’s Login URL and Azure AD Identifier.
-
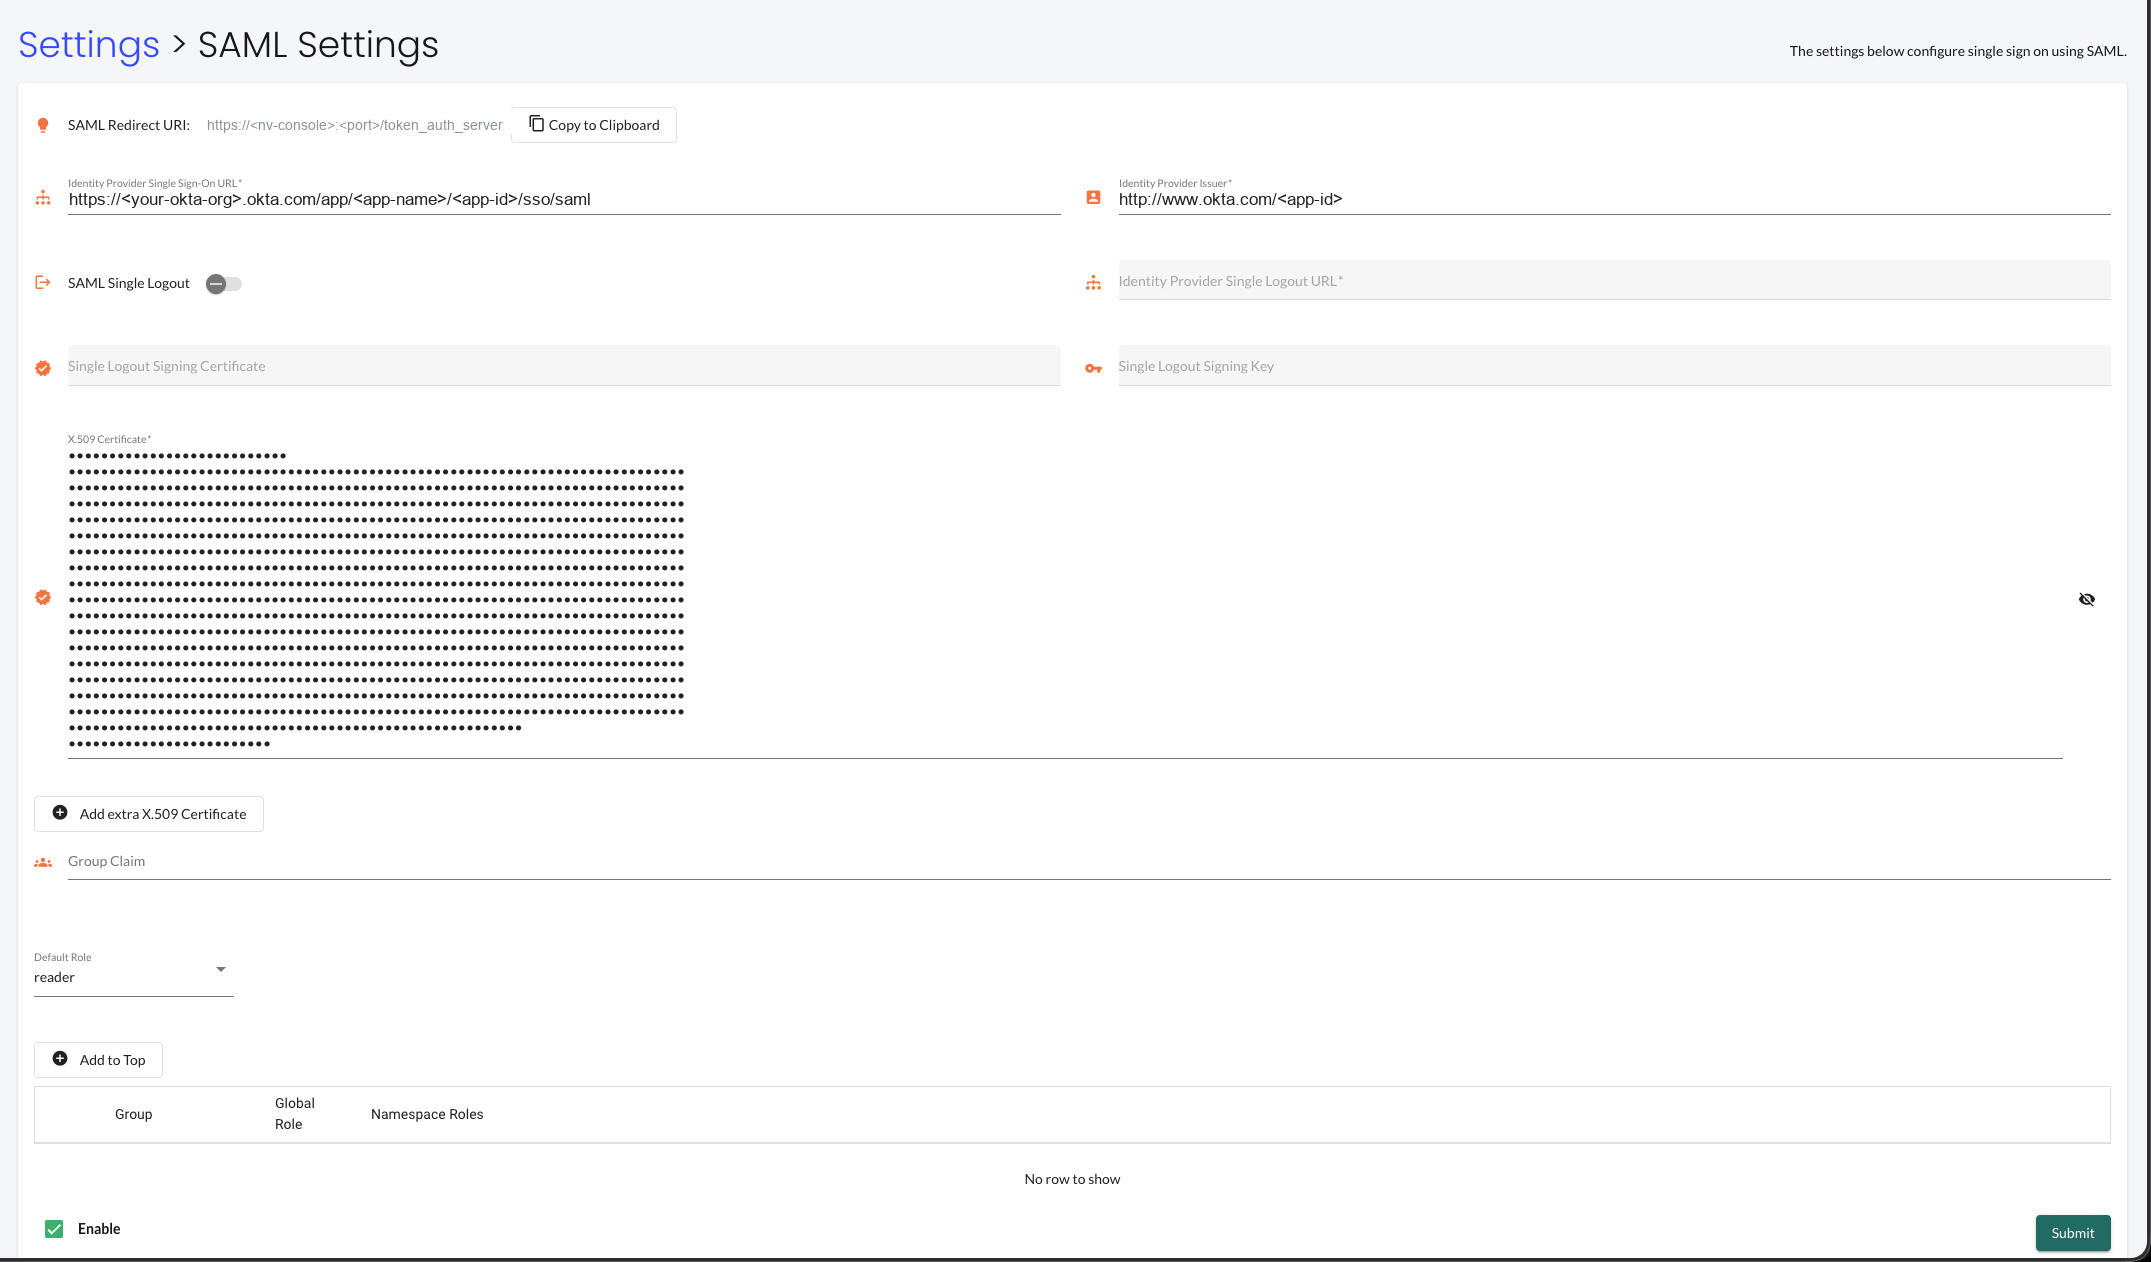
In the NeuVector management console, login as an administrator and go to Settings > SAML Settings.
-
Configure the SAML server as follows:
-
Copy the application’s Login URL as the Single Sign-On URL.
-
Copy the Azure AD Identifier as the Issuer.
-
Open the downloaded certificate and copy the text to the X.509 Certificate box.
-
Set a default role. This is the role assigned to an authenticated user when no group matches the role map.
-
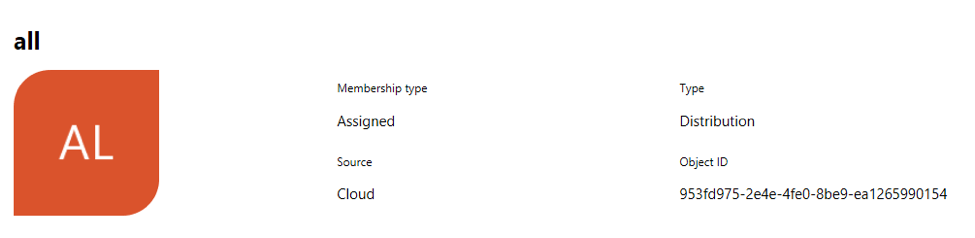
Add the group-based role mapping. Click Add to Top and enter the group together with the Global Role and Namespace Roles to assign to its members. The group claim returned by Azure are identified by the Object ID instead of the name. The group’s object ID can be located in Azure Active Directory > Groups > Group name Page. You should use this value to configure group-based role mapping in NeuVector.
Every user needs a role, assigned either by the default role or by group-based role mapping. A user who ends up without a role cannot log in, even with the correct credentials.
Then check Enable at the bottom left of the page and click Submit to enable the SAML server.
-
-
Copy the SAML Redirect URI shown at the top of the SAML Settings page with the Copy to Clipboard button. It has the form
https://<nv-console>:<port>/token_auth_server, where<nv-console>and<port>are the address and port of your NeuVector console. -
Return to the Azure management console to setup Basic SAML Configuration. Paste the NeuVector SAML Redirect URI into both boxes:
-
Identifier (Entity ID): the audience URI of the NeuVector service provider.
-
Reply URL (Assertion Consumer Service URL): the endpoint Azure AD posts the SAML response to.
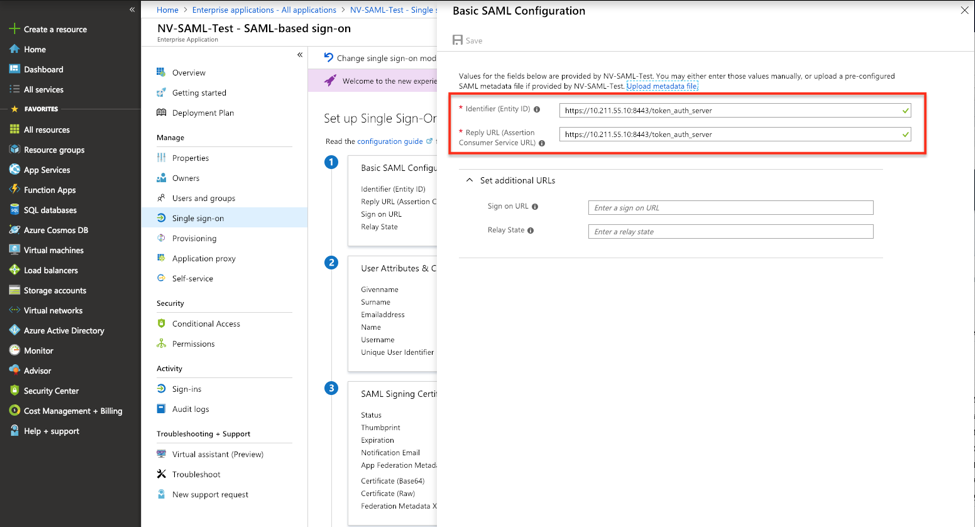
NeuVector uses its SAML Redirect URI as both the assertion consumer service URL and the audience URI (SP entity ID); it is not configurable in the NeuVector console. Enter that same value in both Azure fields so the audience of the assertion matches what NeuVector expects.
-
-
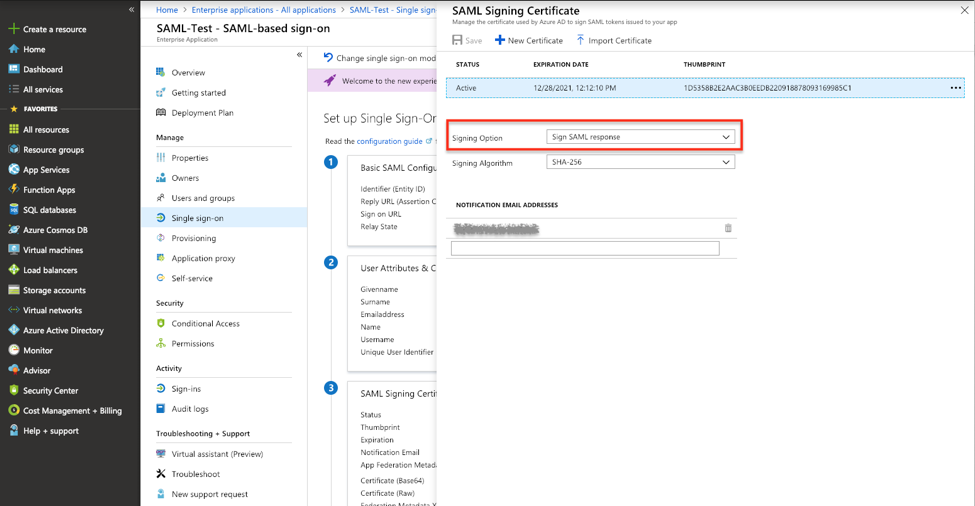
Edit SAML Signing Certificate, changing the Signing Option to Sign SAML response.
-
Edit User Attributes & Claims so the response can carry the login user’s attributes back to SUSE® Security. Click Add new claim to add
UsernameandEmailclaims withuser.userprincipalnameanduser.mailrespectively.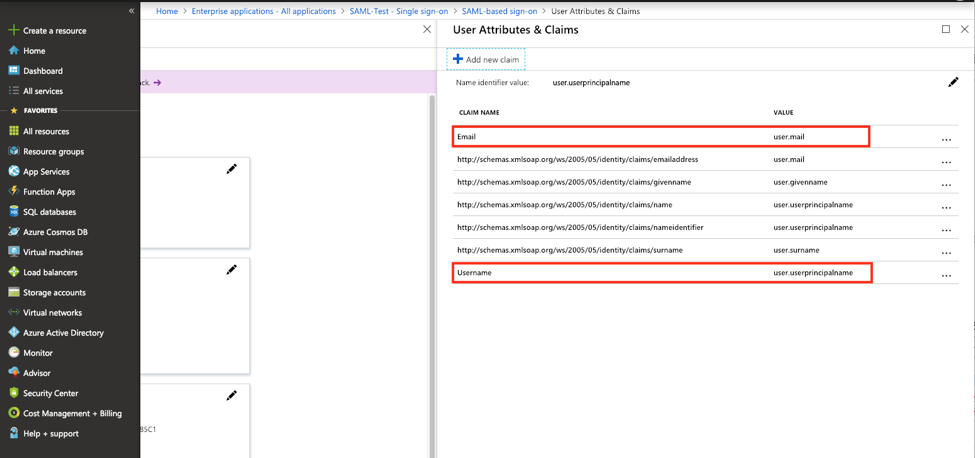
-
If the users are assigned to the groups in the active directory, their group membership can be added to the claim. Find the application in App registrations and edit the manifest. Modify the value of
groupMembershipClaimstoAll.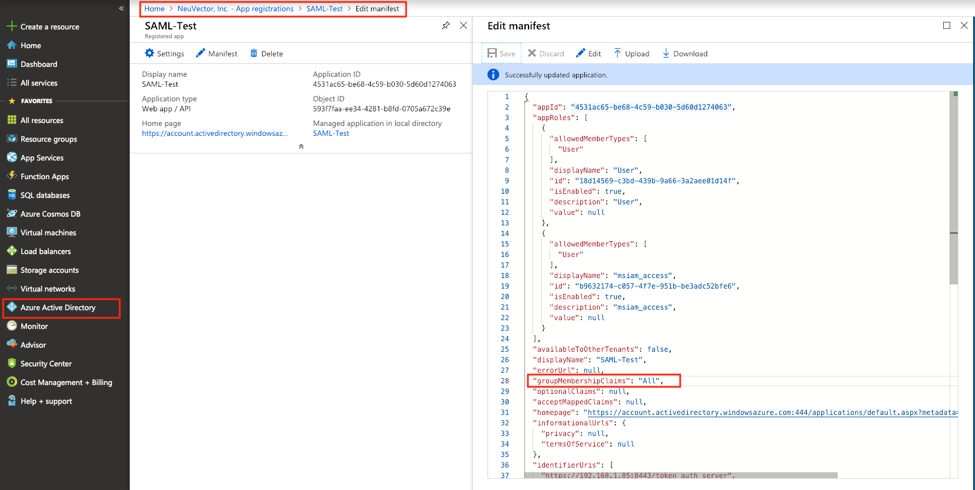
-
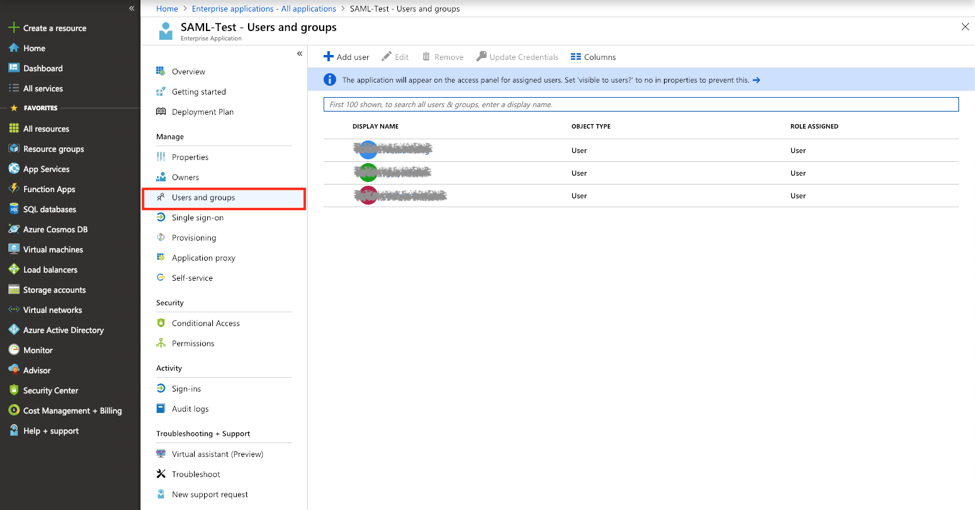
Authorize users and groups to access the application so they can login SUSE® Security console with Azure AD SAML SSO.
Mapping Groups to Roles and Namespaces
Please see the Users and Roles section for how to map groups to preset and custom roles as well as namespaces in SUSE® Security.