Rancher UI extension quickstart
This section describes installing the Admission Controller UI as an extension of Rancher Manager.
Install Admission Controller UI Extension
You install the Admission Controller UI as a global extension, however, you install the Admission Controller controller through the Rancher UI as a cluster scoped resource.
|
For air-gapped installations, follow these steps. |
Within the Extensions page, select the "Enable" button and choose the option to add the Rancher Extensions Repository. When enabled, the "Admission Controller" extension item appears automatically. Select this item to install the extension. Once installed, you can install Admission Controller into the required cluster.
Install Admission Controller
Following the previous steps, within your cluster a new item appears in the side-menu for Admission Controller. This dashboard page guides you through the installation process, completing the prerequisites.
|
During the "App Install" step of the installation wizard, the "Install Admission Controller" button may remain grayed out. If this happens, refresh the page and navigate back to this step. |
Post-Installation
After completing the installation the dashboard page and side menu now contain new items, namely Policy Servers, Cluster Admission Policies, and Admission Policies. From here you can create Policy Servers and Policies to control behavior within your cluster.
Dashboard view
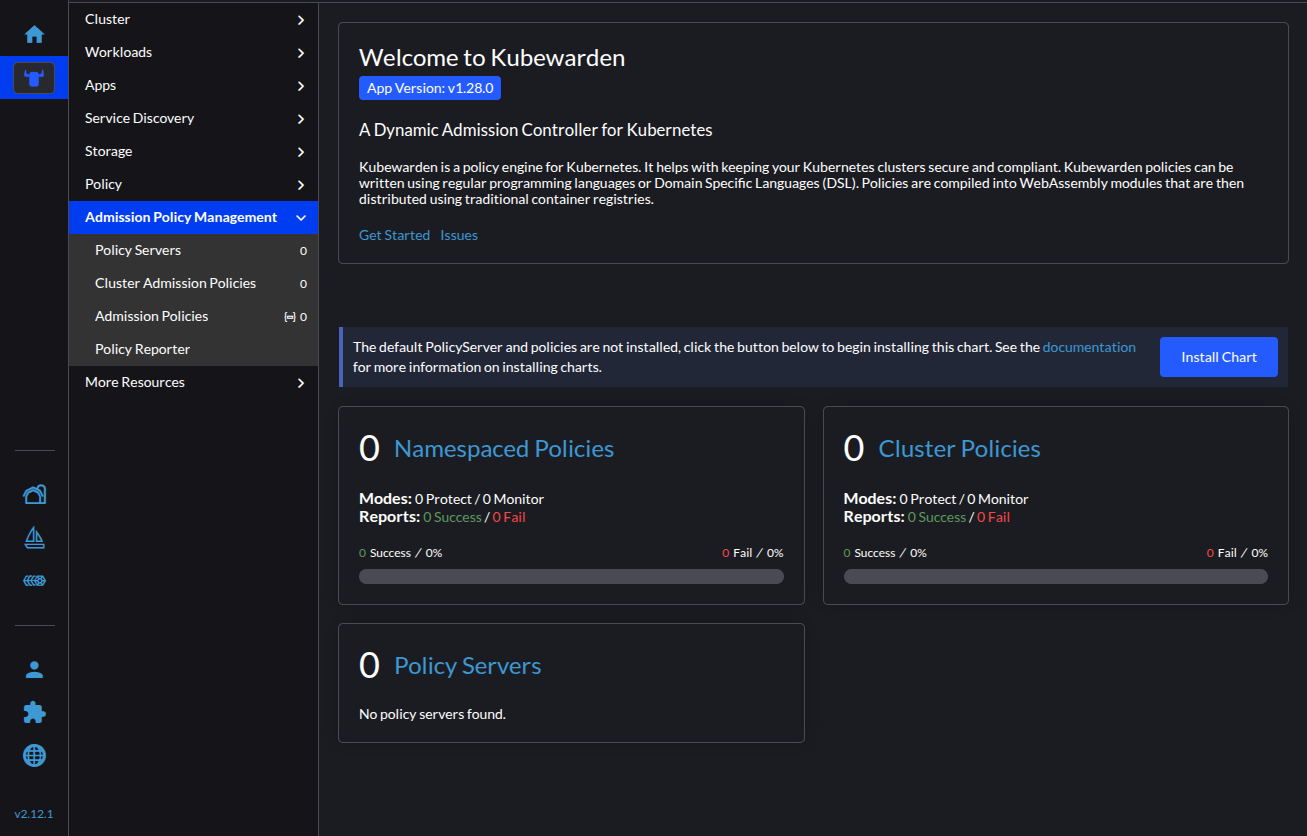
Enabling the default Policy Server and policies
Within the dashboard page you can select the "Install Chart" button to install the
kubewarden-defaults
Helm chart. This chart includes the default Policy Server and a few curated
policies.
After installing the chart, you can view the default Policy Server details with the related policies in a sortable table.
Policy Server detail view

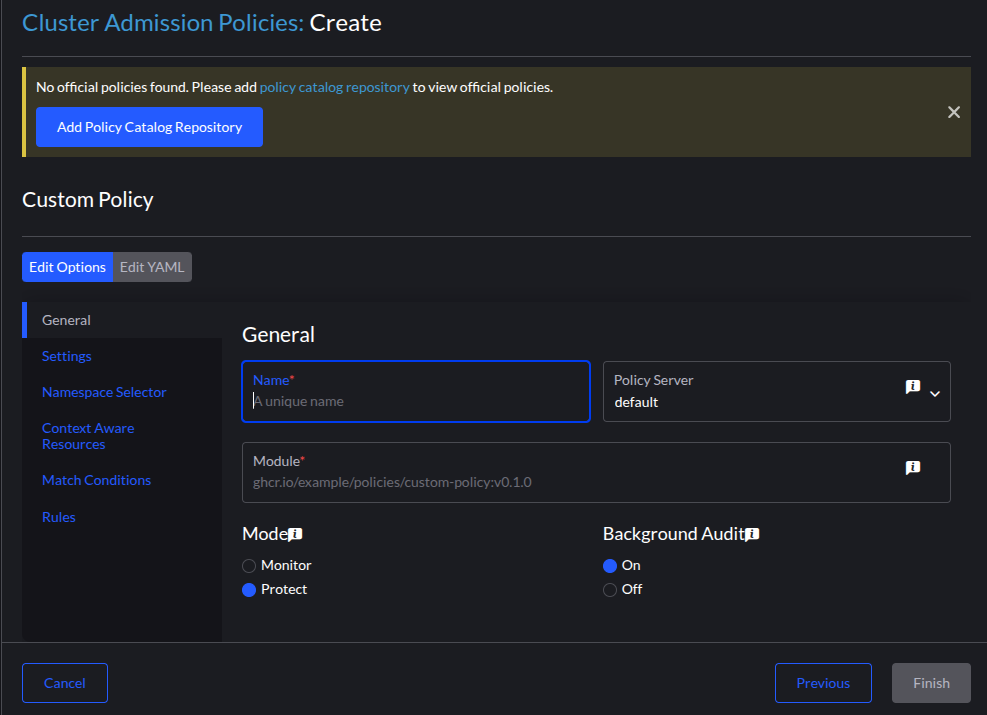
Creating policies
When creating policies, you are initially given a "Custom Policy" option from the Policy Grid. Provide the required information for your policy’s Name, Module, and Rules. It’s recommended to add the Policy Catalog repository to access Admission Controller’s official policies.
Creating a custom policy
Additional features
Follow the instructions to include Monitoring or Tracing.
Air-gapped installation
As Admission Controller is a Rancher Official Extension, the Rancher team
provides a mechanism to automatically generate an Extension Catalog Image. This
becomes added to the rancher-images.txt file when
installing
Rancher Manager for air-gapped instances.
Once this image is mirrored to a registry accessible to your air-gapped cluster, you can import the image within the Rancher UI. This creates a local Helm repository with the Admission Controller UI chart for installation.
Installation steps
-
Create a registry secret within the
cattle-ui-plugin-systemnamespace. Enter the domain of the image address in the Registry Domain Name field. -
Navigate back to the Extensions page (for example,
https://cluster-ip/dashboard/c/local/uiplugins). -
On the top right, select Manage Extension Catalogs.

-
Select the Import Extension Catalog button.

-
Enter the image address in the Catalog Image Reference field.
-
Select the secret you just created from the Pull Secrets drop-down menu.

-
Click Load. The extension will now be Pending.
-
Return to the Extensions page.
-
Select the Available tab, and click the Reload button to make sure that the list of extensions is up to date.

-
Find the Admission Controller extension you just added, and select the Install button.