Client onboarding
SUSE Manager is all about managing client systems. So one of the first things you need to do is onboard some clients. This workflow shows you how to set up your SUSE Manager Server to manage a new client, set up the software channels you need, and bootstrap the client using an activation key.
1. Use case
This workflow shows you how to onboard a client to your SUSE Manager Server.
The client must be running a supported Linux operating system. For a list of supported client systems, see Supported Client Systems.
This is one of the first tasks you need to do when you set up SUSE Manager for the first time, and you will probably have to do it many more times as you use the product.
2. Outcome
When you have completed this workflow, your client is onboarded, and it can be seen in the systems list of the SUSE Manager Web UI. You can then use SUSE Manager to manage the client.
3. Preparation
Before you start, you should already have:
-
SUSE Manager Server installed, that you can access using the Web UI.
-
Client machine with an operating system installed, which you can access across the network that your SUSE Manager Server is on, using SSH.
-
Appropriate subscriptions from http://scc.suse.com for the products you are using.
This workflow uses a SUSE Linux Enterprise Server 15 SP2 operating system. You can use other Linux operating systems, but some of the steps might be different. For more information on onboarding other clients, see Client Registration Methods.
4. Step-by-step workflow instructions
-
On the client, at the command prompt, show the current hostname:
hostname -f
This command will probably return an error, or show something like
localhost. -
Set a new hostname. Your new hostname should have a subdomain name and thus include at least two periods. In this example, we are using
client1.suma.examplehostnamectl set-hostname client1.suma.example
-
Check that your change was successful:
hostnamectl
-
Open YaST and navigate to . Edit the hostname to match the one you just set, and click OK.
-
In YaST, navigate to and go to the
Hostname/DNStab. In theStatic hostnamefield, type your new hostmame. -
Check that the change was successful:
hostname -f
This command should return your new FQDN.
-
In the SUSE Manager Web UI, navigate to .
-
In the
Organization Credentialstab, ensure you have entered your SUSE Customer Center credentials, and are correctly authenticated. -
In the
Productstab, ensure that the product catalog is fully updated: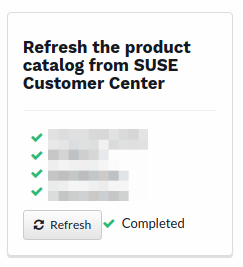
-
Use the product search bar to find the channels you need for your client operating system. Check the channels you want to install, and click Add products:
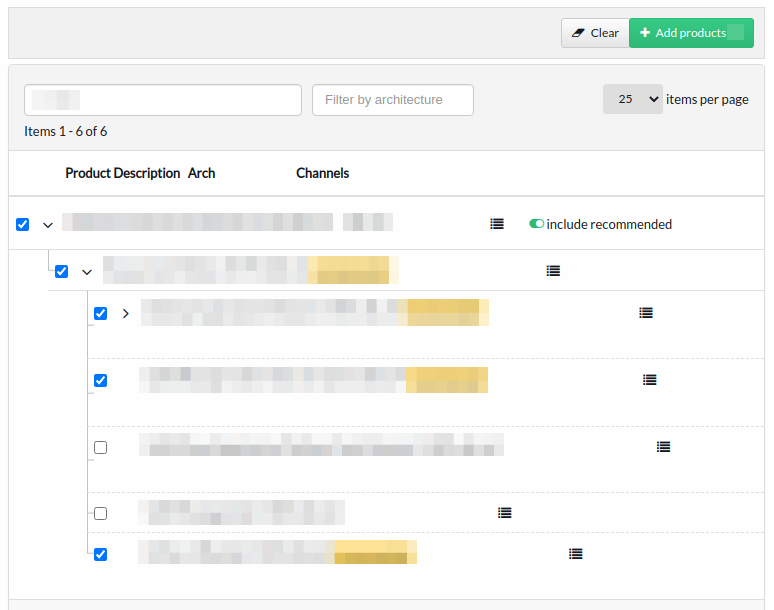
-
Wait for the product channels to fully synchronize. Depending on the products you have chosen, this could take a long time.
-
In the SUSE Manager Web UI, navigate to , and click Create Key.
-
Give your activation key a name, and select the base channel that matches the client you want to onboard. This should be the product you just enabled:
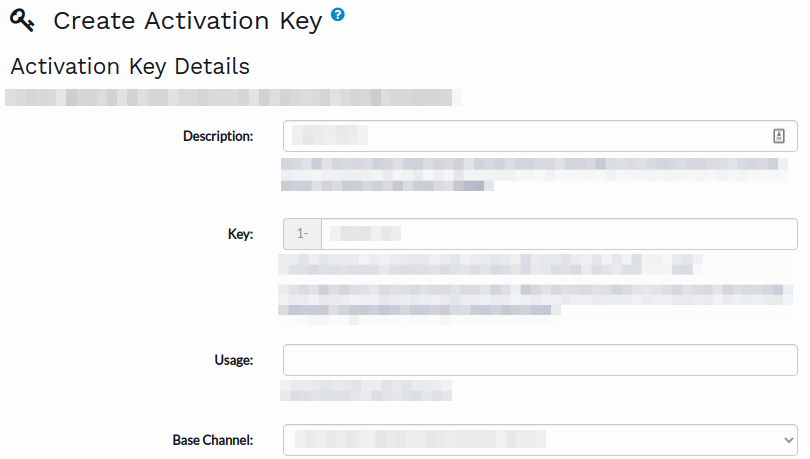
-
Check the child channels to include, and any add-on system types you want clients registered with this key to have. Click Create Activation Key.
-
In the SUSE Manager Web UI, navigate to .
-
Type the hostname and provide authentication credentials for the client you want to onboard, and select the activation key. Click Bootstrap:
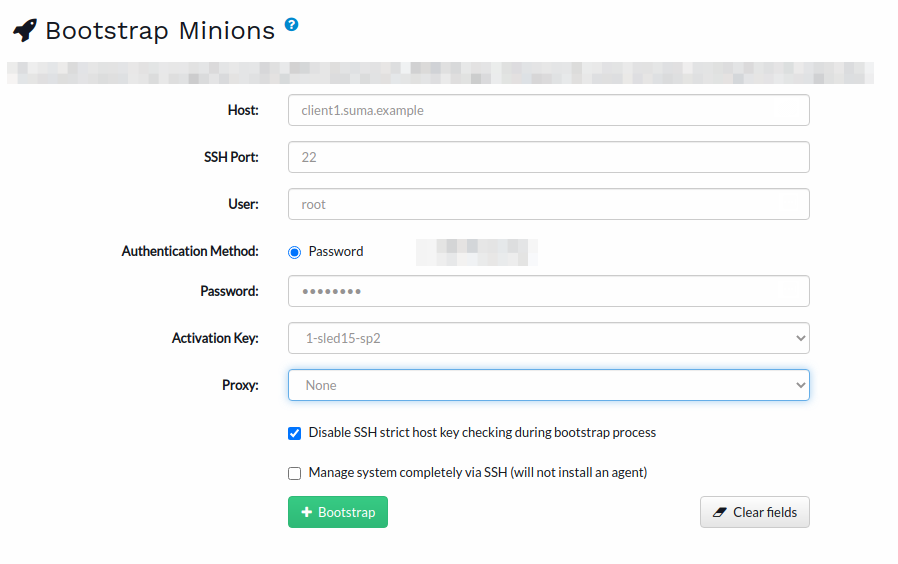
-
Navigate to to manage your new client.
5. Related topics
-
For more information about supported clients and client features, see Supported Clients and Features.
-
For more information about different onboarding methods, and instructions for clients running various operating systems, see Client Registration Methods.
-
For more information about general client concepts, see Software Channels.